


TOPO Climbing | CLIMBING7.COM
Publié le
 Partager sur WhatsApp
 Partager sur Twitter
Partager sur Instagram
Partager sur Twitter
Partager sur Instagram

 Partager sur Facebook
 Imprimer le topo
 Laisser un commentaire

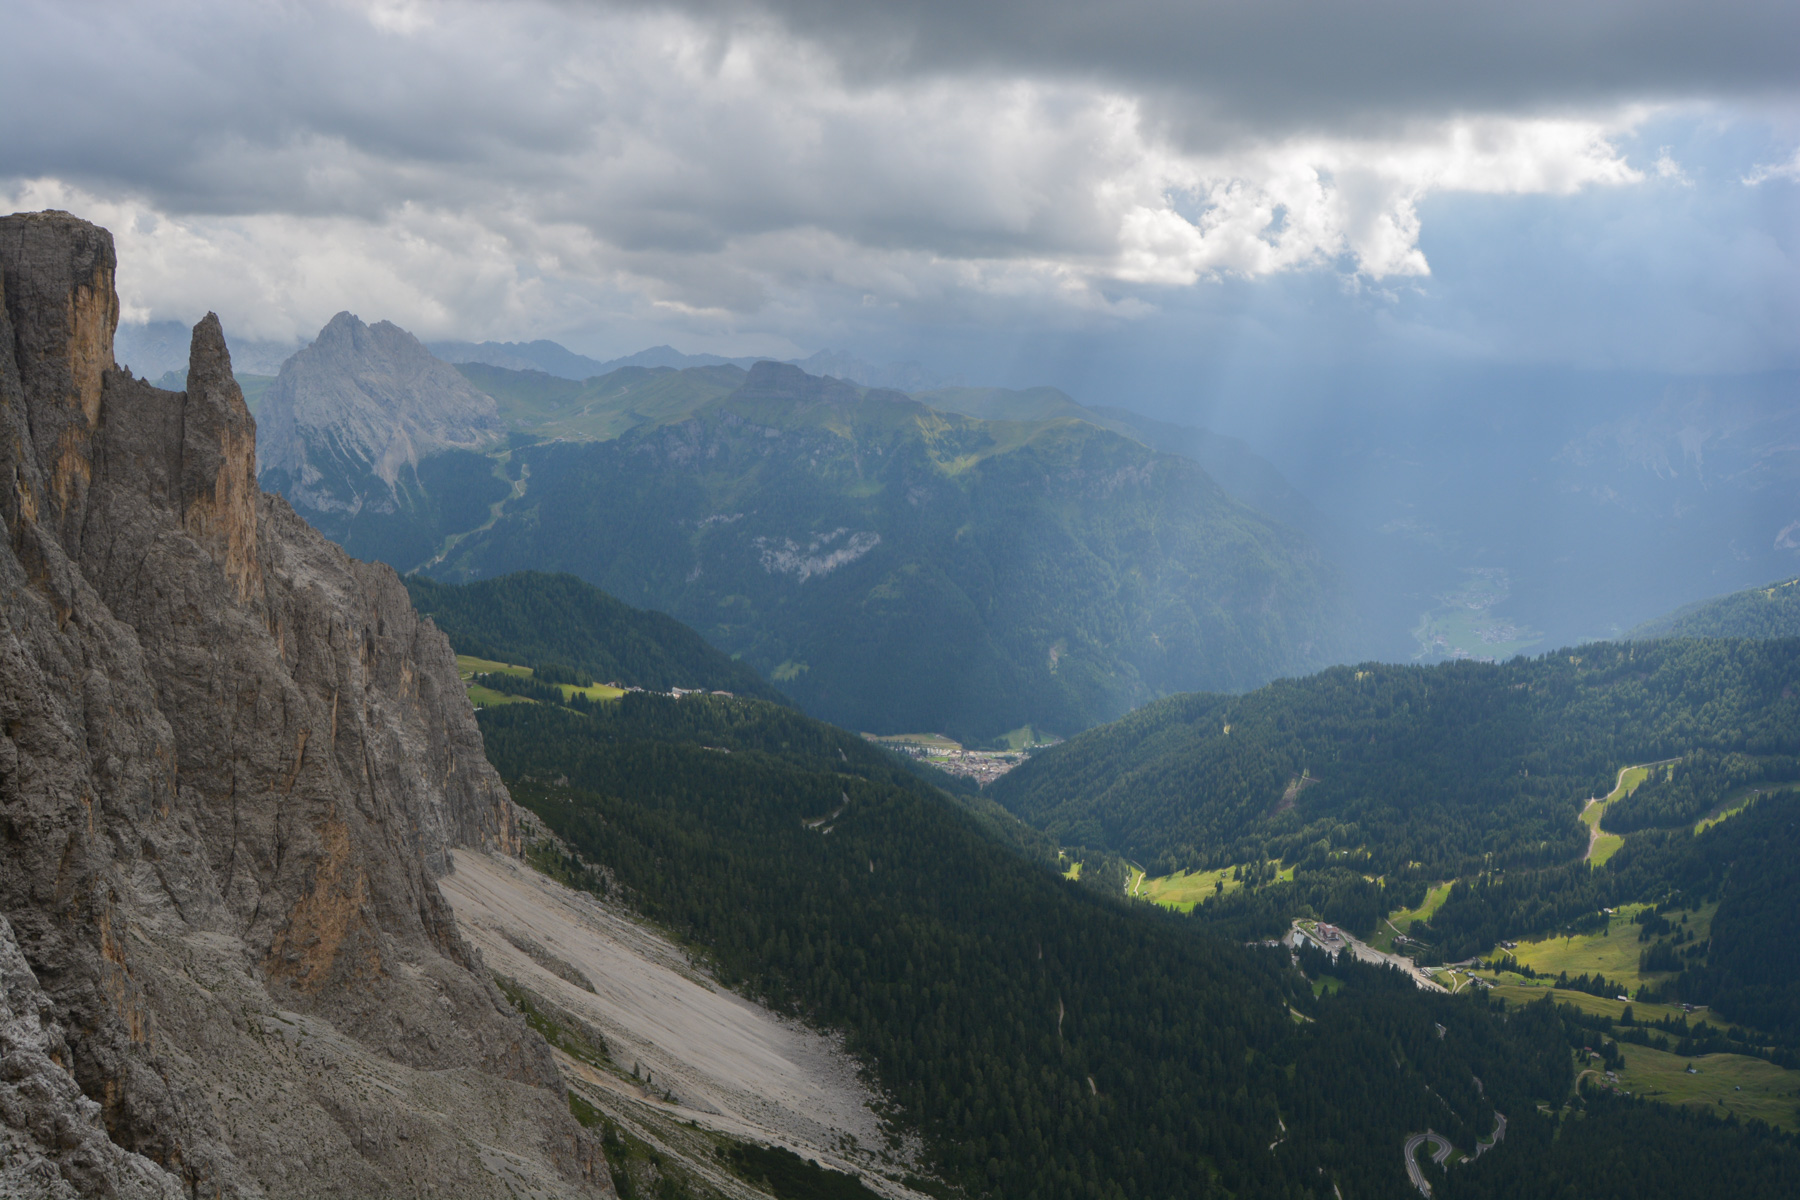
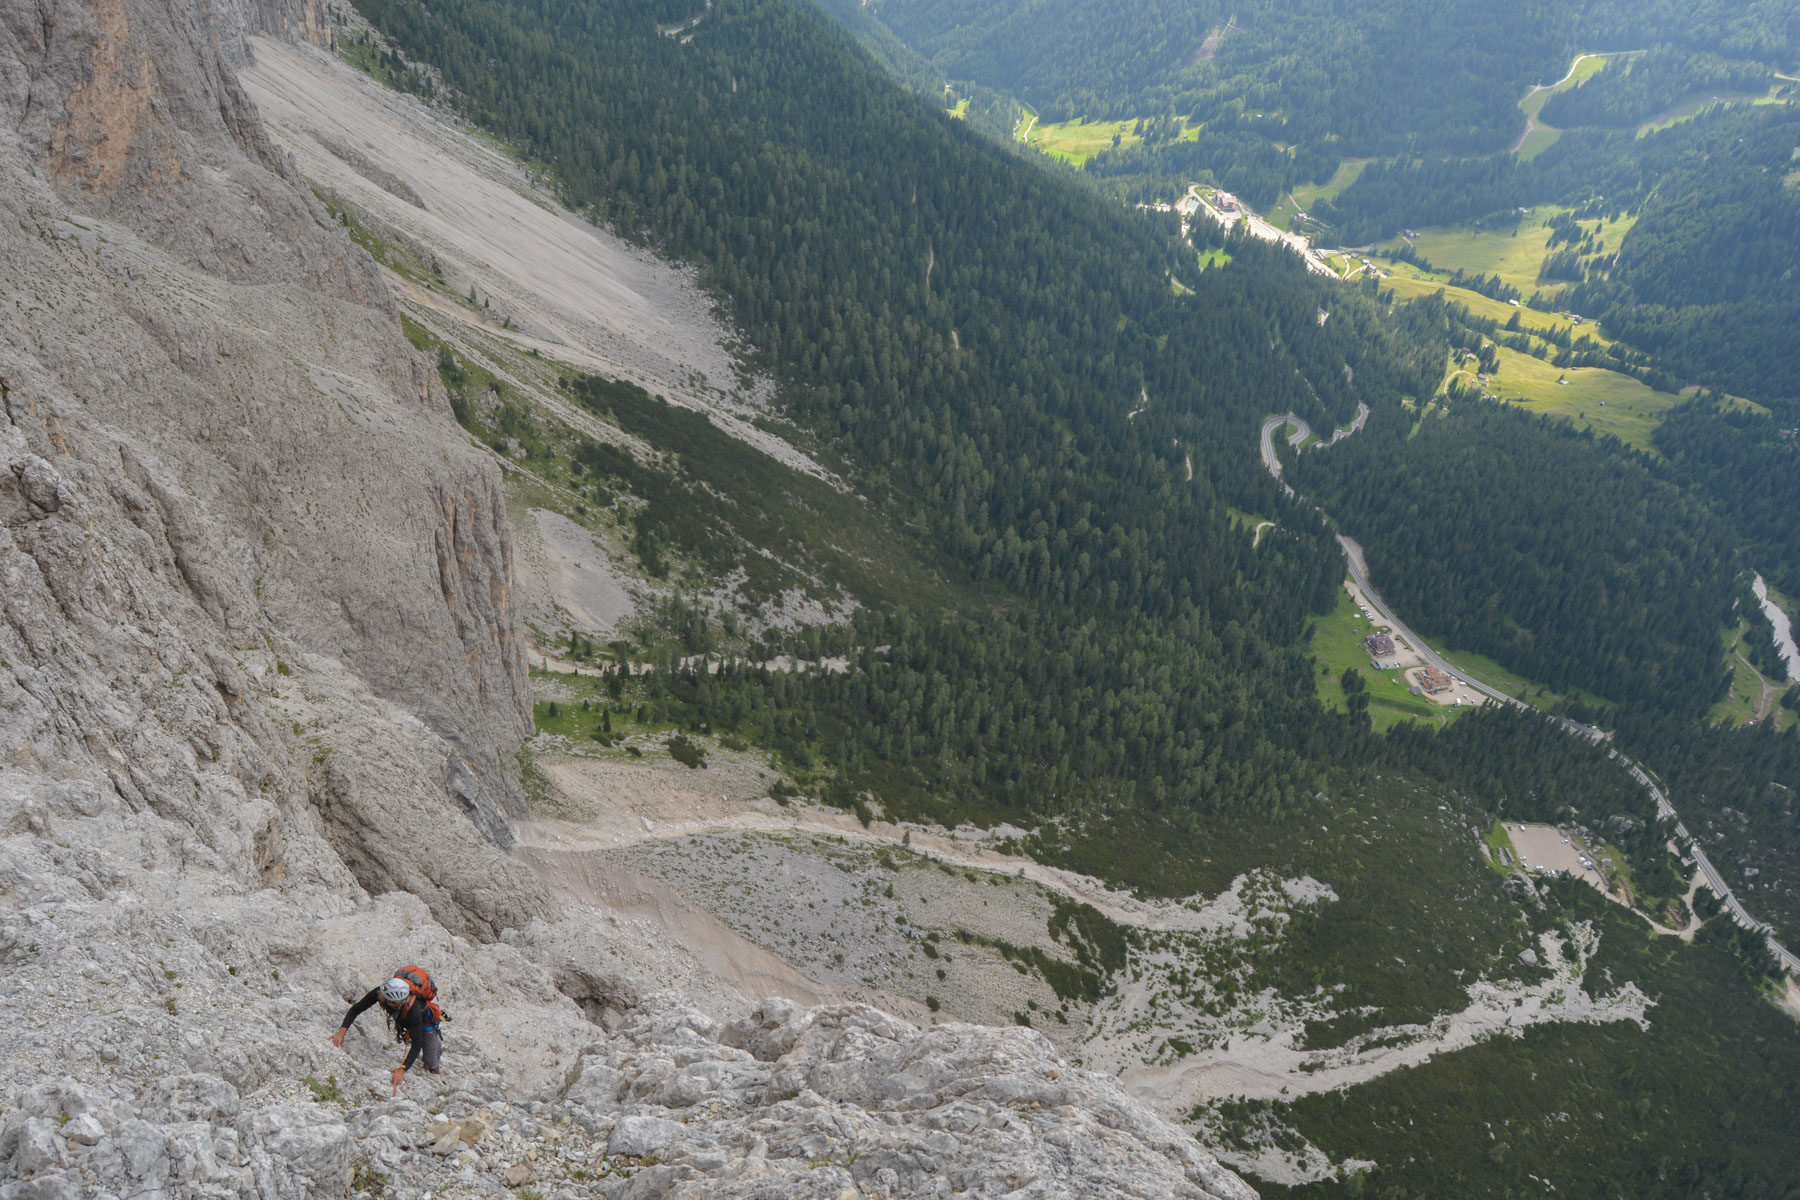
Opened in 1910 by Angelo Dibona, Guido and Max Mayer and Luigi Rizzi, the via Dibona is a clever, logical and accessible route up the west wall of the Sass Pordoi in the western Dolomites. While there are a few pitons and other sealed rings along the way, the route is in adventure terrain on rock that is generally good, even excellent on some pitches. The main interest of the route lies in crossing the immense wall to reach the large ledge below the upper wall, which is another 300m long, and enjoying the exceptional panorama. Without being unforgettable in terms of climbing, there are nonetheless some great pitches, super aerial traverses, dihedrals, chimneys and a gassy slab pitch. The weather window is short here, and as we reach the exit pitch, we're greeted by a hailstorm. A great experience, a 5-star Dolomites atmosphere!
❱❱ Technical summary
Type ✦ Big route in adventure terrain
Location ✦ Cortina d'Ampezzo
Region ✦ Dolomites
Country ✦ Italy
Lengths ✦ 14
Vertical rise ✦ 580m
Difficulty max ✦ V
Interest ✦ ★★★
❱❱ Access to the place
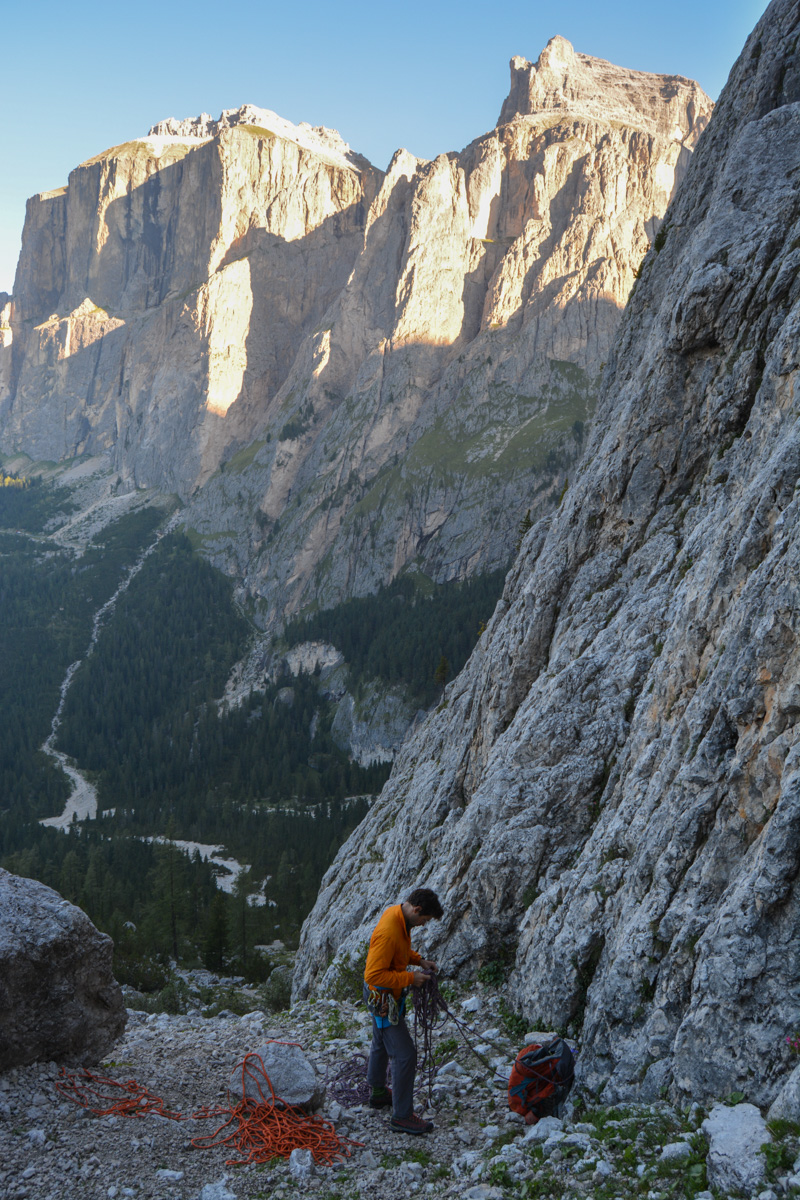
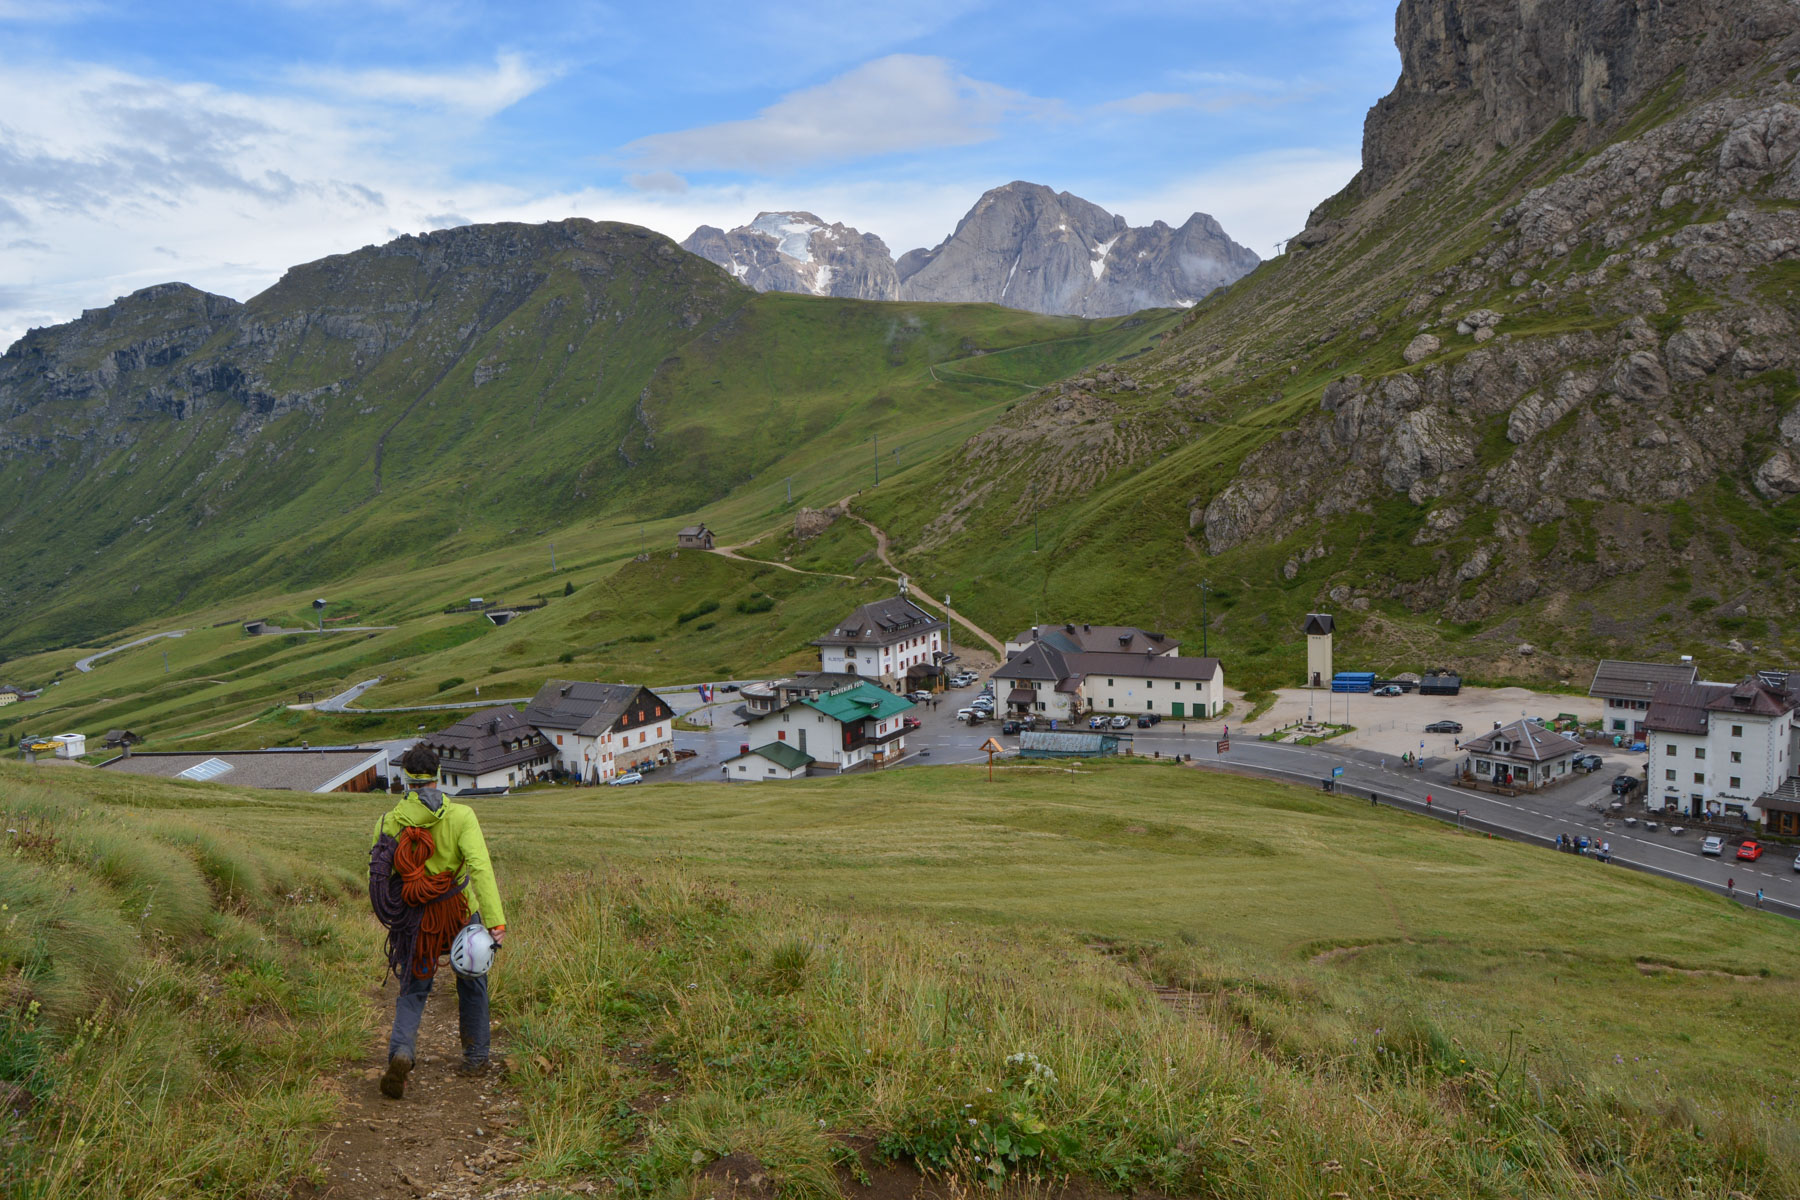
From Canazei, take the road leading to the Passo de Sella and park in the parking lot at the Pian Schiavaneis chalet/restaurant, or better still, a little further to the right at a large parking lot almost below the wall (bivouac possible).
❱❱ Map & topo

❱❱ Itinéraire
From the parking lot, take the path that joins the long scree slopes above, which form flows from the walls. Climb straight up and at the top turn slightly left to reach the foot of the route (a cairn on a rock).
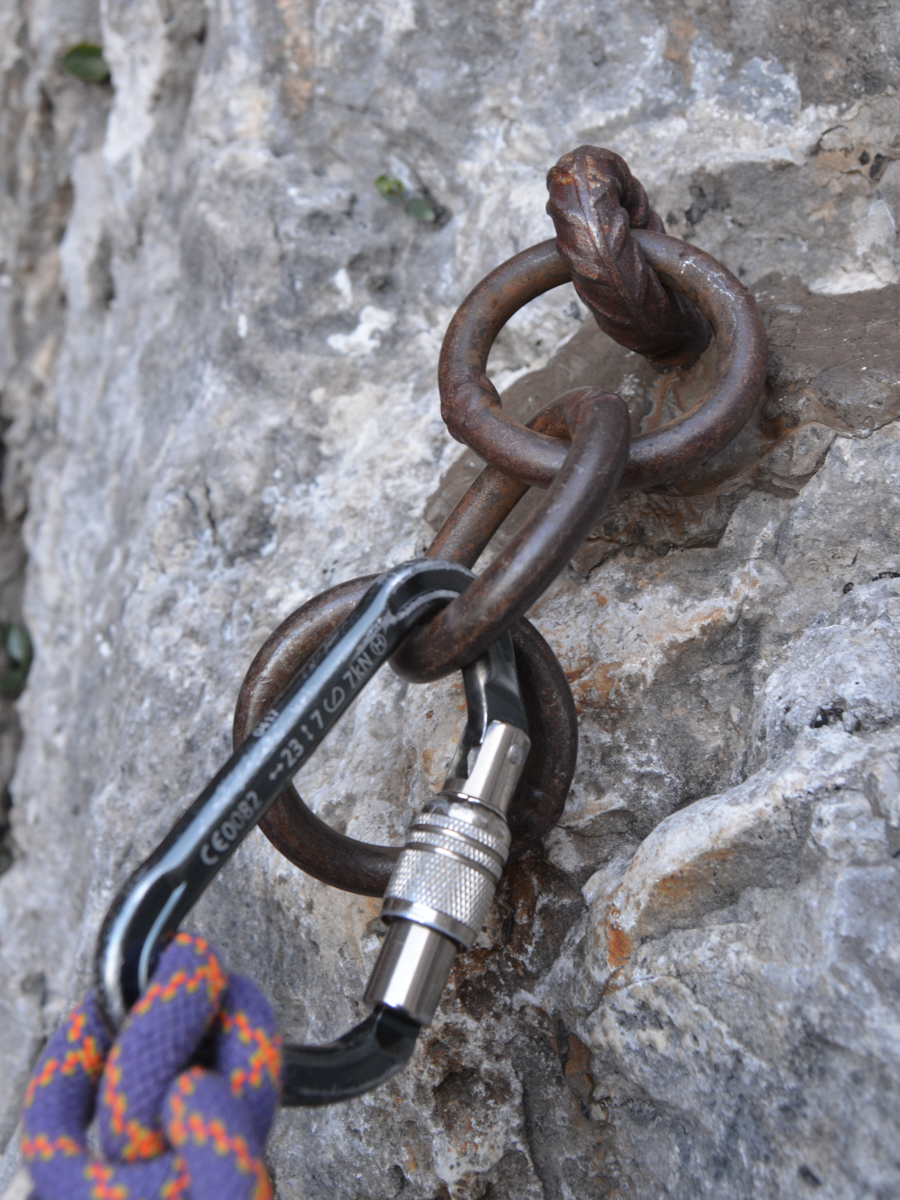
The route is around 580m long and has 14 pitches. The maximum level required is V (the ratings given in the original topos are not very consistent with the difficulties encountered). You'll need a full set of friends and a few stoppers, as well as straps for the rocky crutches. There are a few pitons along the way, and some belays are equipped with vintage sealed rings. The route we took doesn't seem to be the same as the topos (which list 15 or 16 pitches), particularly on pitches 4 and 5, where we had our doubts, and perhaps also on the last 2 pitches. The topo remains indicative...
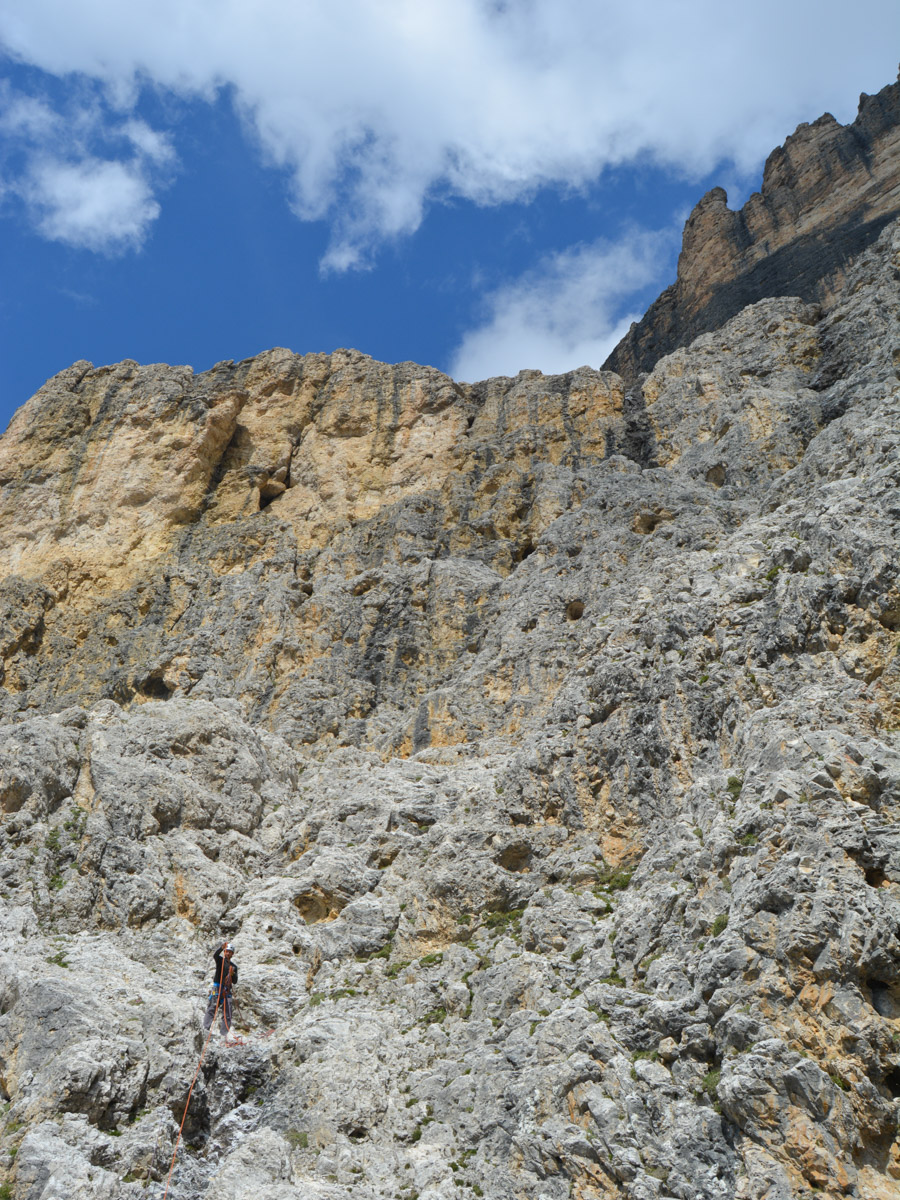
Easy, obvious gully, with a few steps in III if not II. 1 piton on the way and a triple ring sealed at the belay.
Continue up the gully, a little more vertical. Exit onto a ridge. 1 piton on the way. Relay to be equipped on a crutch.
Descend to the other side of the ridge, walk on a small ledge and enter a narrow couloir to climb (IV) to exit to the right and reach an inclined platform. Climb as far as you can until you reach the ridge again. We're now facing the big traverse. Relay on a rock to be equipped with a strap.
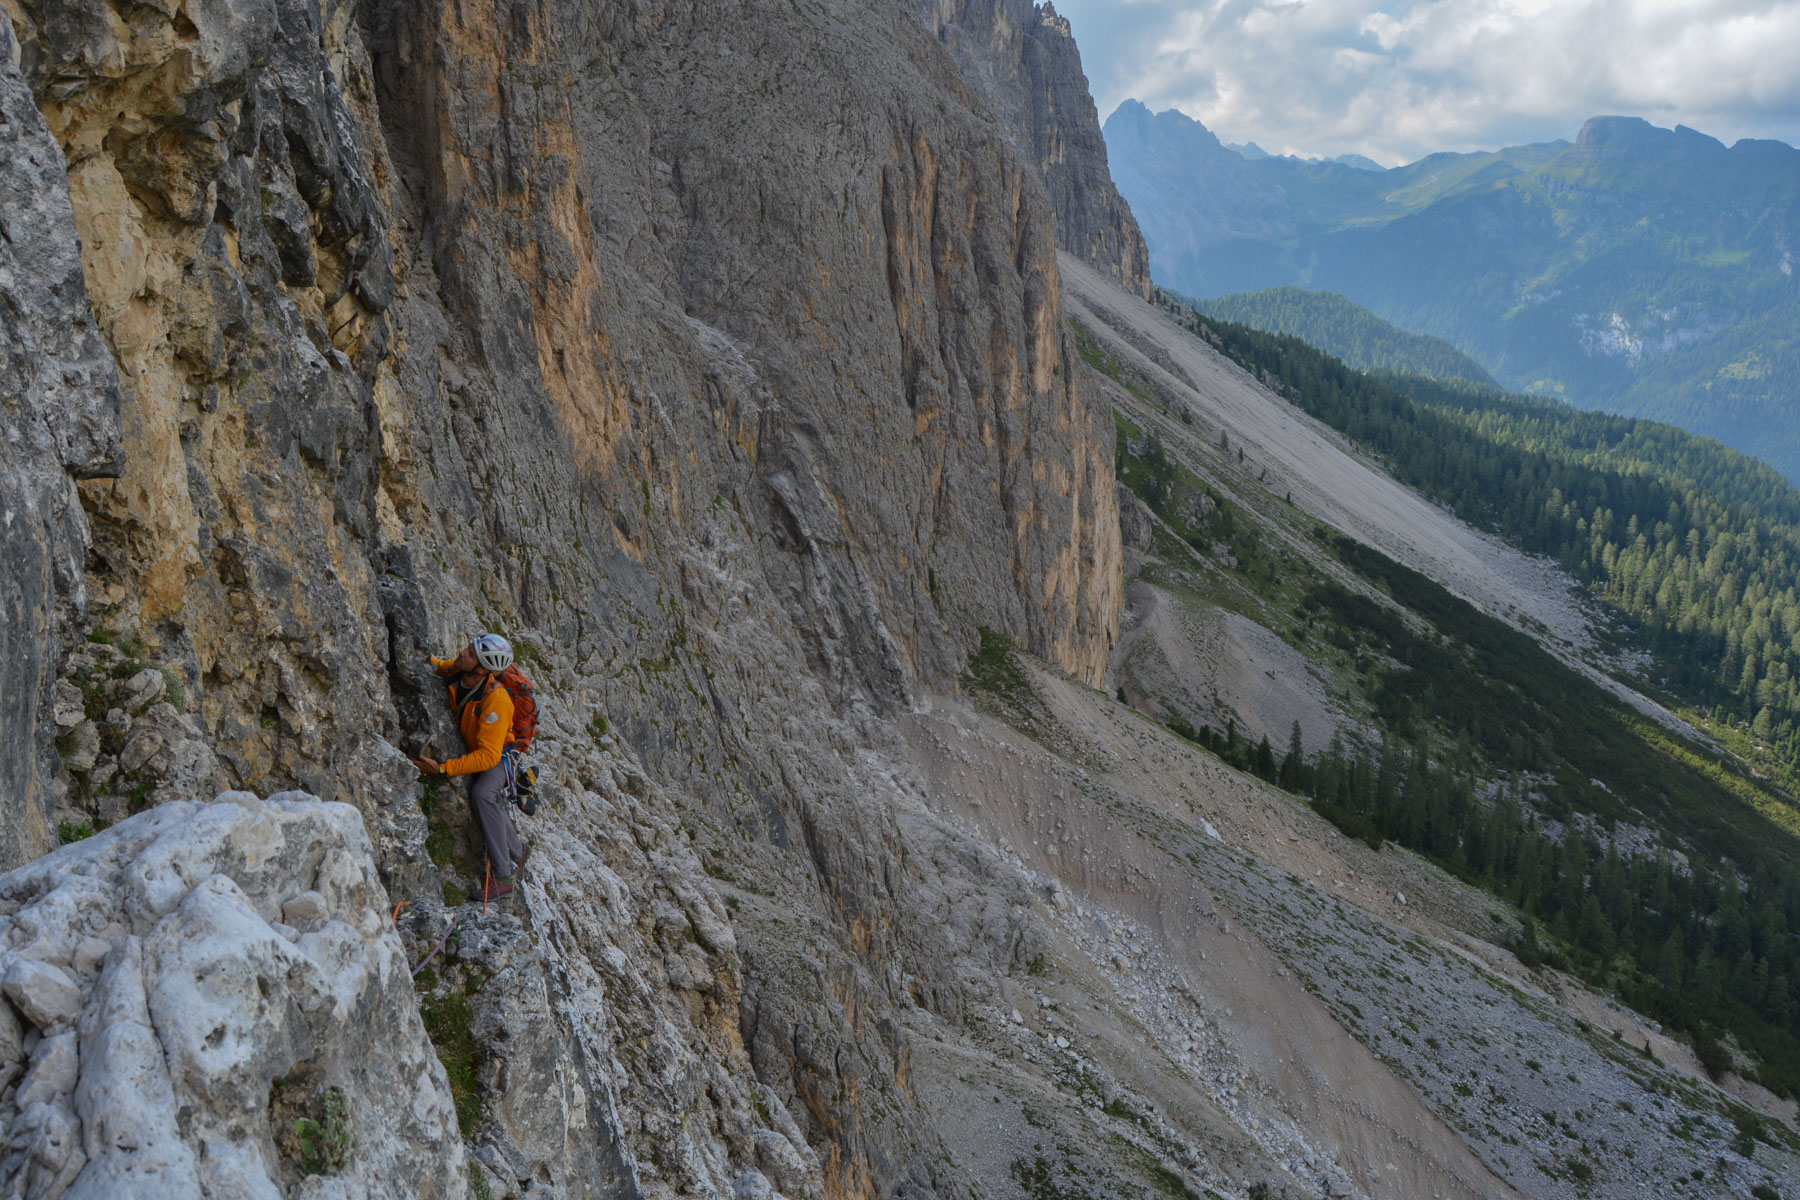
Descend 5m to reach the next wall (1 belay there) then traverse up, following the easiest line. It's III but very aerial. There's a lunula and a piton along the way. The progress line climbs slightly and follows the rocky ledges. After 50m, we pass a rock that's a bit sticky and behind it looks like a grassy ledge with a ramp leading up to the top.
Hesitation here, to continue the traverse or climb? We set off on the traverse to actually cut the big waterfall on its upper section. It's a brilliant pitch, with big holds, pretty III/IV movements and terrible gas under the buttocks! On the way there's an equipped crutch and a piton. It passes through an area of water-blackened rock, then further on, we find white rock and a small platform to equip the belay with straps and stoppers. You can make out the exit 10m above.
10m of wall to get out of the waterfall and above it's very easy (II) to climb a belay in the rocky valley.
Continue up the valley, navigating on sight to reach a platform of bleached rock below a couloir with a large boulder stuck in the middle. Stand-up belay with ground straps to be equipped.
Climb up the small couloir below the boulder and right to exit on the boulder and continue left until you find yourself below the start of the characteristic dihedrals. We're in the hollow of a sort of high amphitheatre, so watch out for falling rocks...
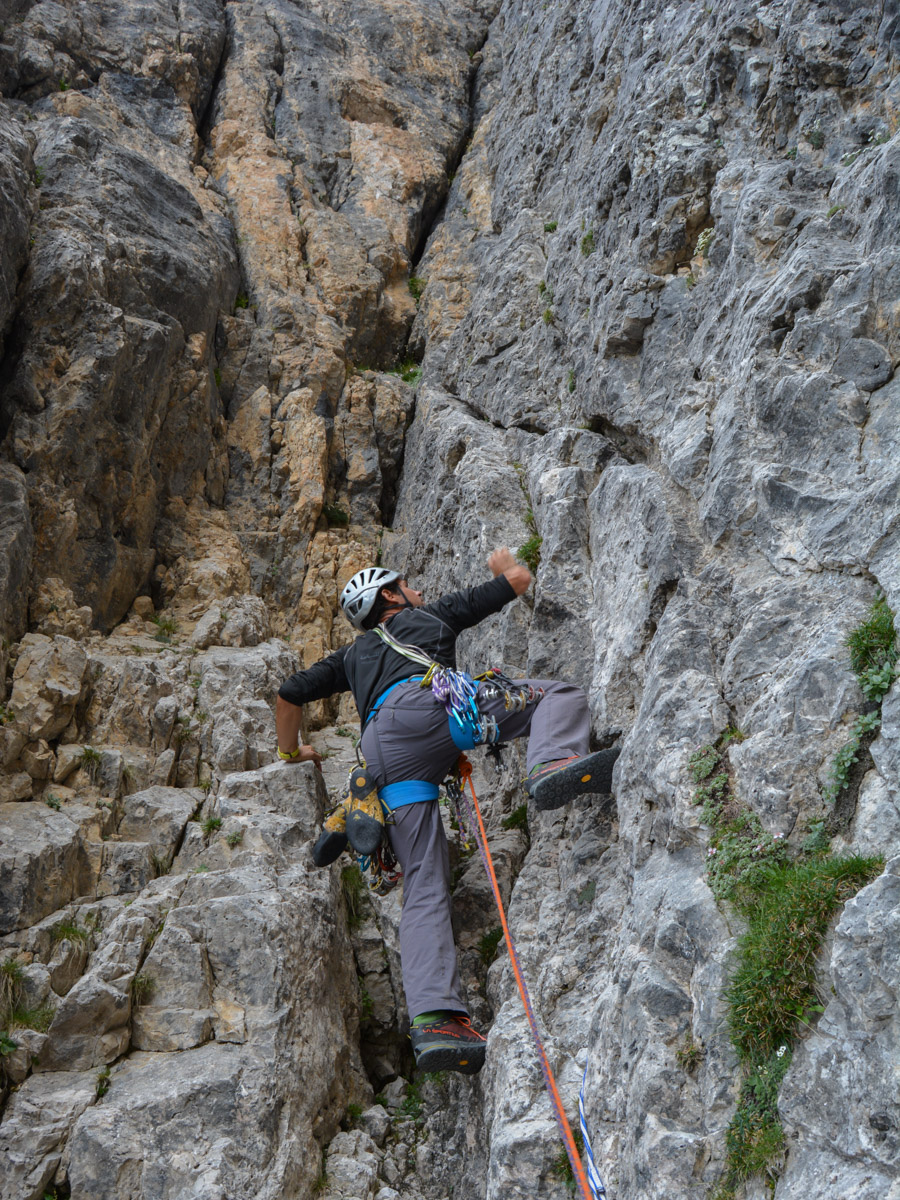
Start in a small chimney and continue in III/IV with some nice holds. Above, under a magnificent dihedral with a belay equipped with sealed rings.
One of the route's best pitches. Climbing on excellent rock, nice movements with straight holds, quite sustained for the level. A few pitons in place and a belay on the way past. At the top, exit to the left to reach a corner platform giving access to an extraordinary panorama.
Another beautiful pitch, in a steady V, especially in the last 20 meters. Exit by crossing to the left of the belay station, then climb a mini-steep that curves back to the right. Then tackle the blackened slab with its small holes. Climb diagonally to aim for a yellow dihedral higher up. We end up near the dihedral and exit to the right over the head of a boulder, which is quite comfortable and below a small wall. Pitons and lunulas along the way. Relay equipped with a sealed ring.
Exit by traversing around the ridge to the right. Climb up and above it is II then I. Walk more to the left to reach a small cairn indicating the supposed start of pitch 13.
Climbing up an incline with big holds. We pass a cave. Above it, there's another flat area. Position yourself to the left of the leftmost large black trail. We're on the edge of a large yellow overhang and at the foot of a chimney that we can see coming out on the summit ridge.
Pass the small chimney to reach another, wider chimney just above. The end is easier to reach the intermediate summit, on the ledge and under the upper wall.
Climb up the ledge to get under the upper wall and follow it on a small, barely visible path to the south (right). After 20′, you pass a small shoulder and switch to the east. You pass under the cable car and can see the Pass Pordoï station below. Continue along the wall to find a scree slope that leads to the trekking path to the parking lot. From here, if you don't have a 2nd vehicle, head downhill along the road until you find a path indicating a return to Pian Schiavaneis in the woods.


Leave a Reply