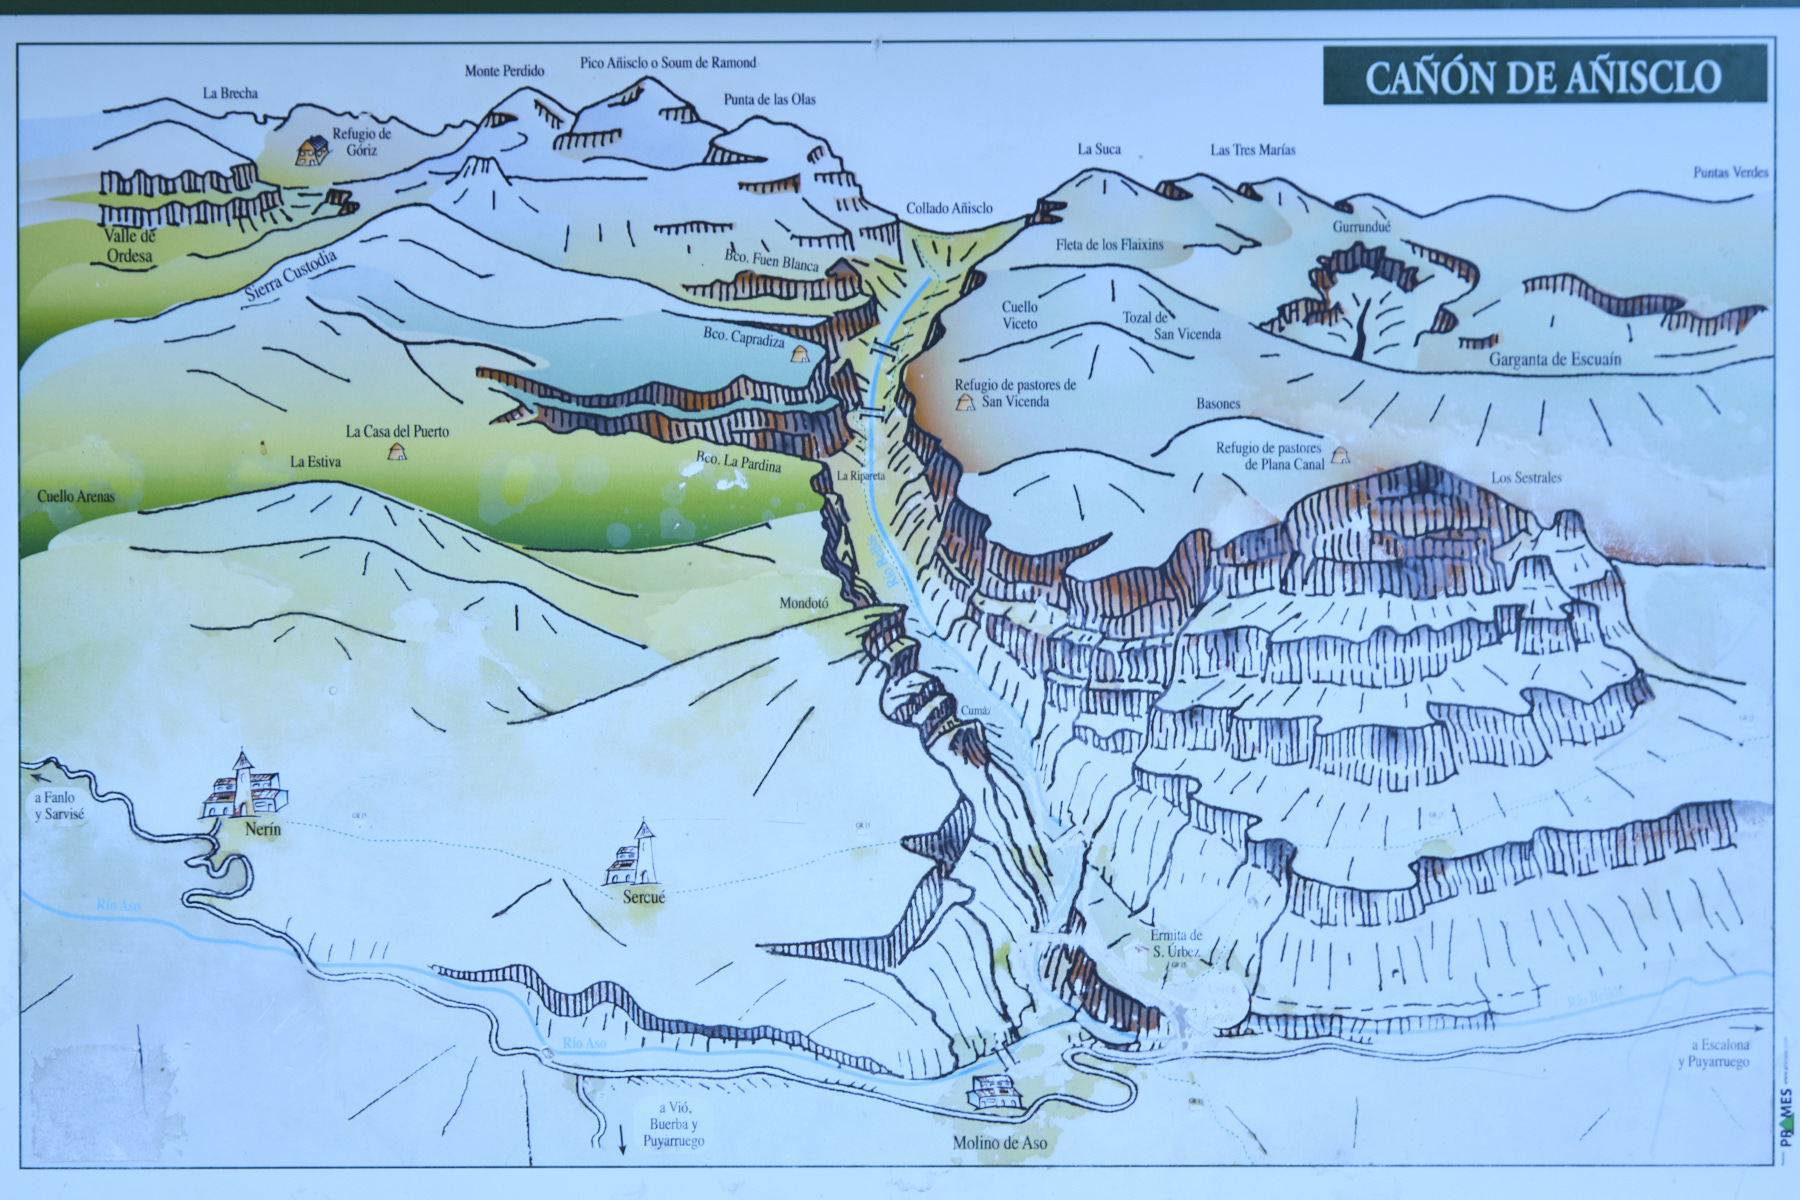
Exploring the Canyon d'Añisclo, at the foot of the Monte Perdido massif, is well worth the detour. Despite the great distance and altitude difference, it's a beautiful loop, with the added bonus of the aerial section of the Faja Pardina and the ascent of the Sestrales to dominate this incredible canyon. The scenery on the southern slopes of Monte Perdido is incredible, especially in the section between the Faja Pardina exit and the Barranco Capriza before descending to the canyon floor. The loop can be split into 2 days for a more leisurely tour, with the option of bivouacking at Barranco Caprariza.
❱❱ Technical summary
■ Departure and return: Nerin (departure) and San Urbez parking lot (return), Añisclo canyon road, Ordesa Park and Monte Perdido,Aragon, Spain
■ Type of route: high-mountain hike, almost a loop (2 vehicles required)
■ Distance: 28.5 km
■ Cumulative elevation gain: +1570 m
■ Cumulative negative altitude gain: -1890 m
■ Estimated total time: 10h to 11h ■ Min and max altitude: 960 m / 2101 m
■ Marking: signs in some places, no marking but frequent cairns
■ Equipment in place: a few rungs and cable for the Faja Pardina exit, nails before the footbridge at the bottom of the canyon
■ Equipment to bring: GPS track very useful
Difficulties: in addition to the distance and altitude difference, there are some very steep sections to descend, unstable terrain, aerial passages (faja, descent of the Sestrales) and itinerary reading that is not obvious (descent to the bottom of the canyon and the Sestrales).
❱❱ Access to the place
You need to take the Añisclo canyon road either from Sarvisé, south of Broto, or from Escalona on the road between Bielsa and Ainsa. For this itinerary, 2 vehicles are required: the first to set off from the village of Nerin and the second left at the San Urbez parking lot a little further down, at the exit of the Añisclo canyon.
❱❱ Map & topo
The route of the descent section from the Barranco Caprariza stone bridge to the bottom of the canyon is indicative.
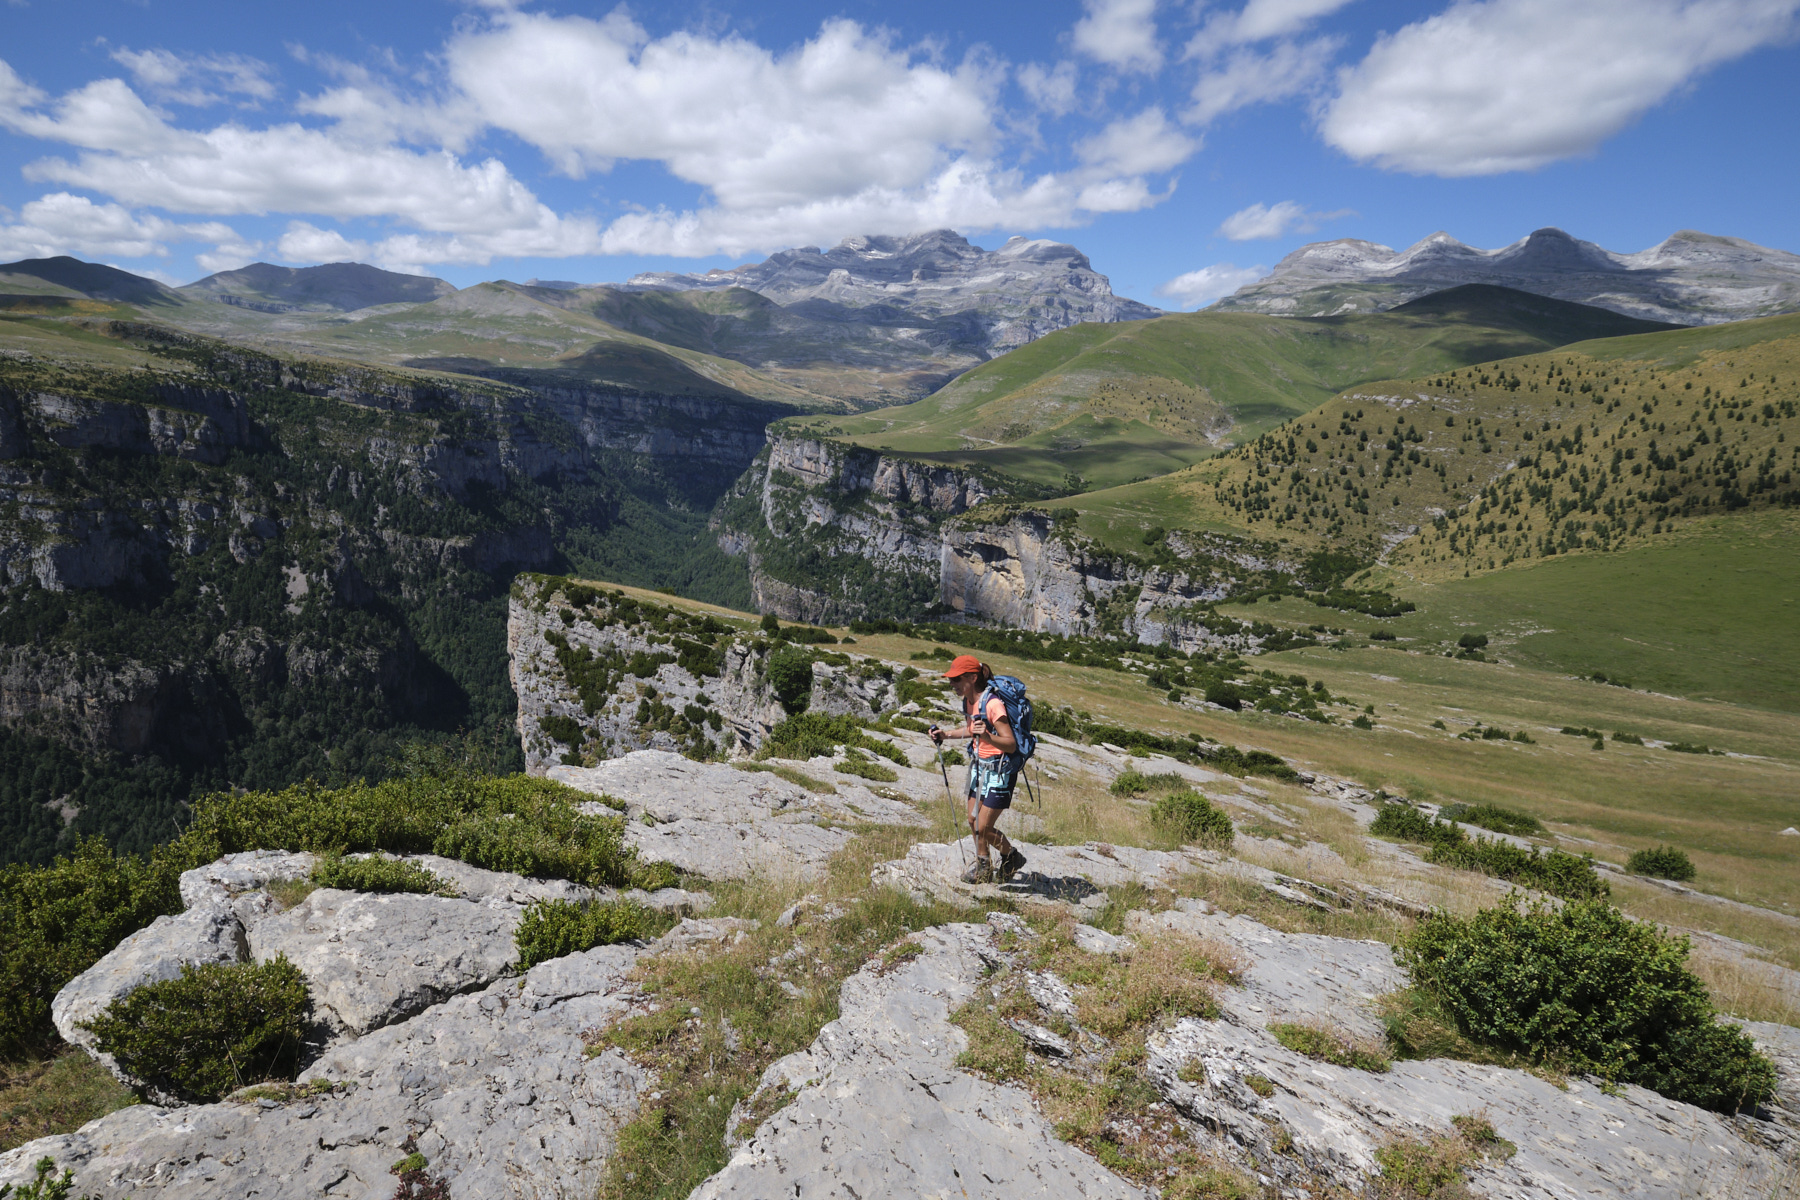
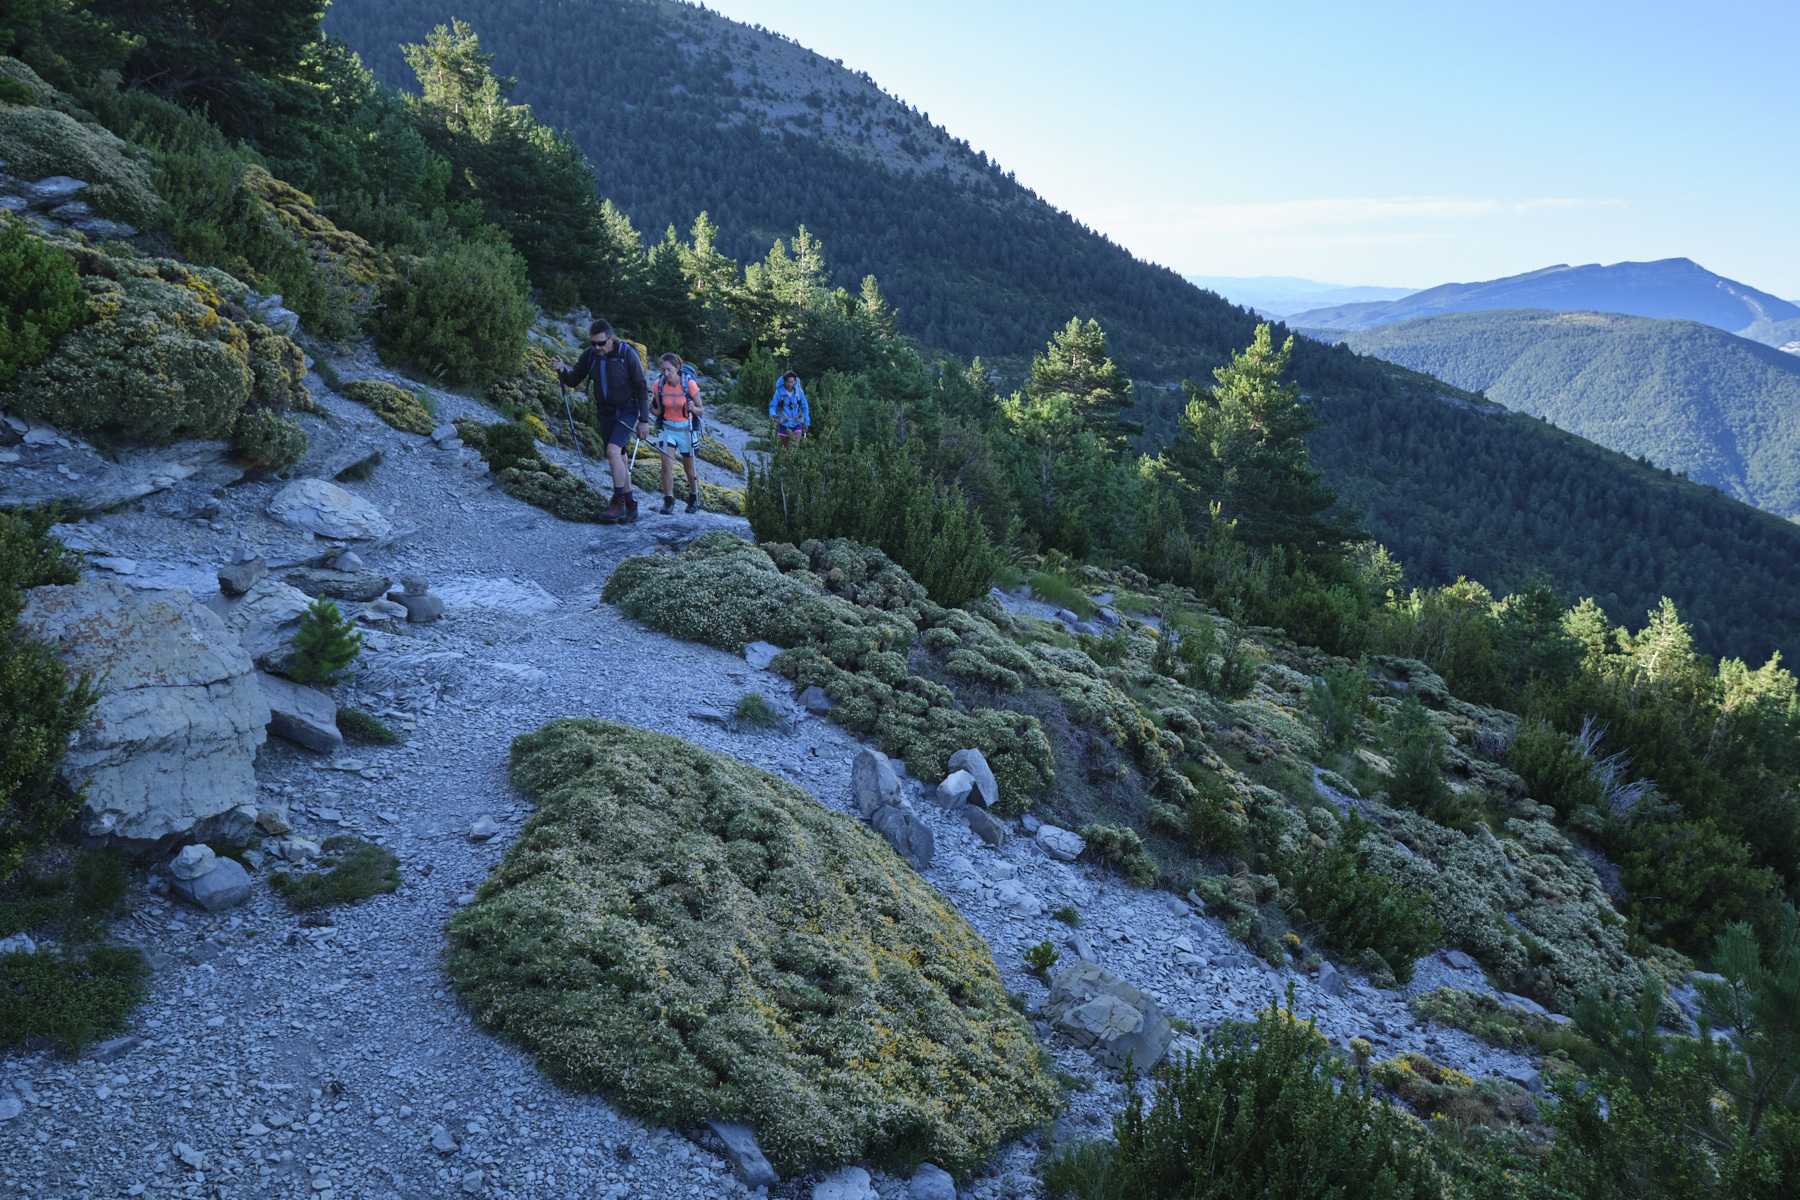
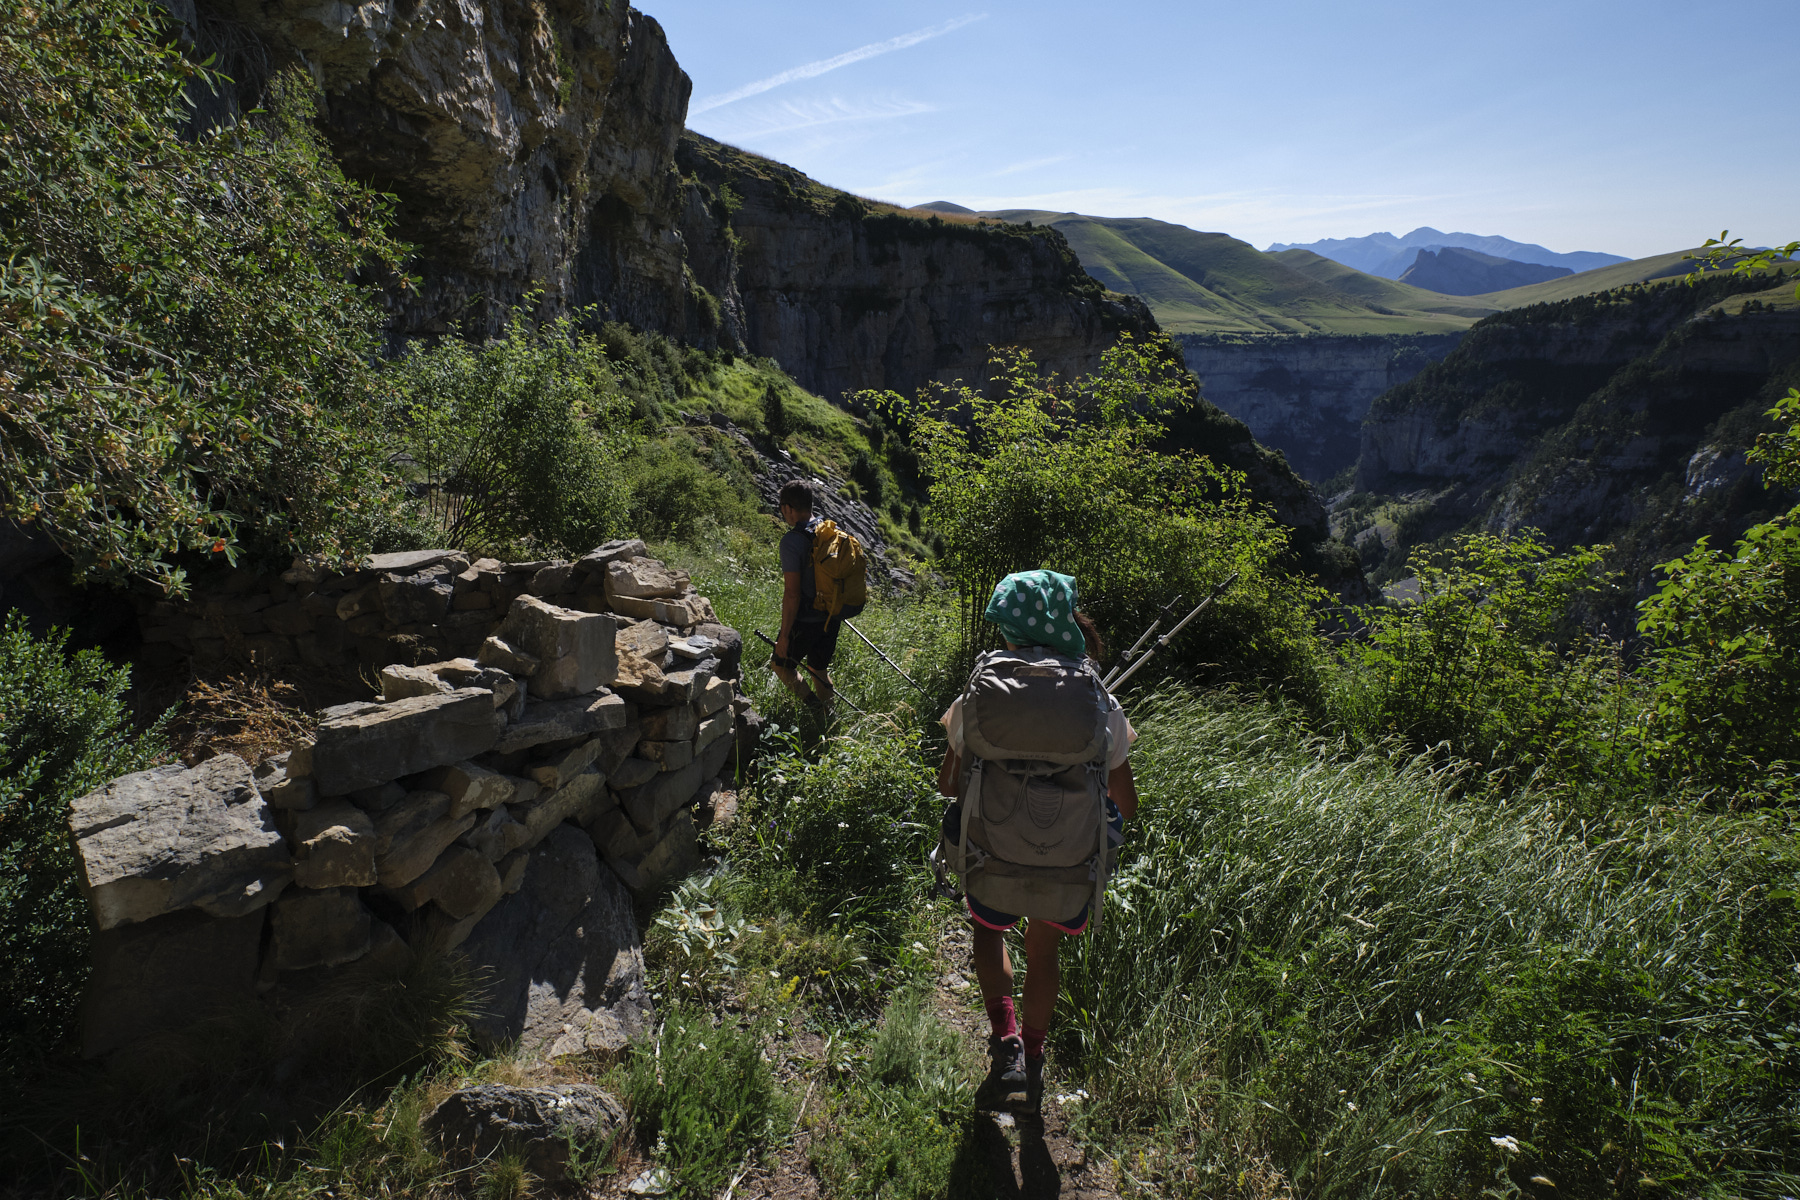
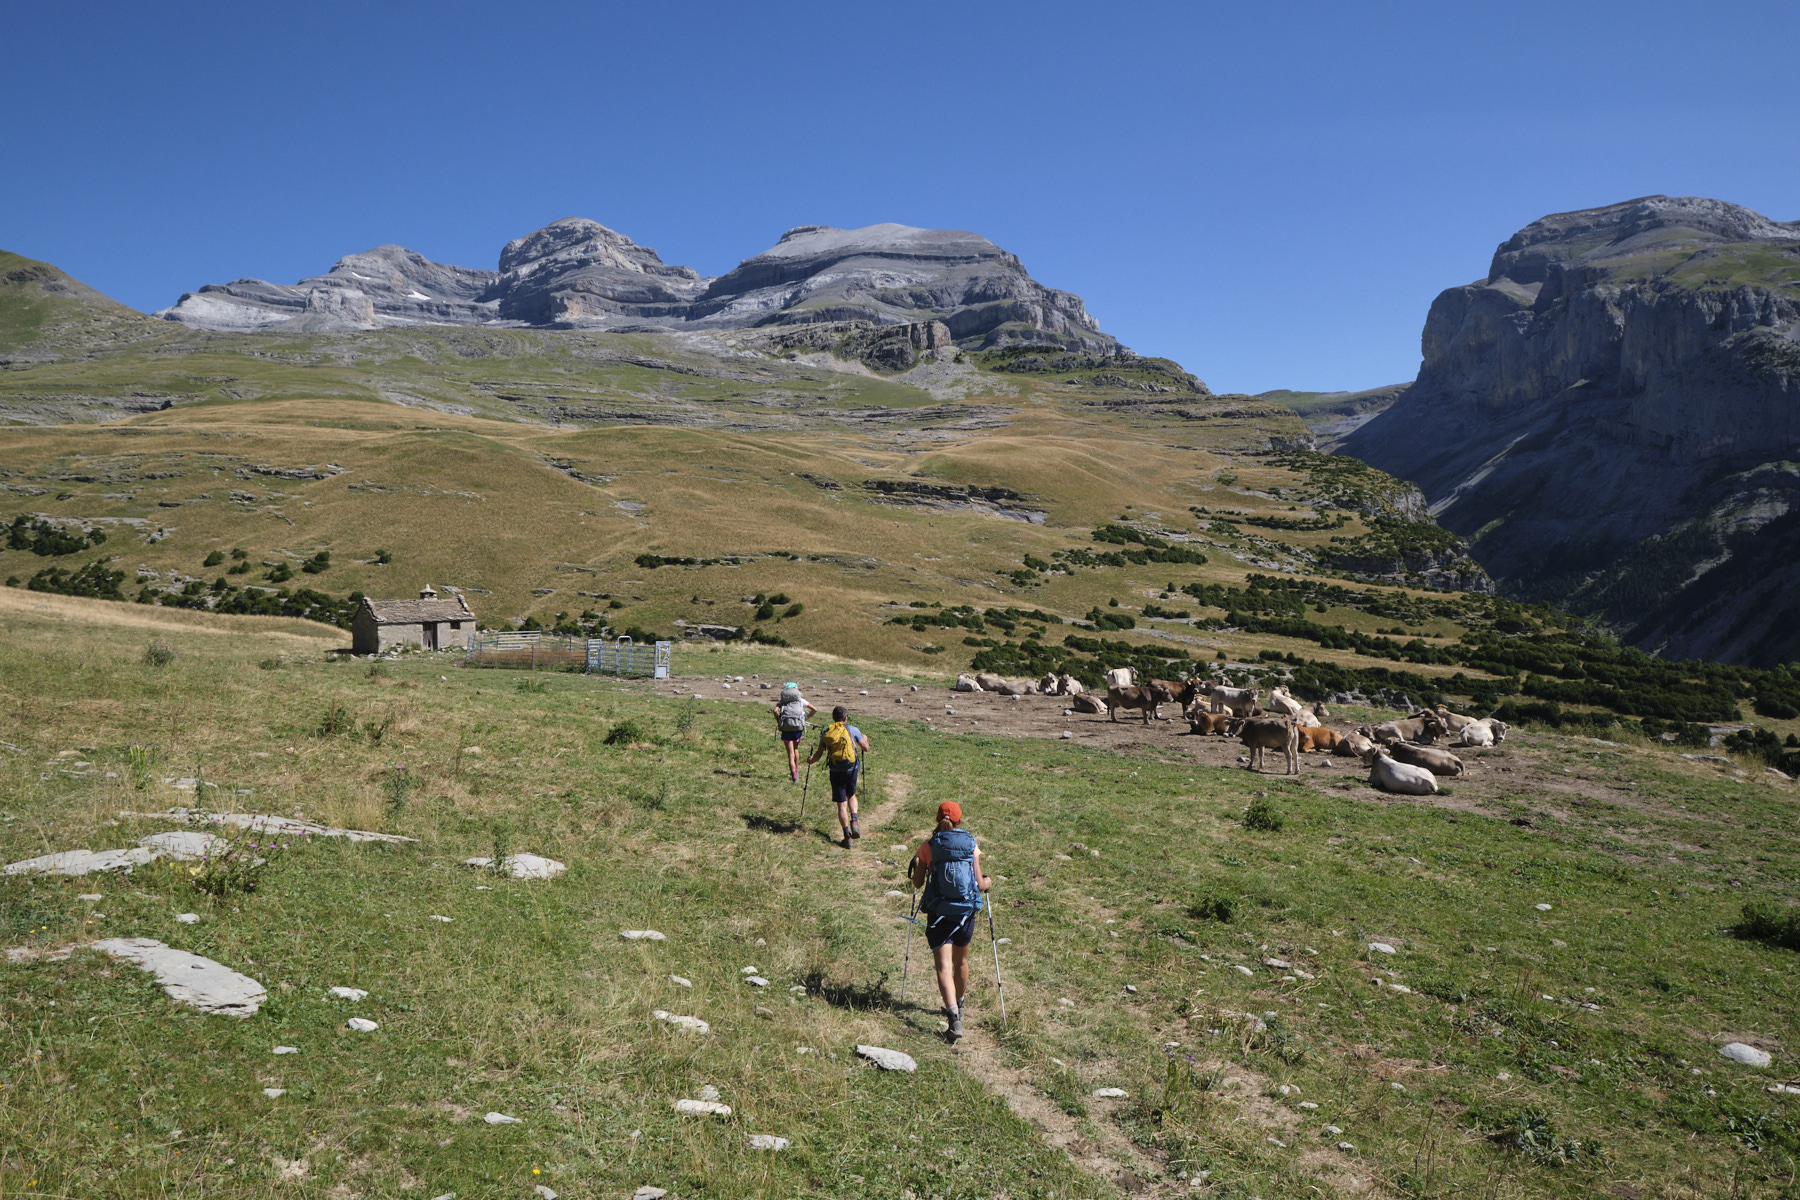
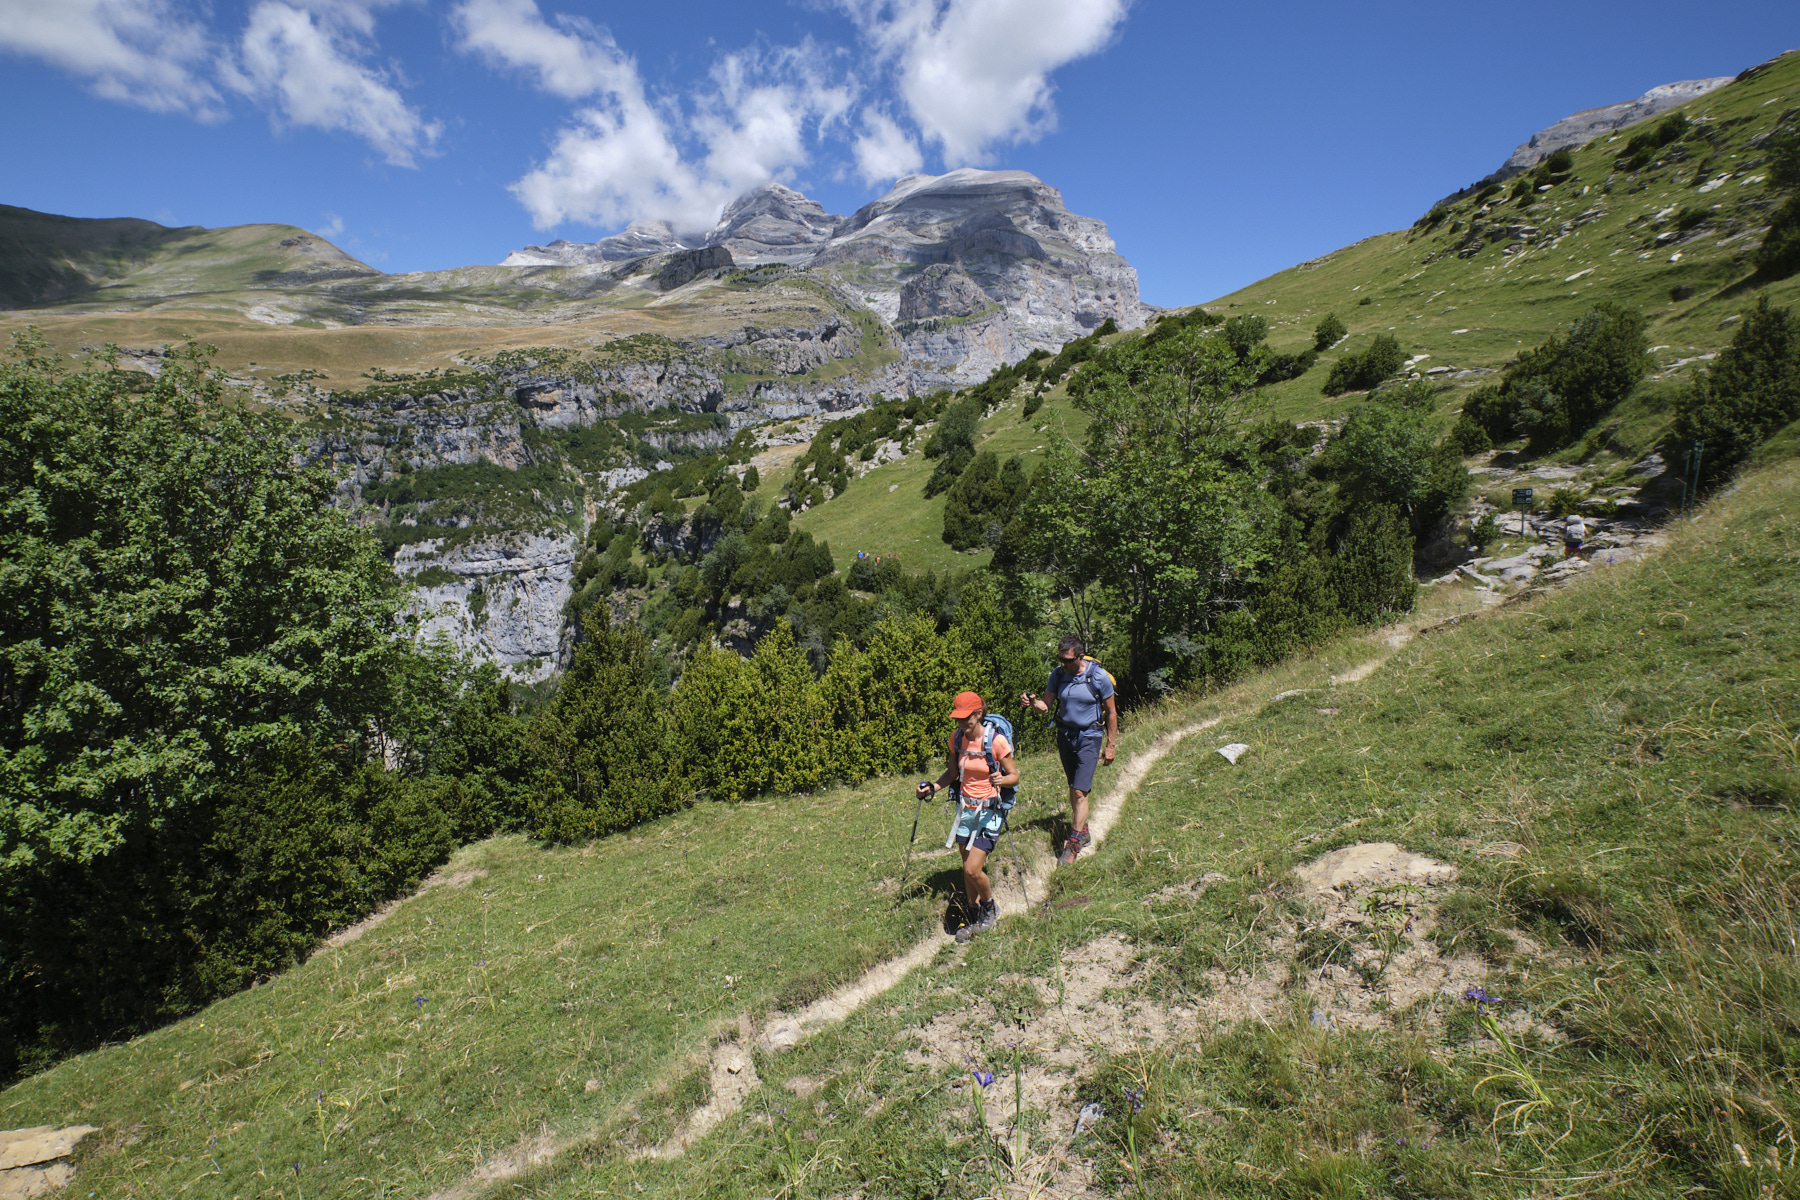
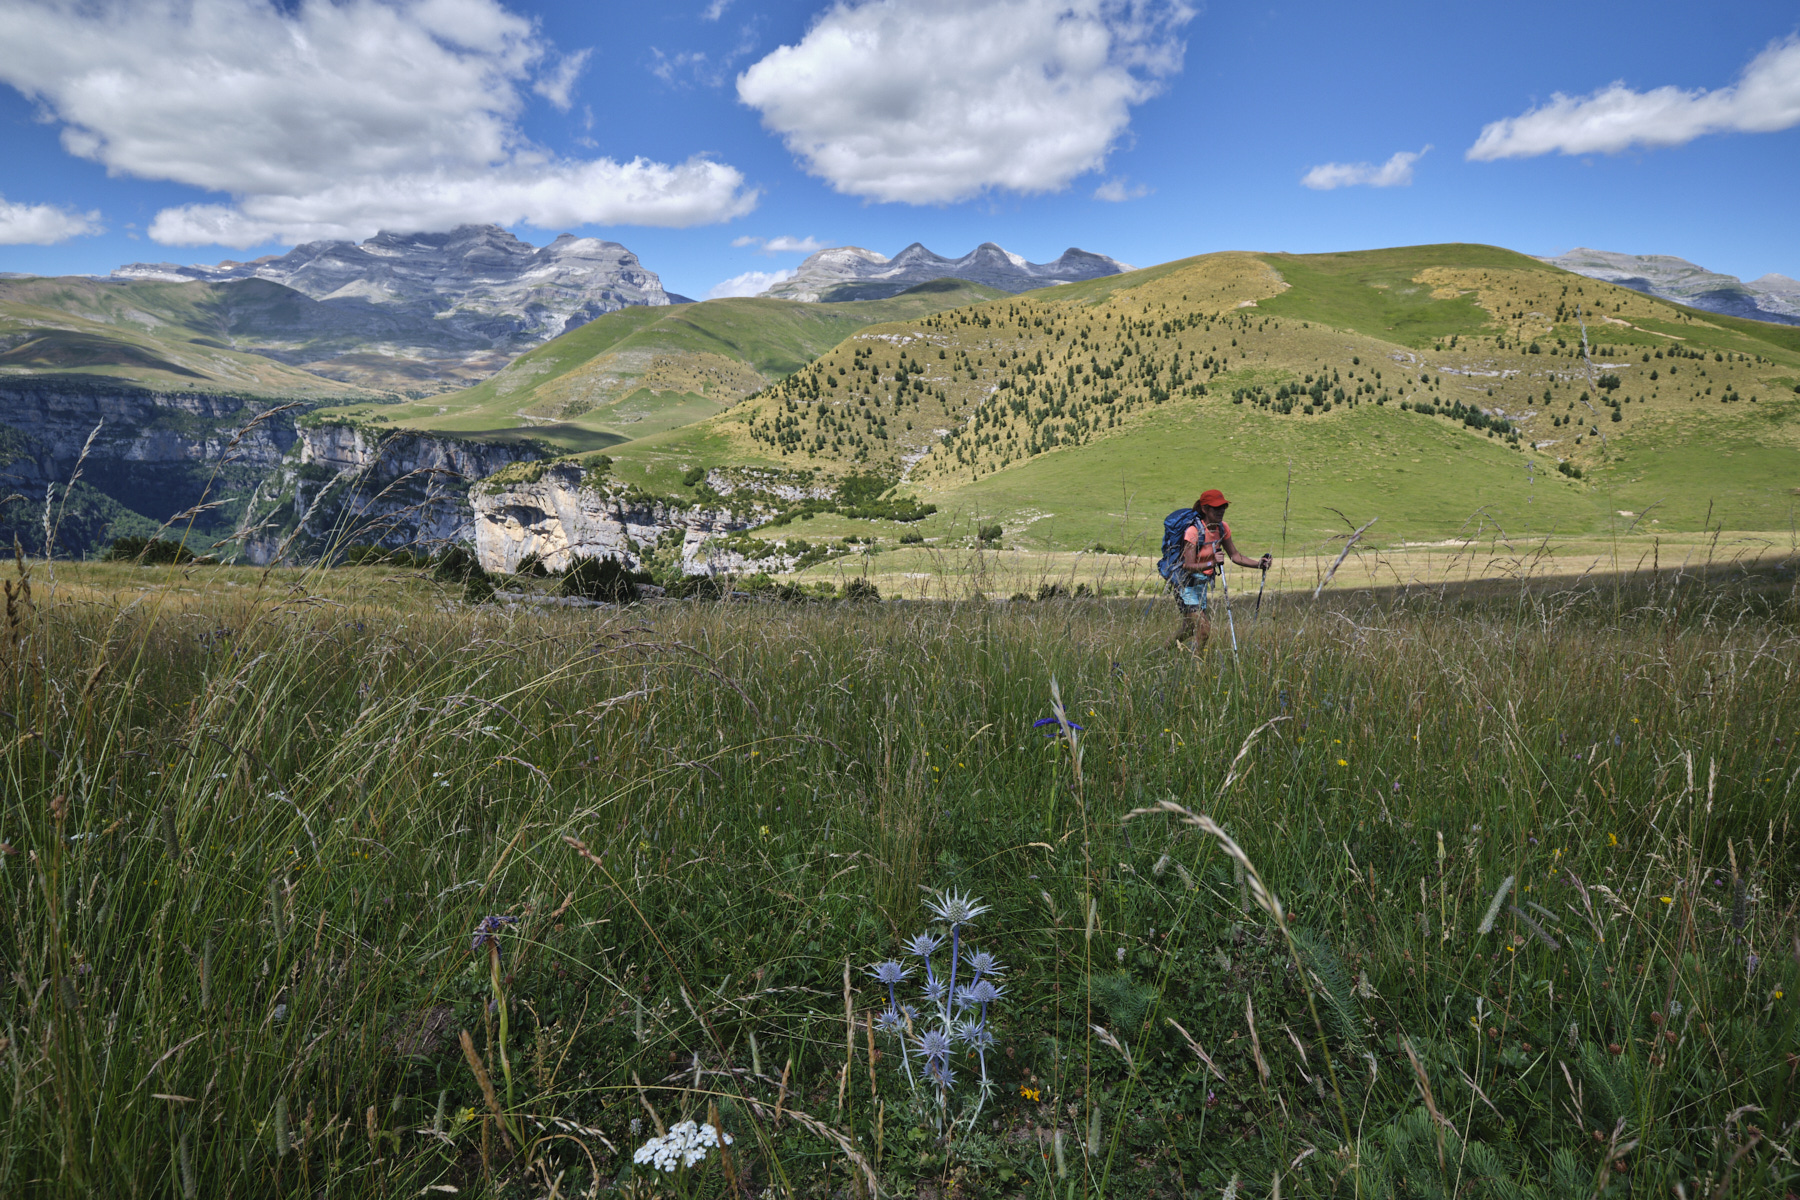
This first section climbs above the village of Nerin, skirting the Tozal d'Escuain and Punta Salz from the west, to reach the Col d'Arenas at almost 1900m, with the first views of the Monte Perdido massif. The trail generally follows the route of the carriage road, cutting across the slopes to avoid numerous sharp bends. There is just one fork above Nerin, leaving the Mondoto trail on the right and heading off to the left. More than 600m of ascent that passes by itself because it's gradual and sheltered from the sun.
2nd part: from Col d'Arenas to Mallata Candon via Faja Pardina (1810m, 2h)
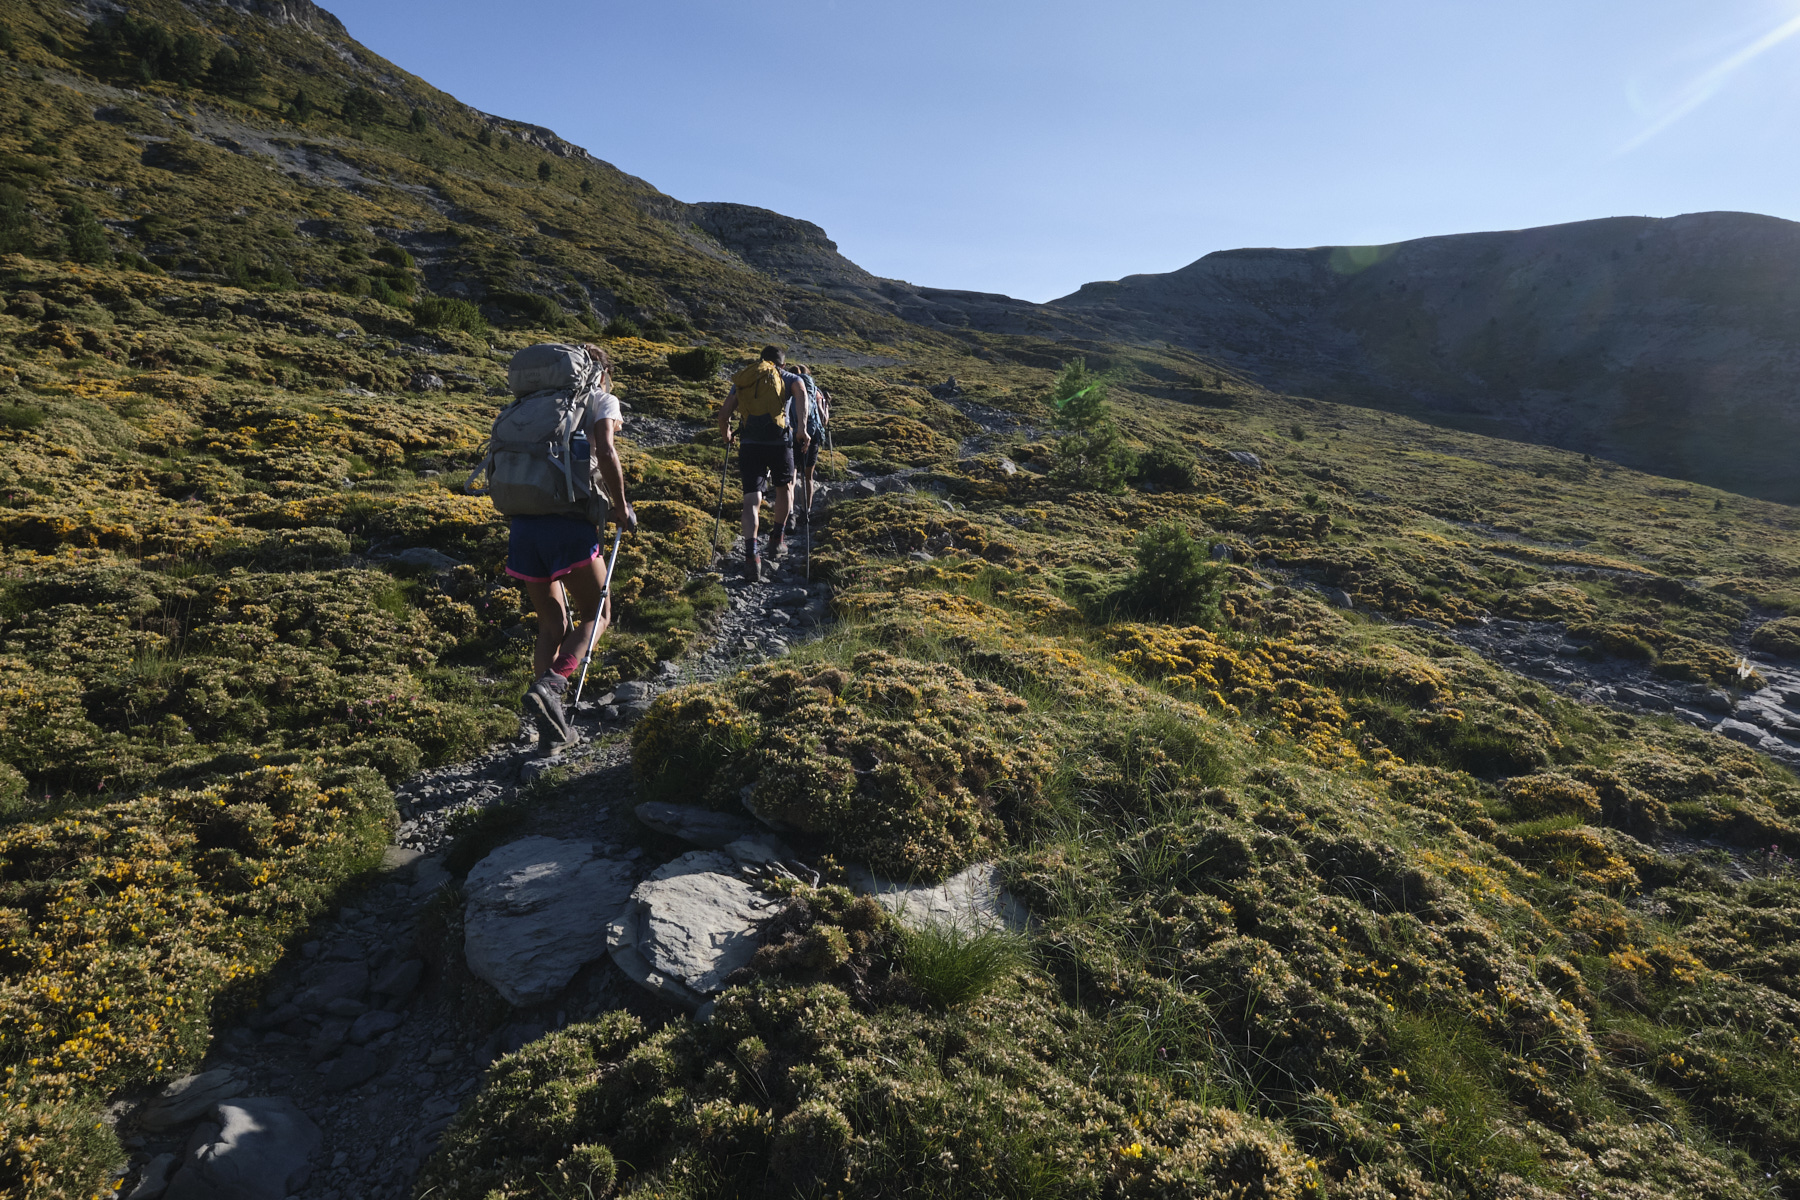
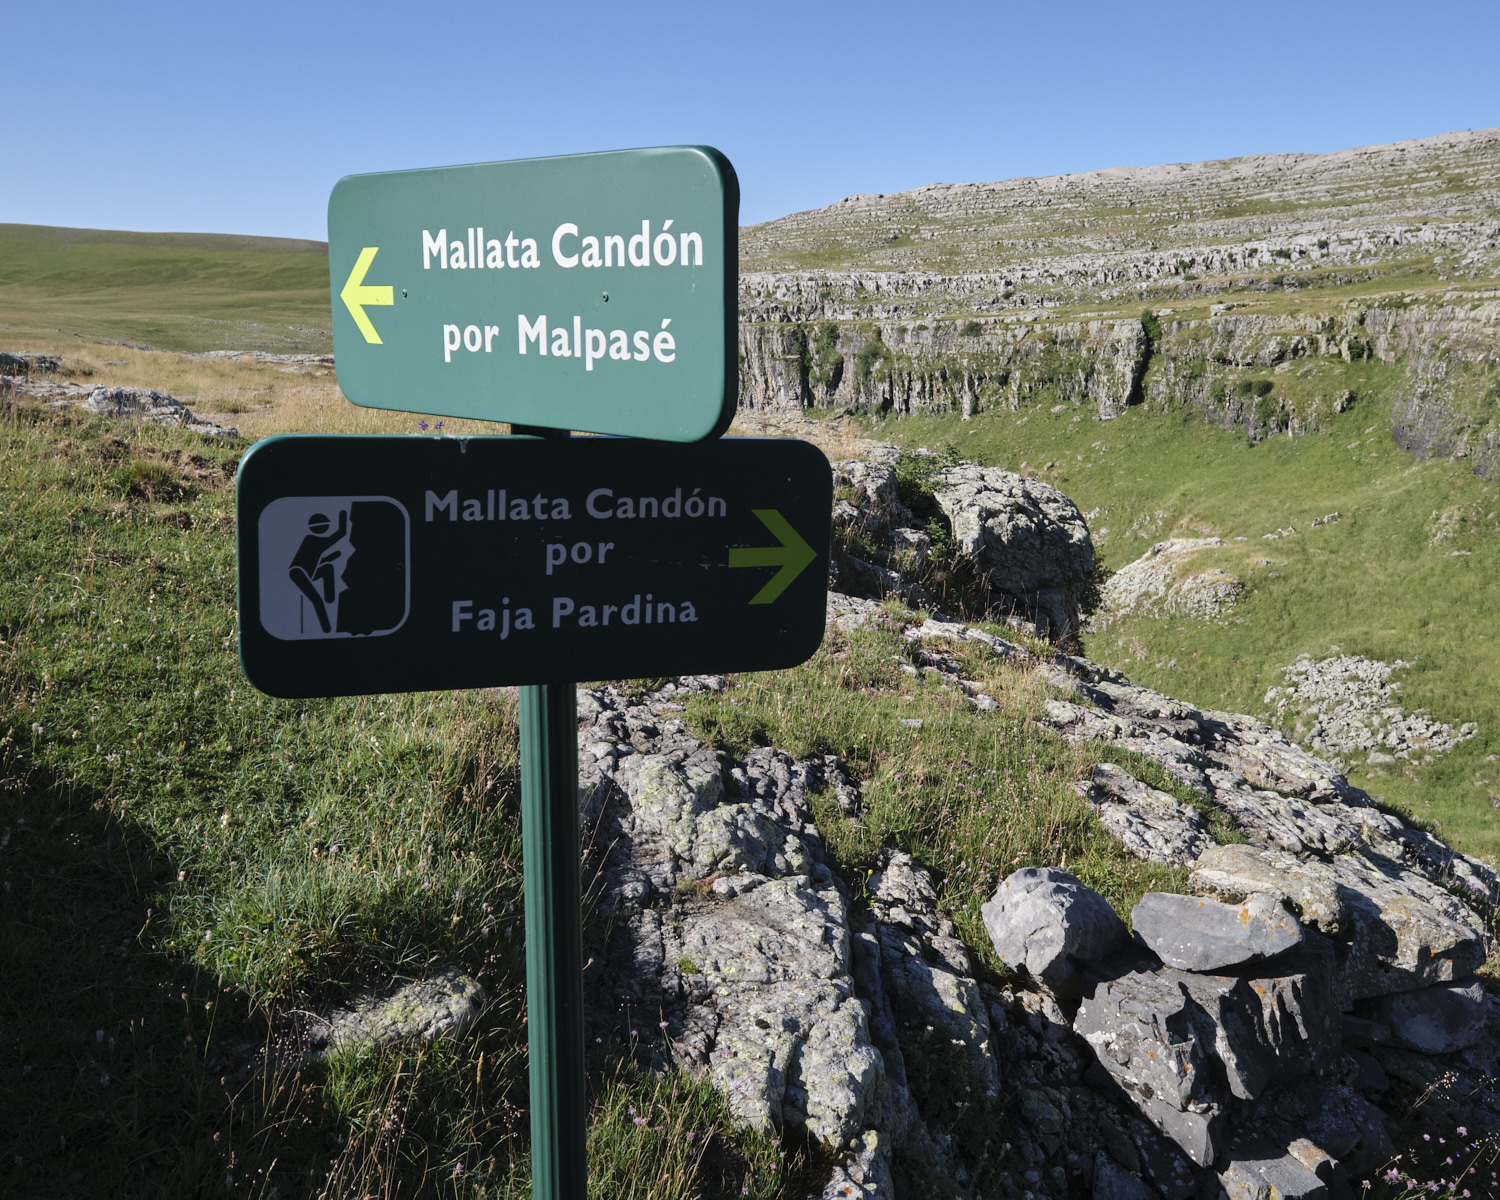
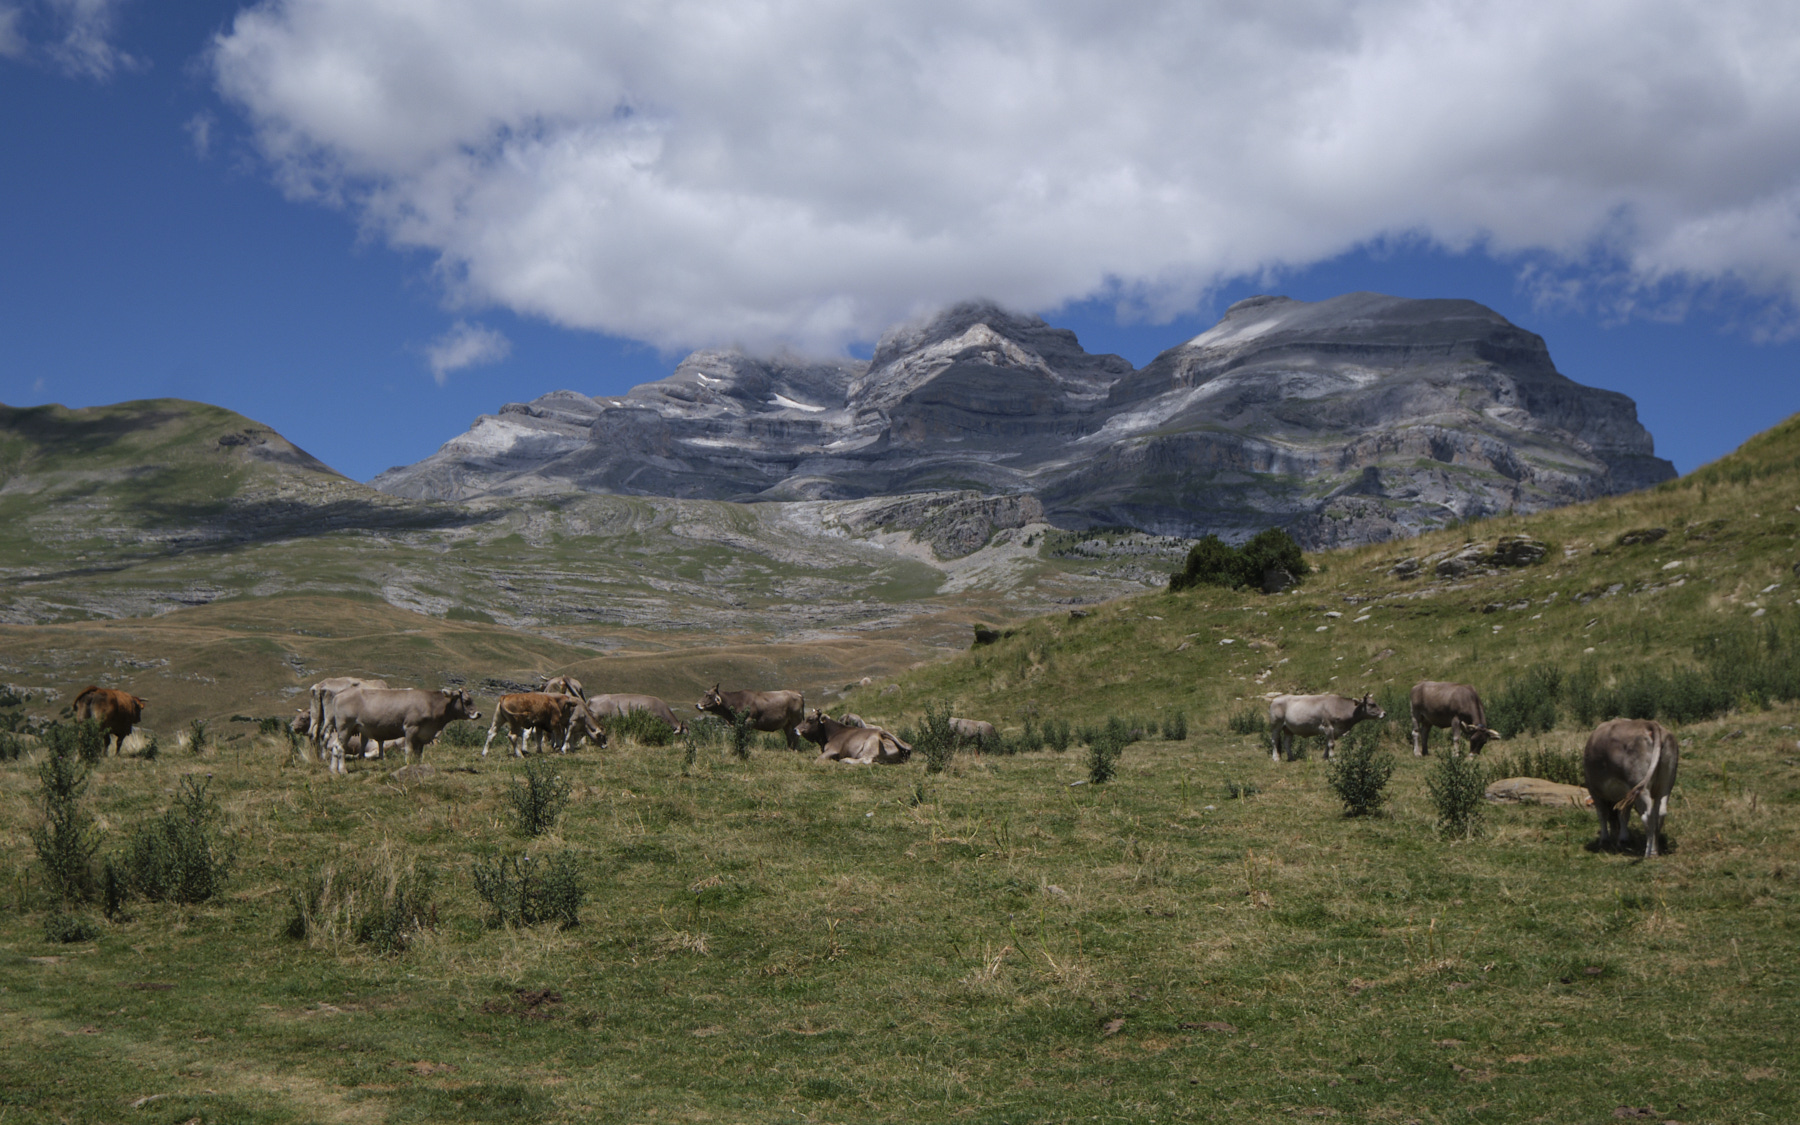
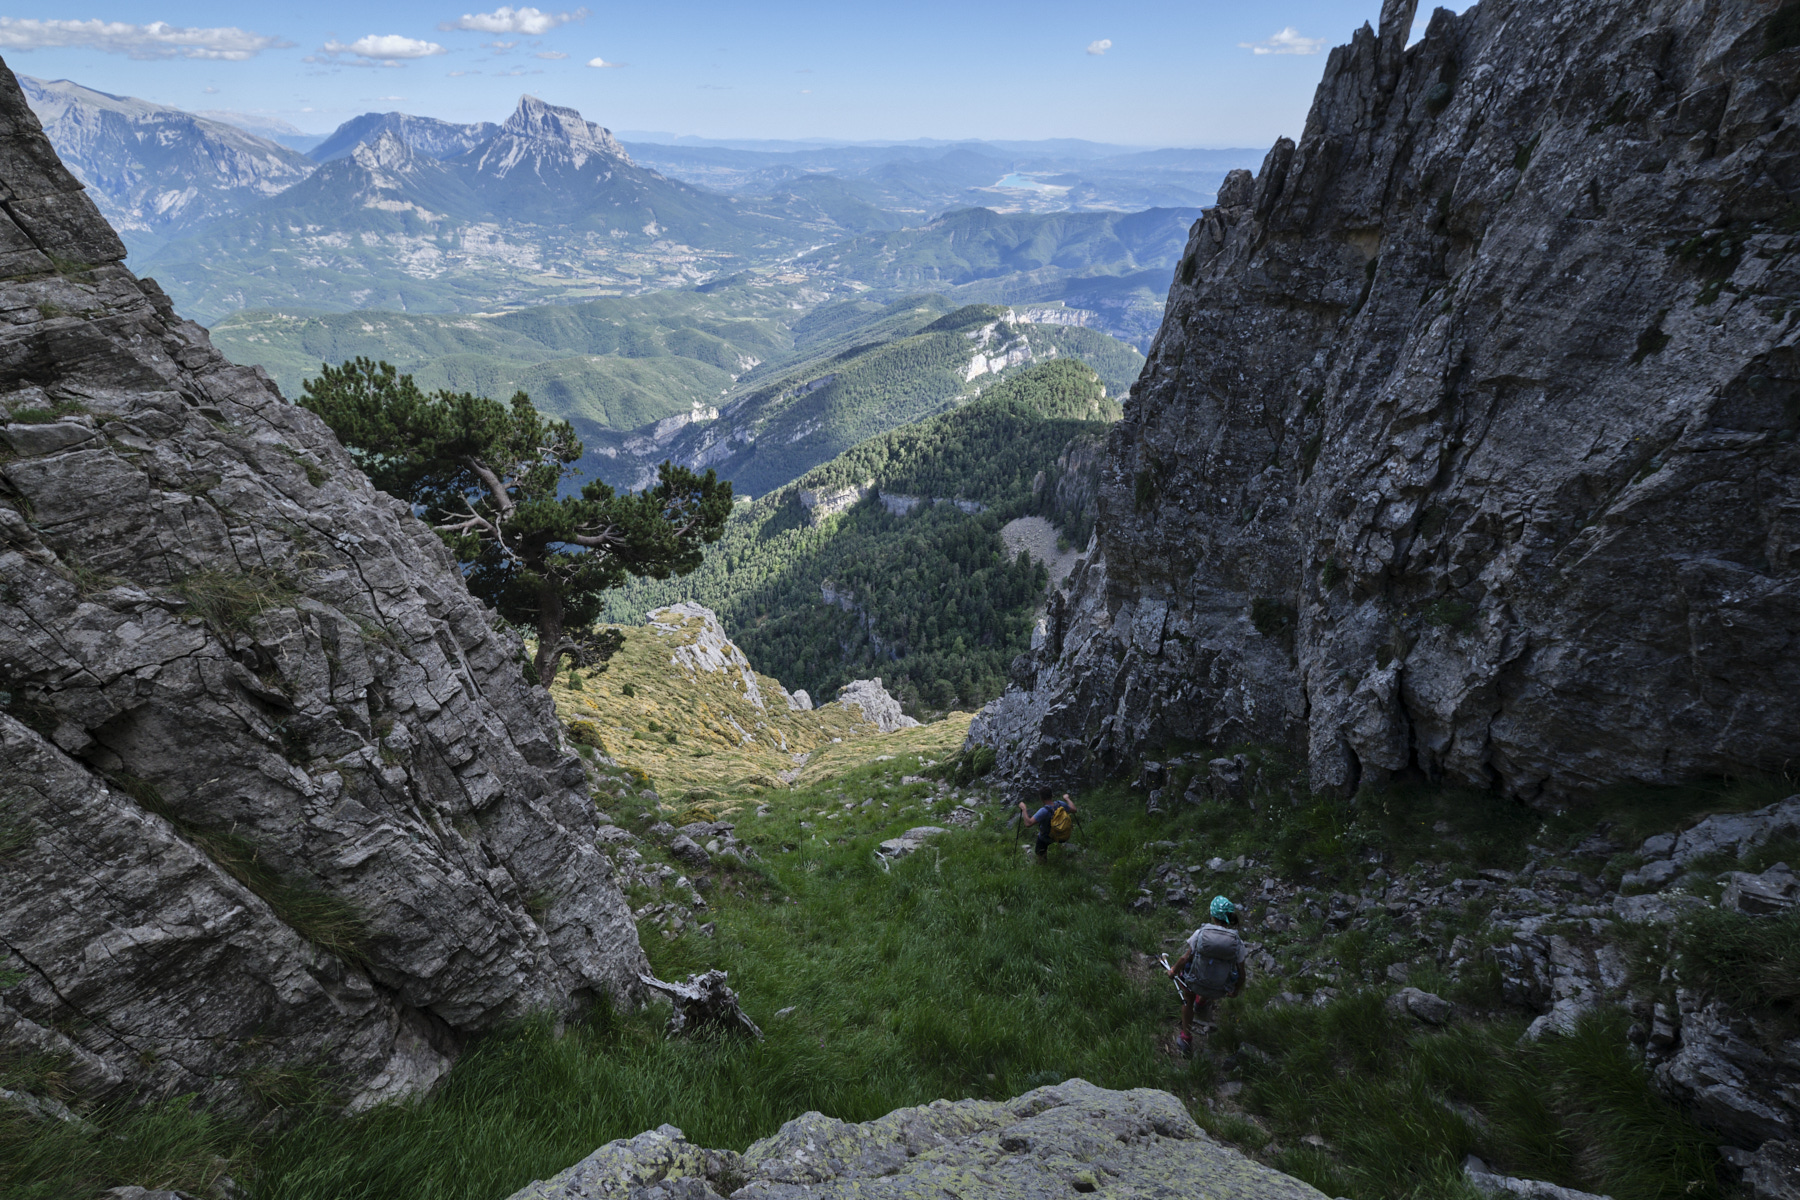
From the pass, follow the track towards Cuello Gordo and the Goritz hut, which you soon leave to cross a grassy flat and pass by the Cuello Arenas hut. Immediately afterwards, descend and follow the small path that leads to the Pardina barranco (sign). You'll discover the barranco and the path ends up on a northerly spur until you reach the beginning of the barranco, where you'll find a signpost indicating the Mallata Candon via the Faja Pardina.
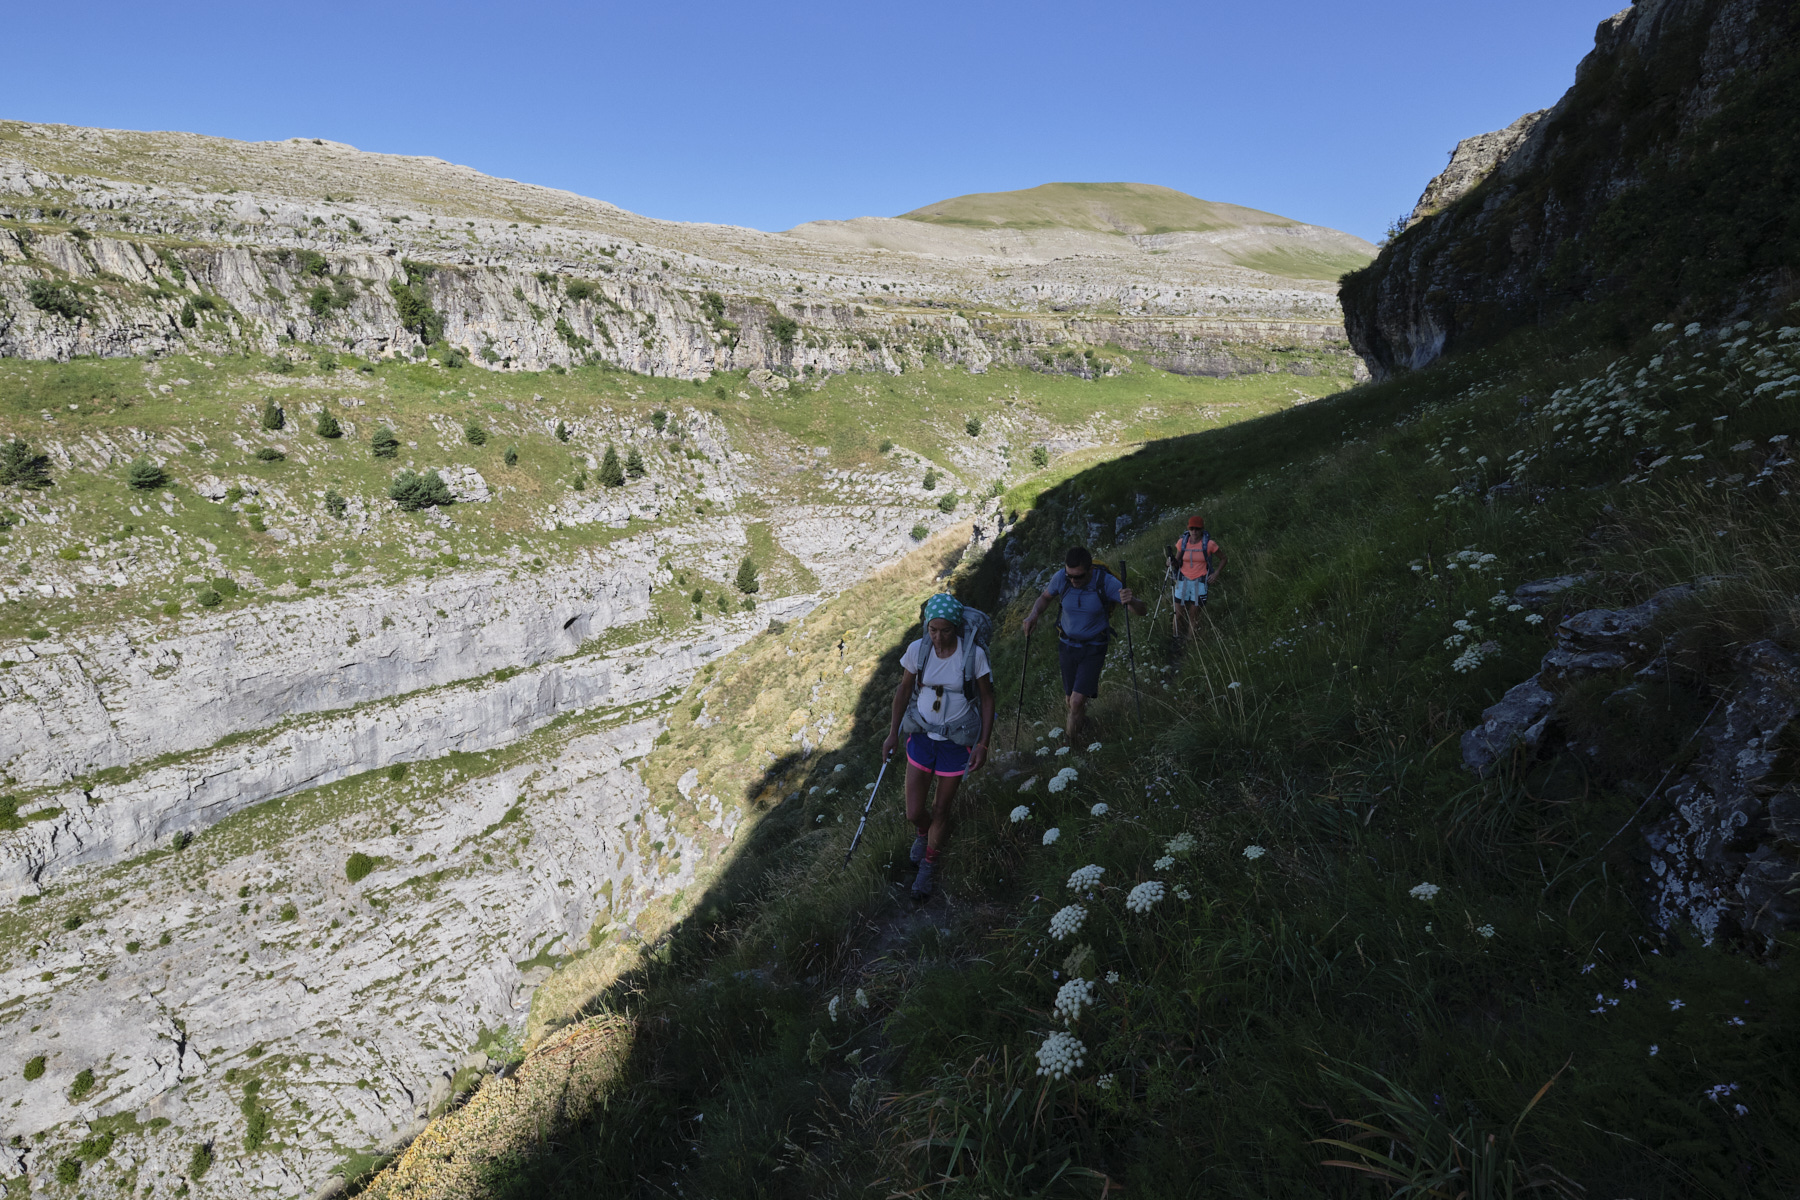
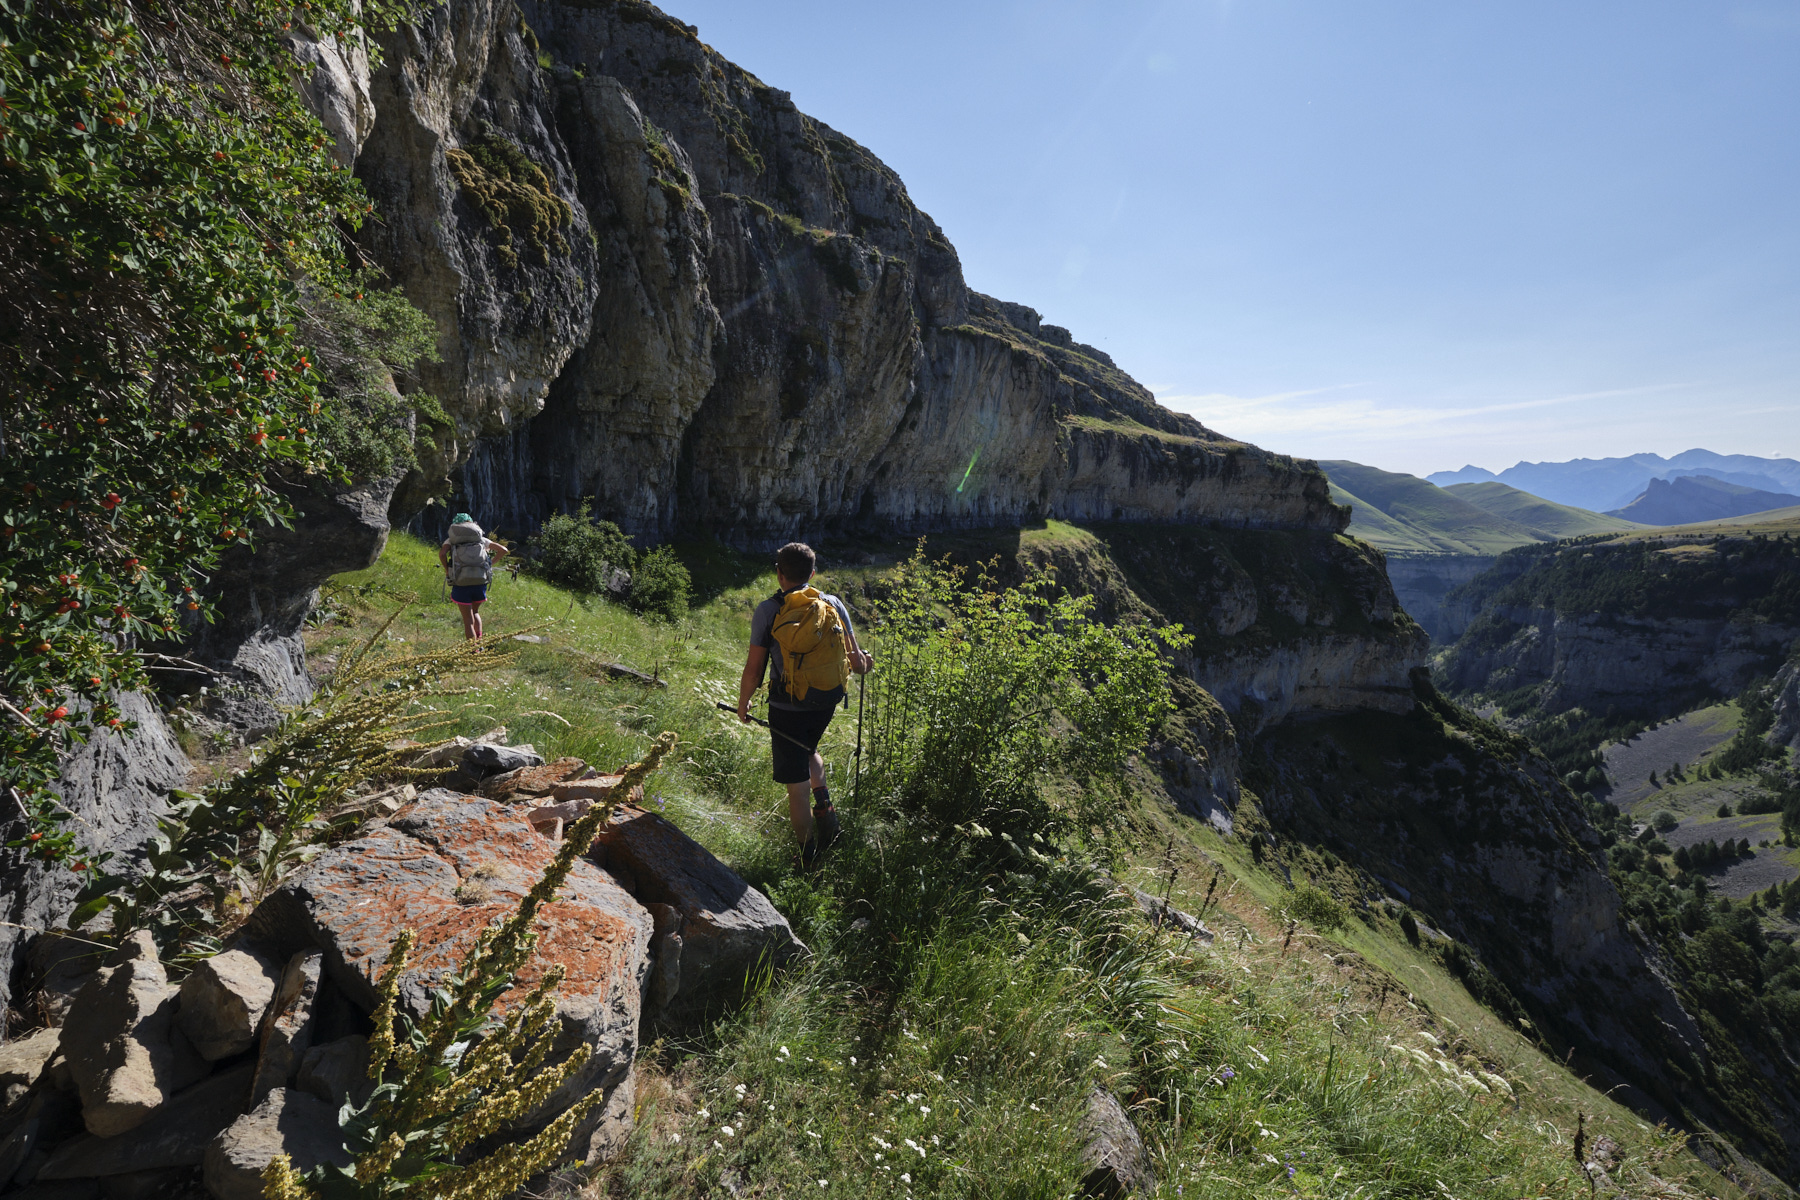
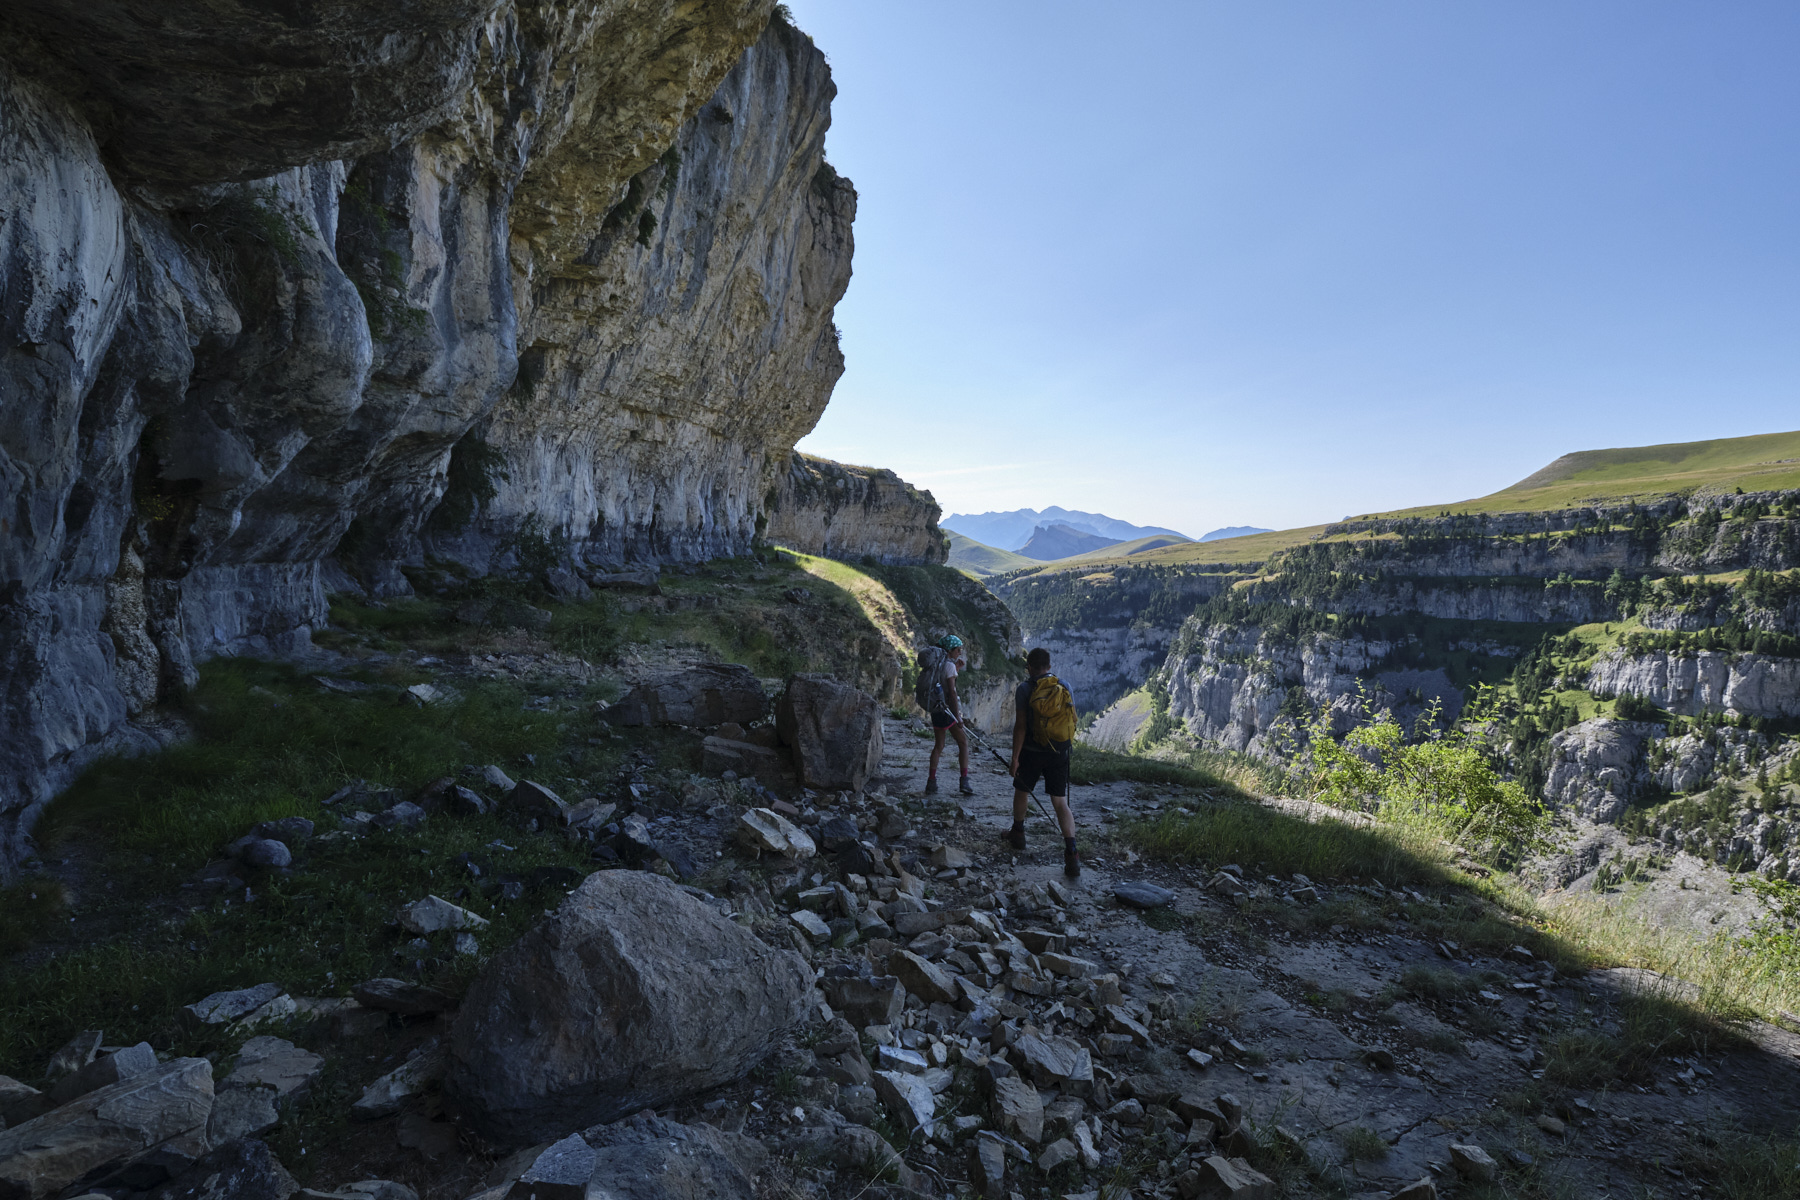
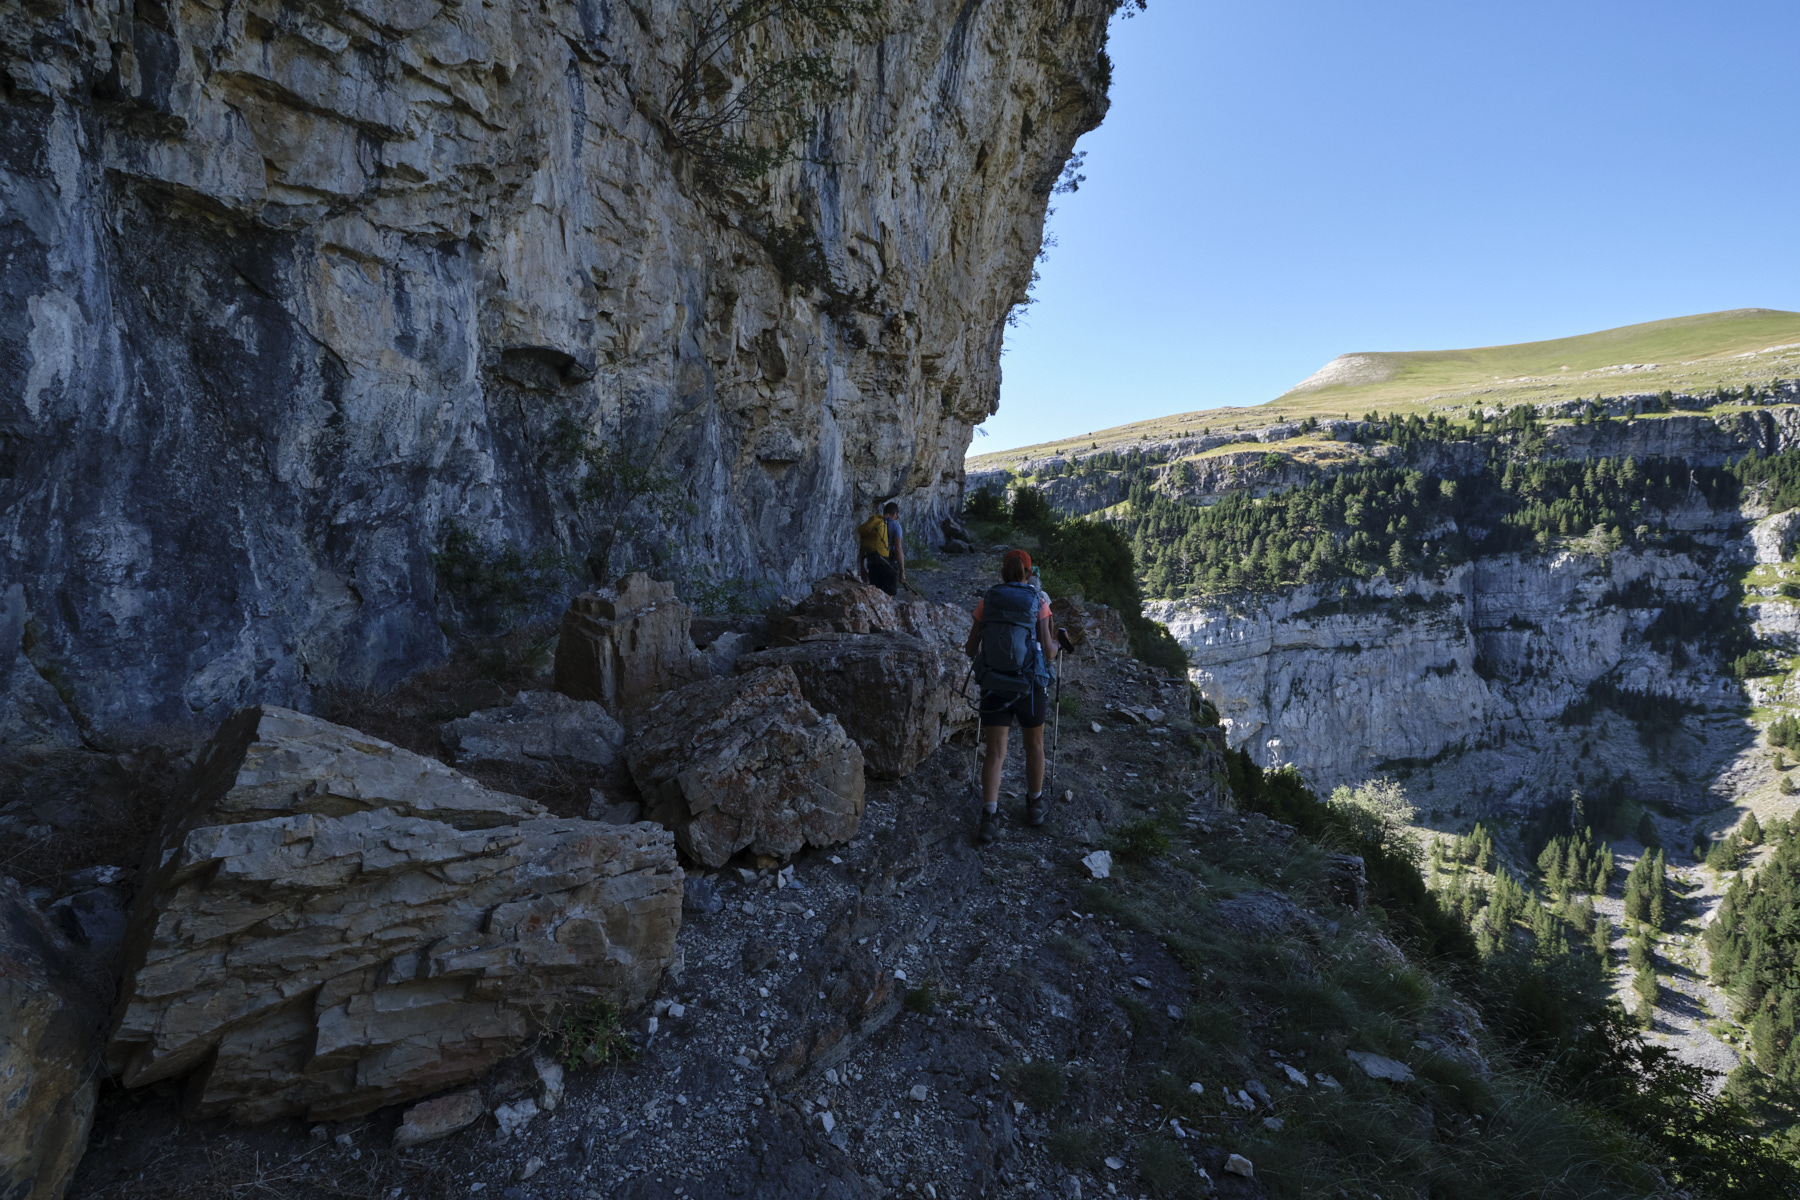
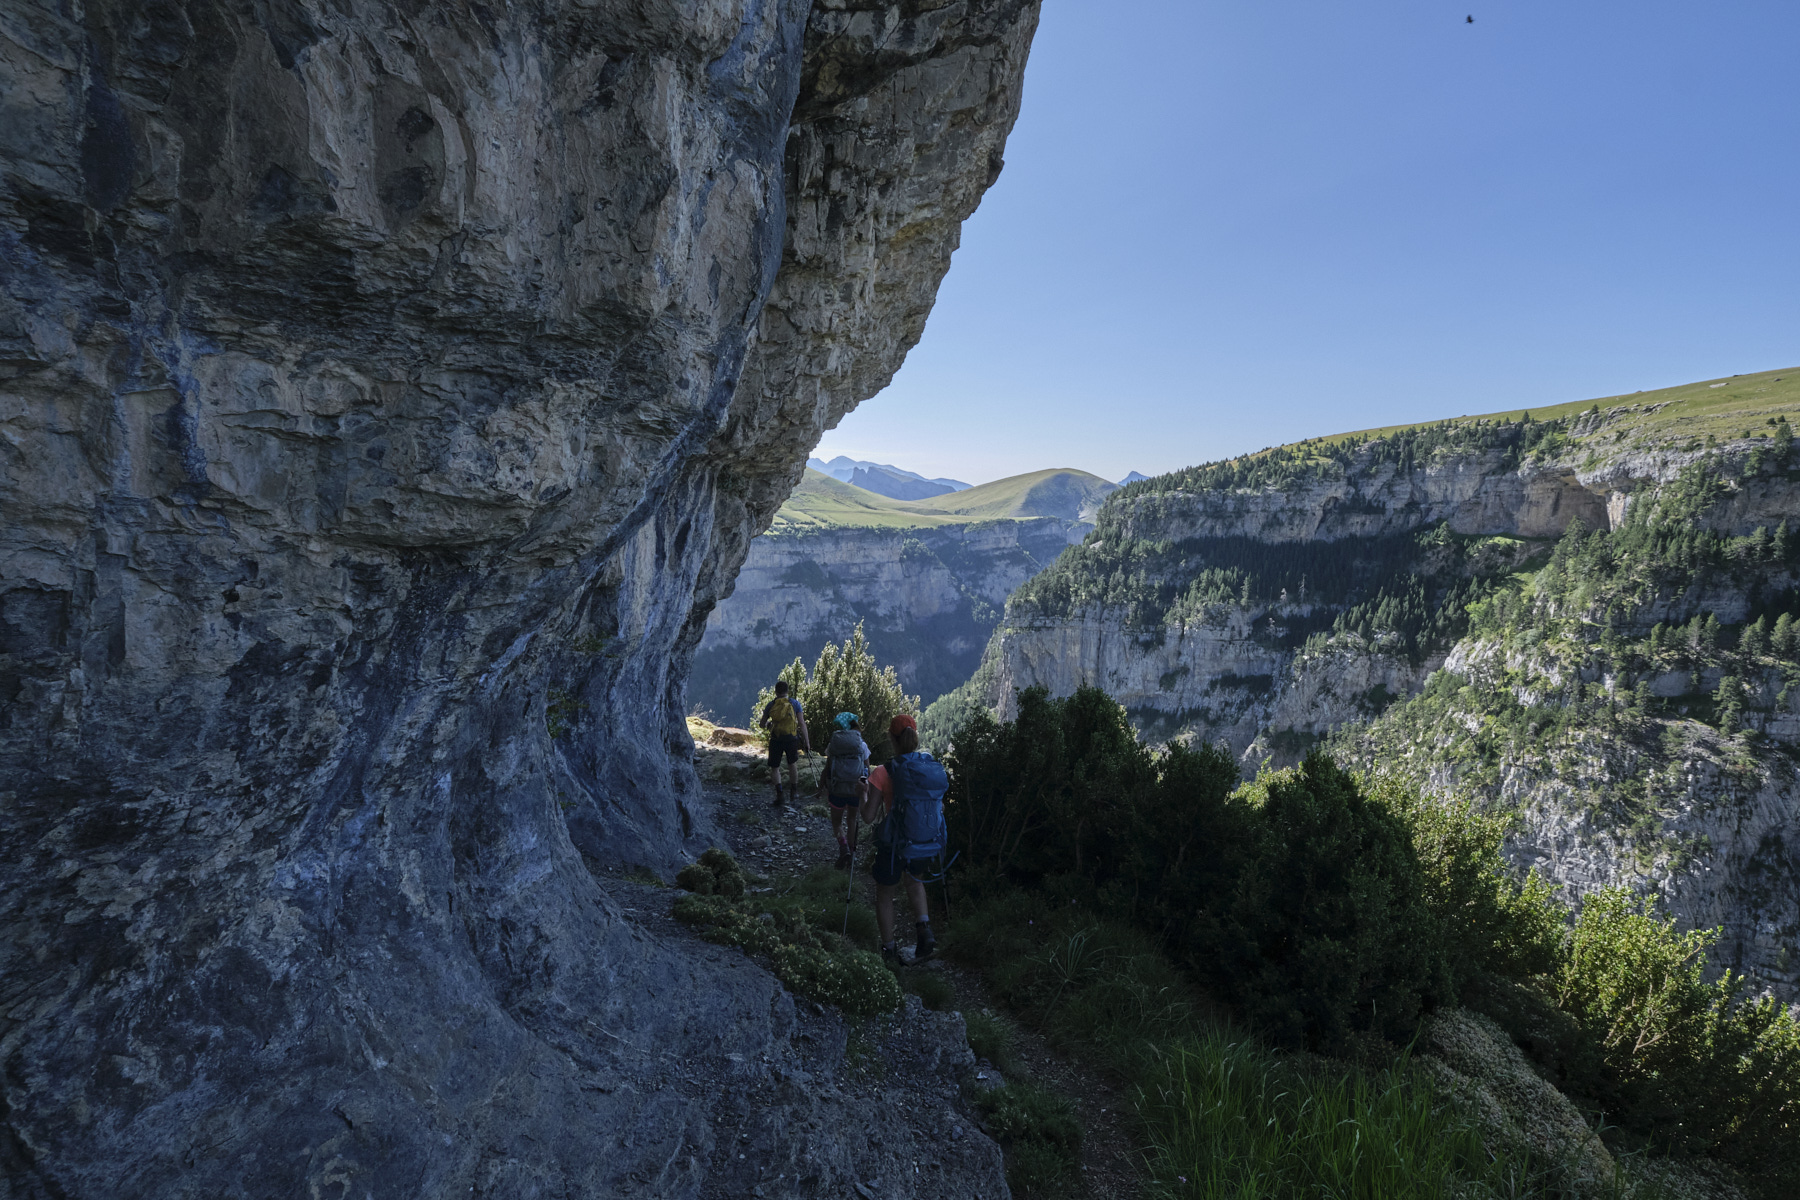
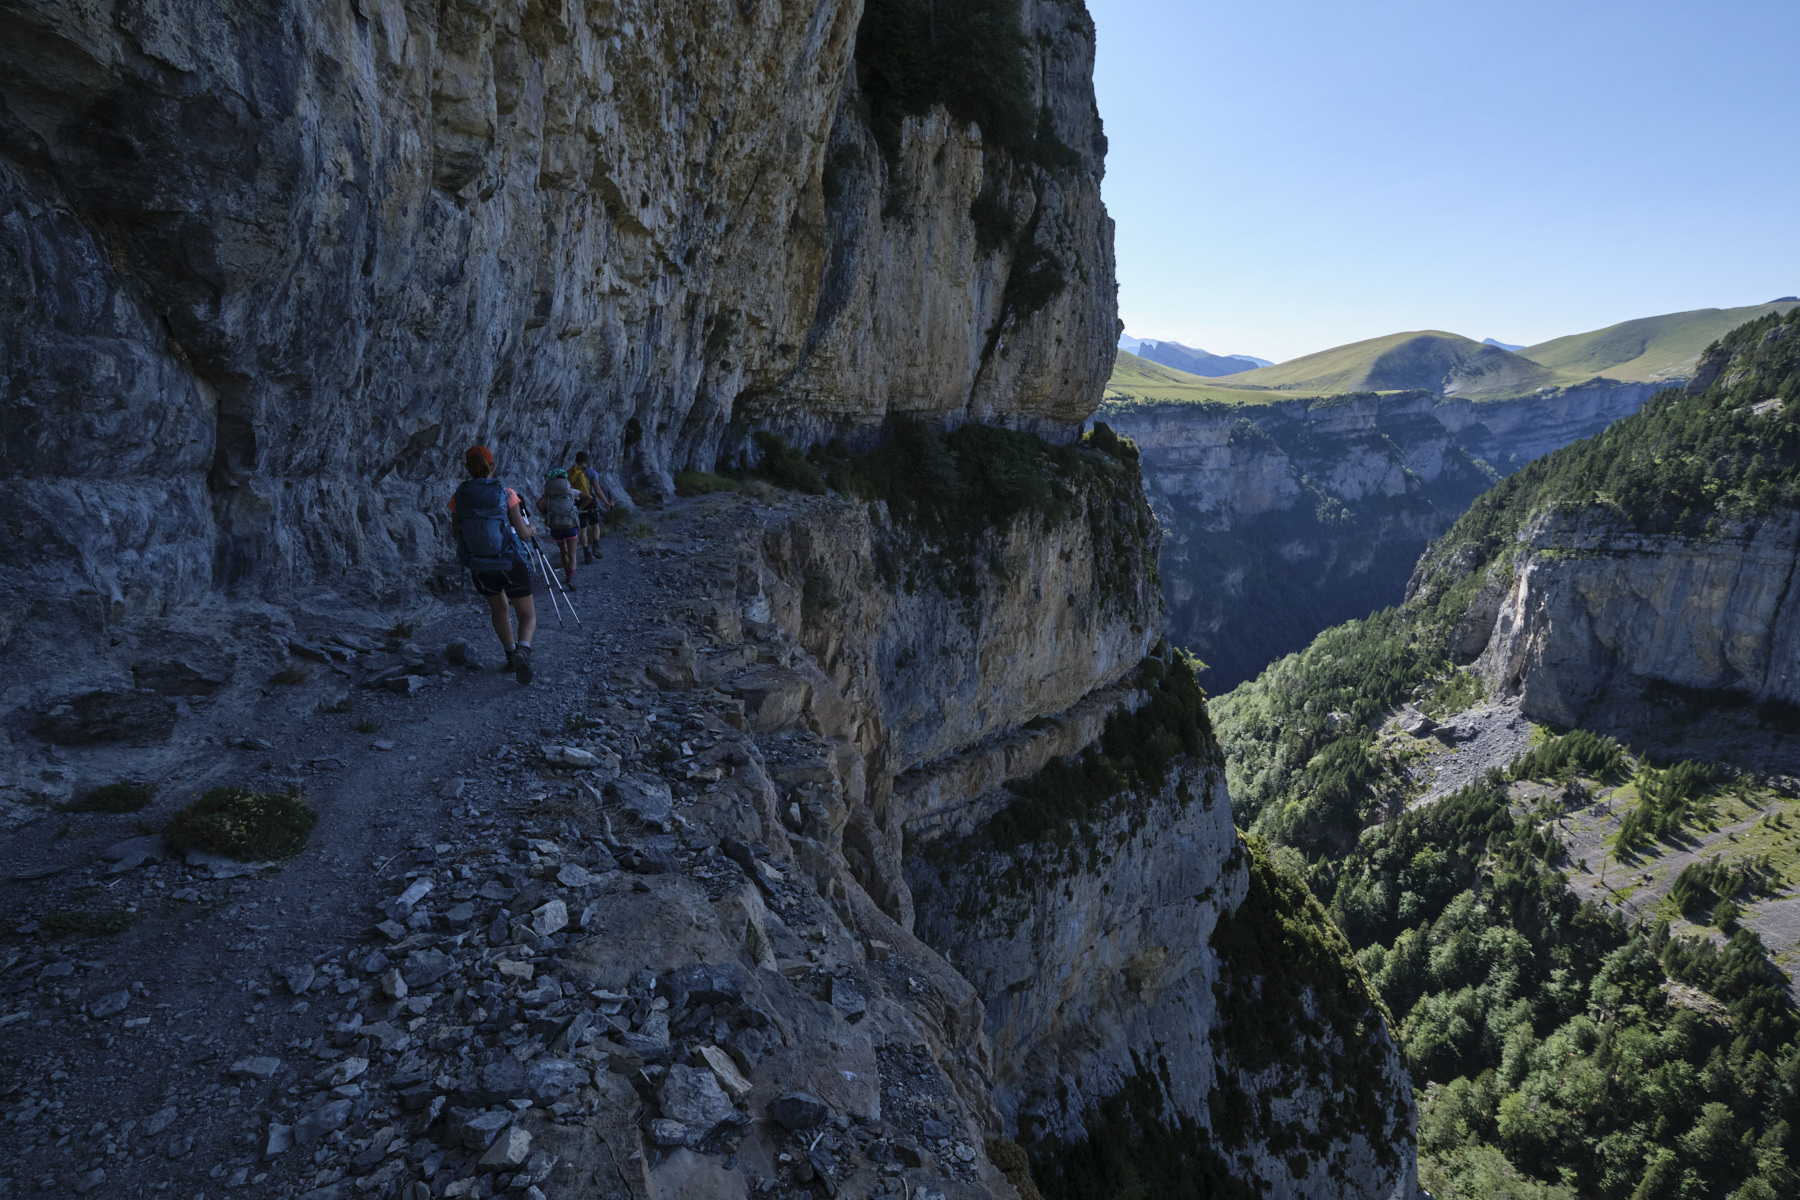
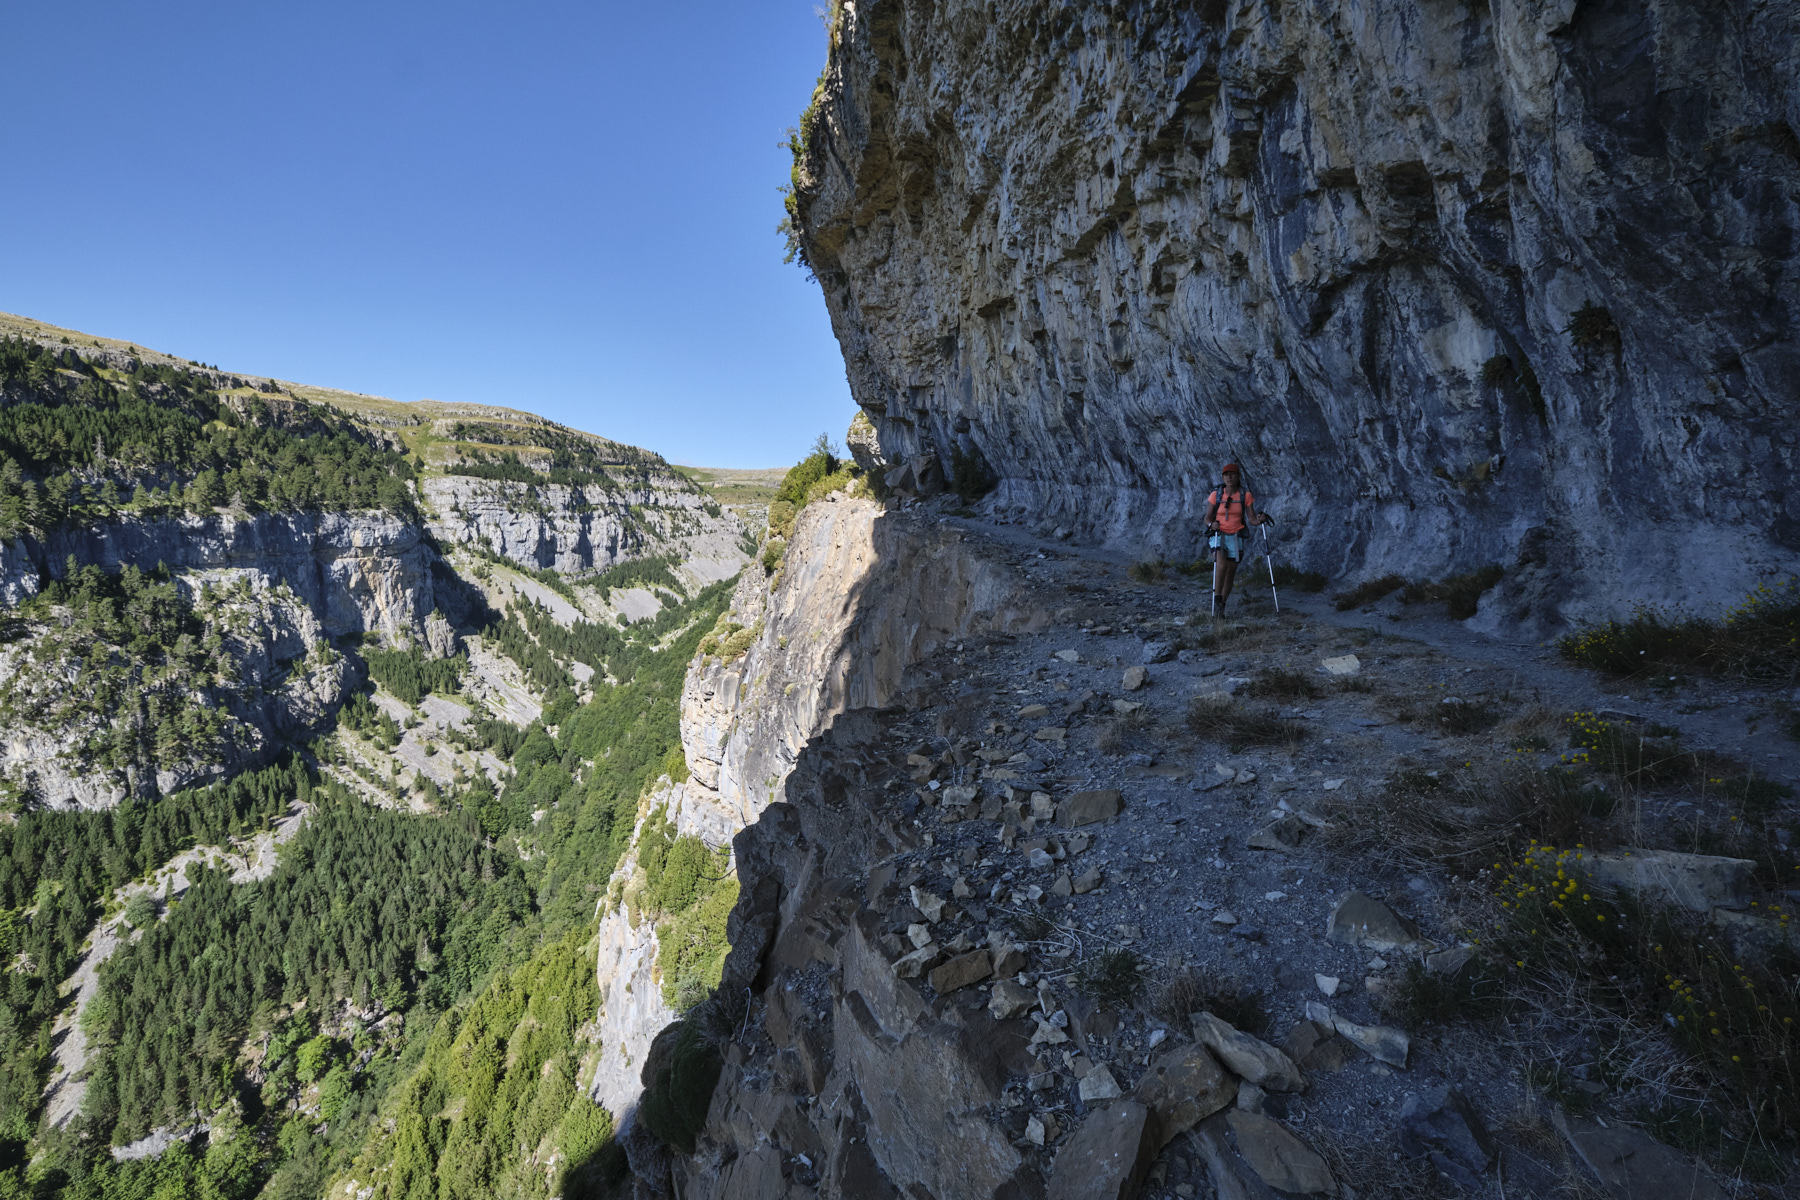
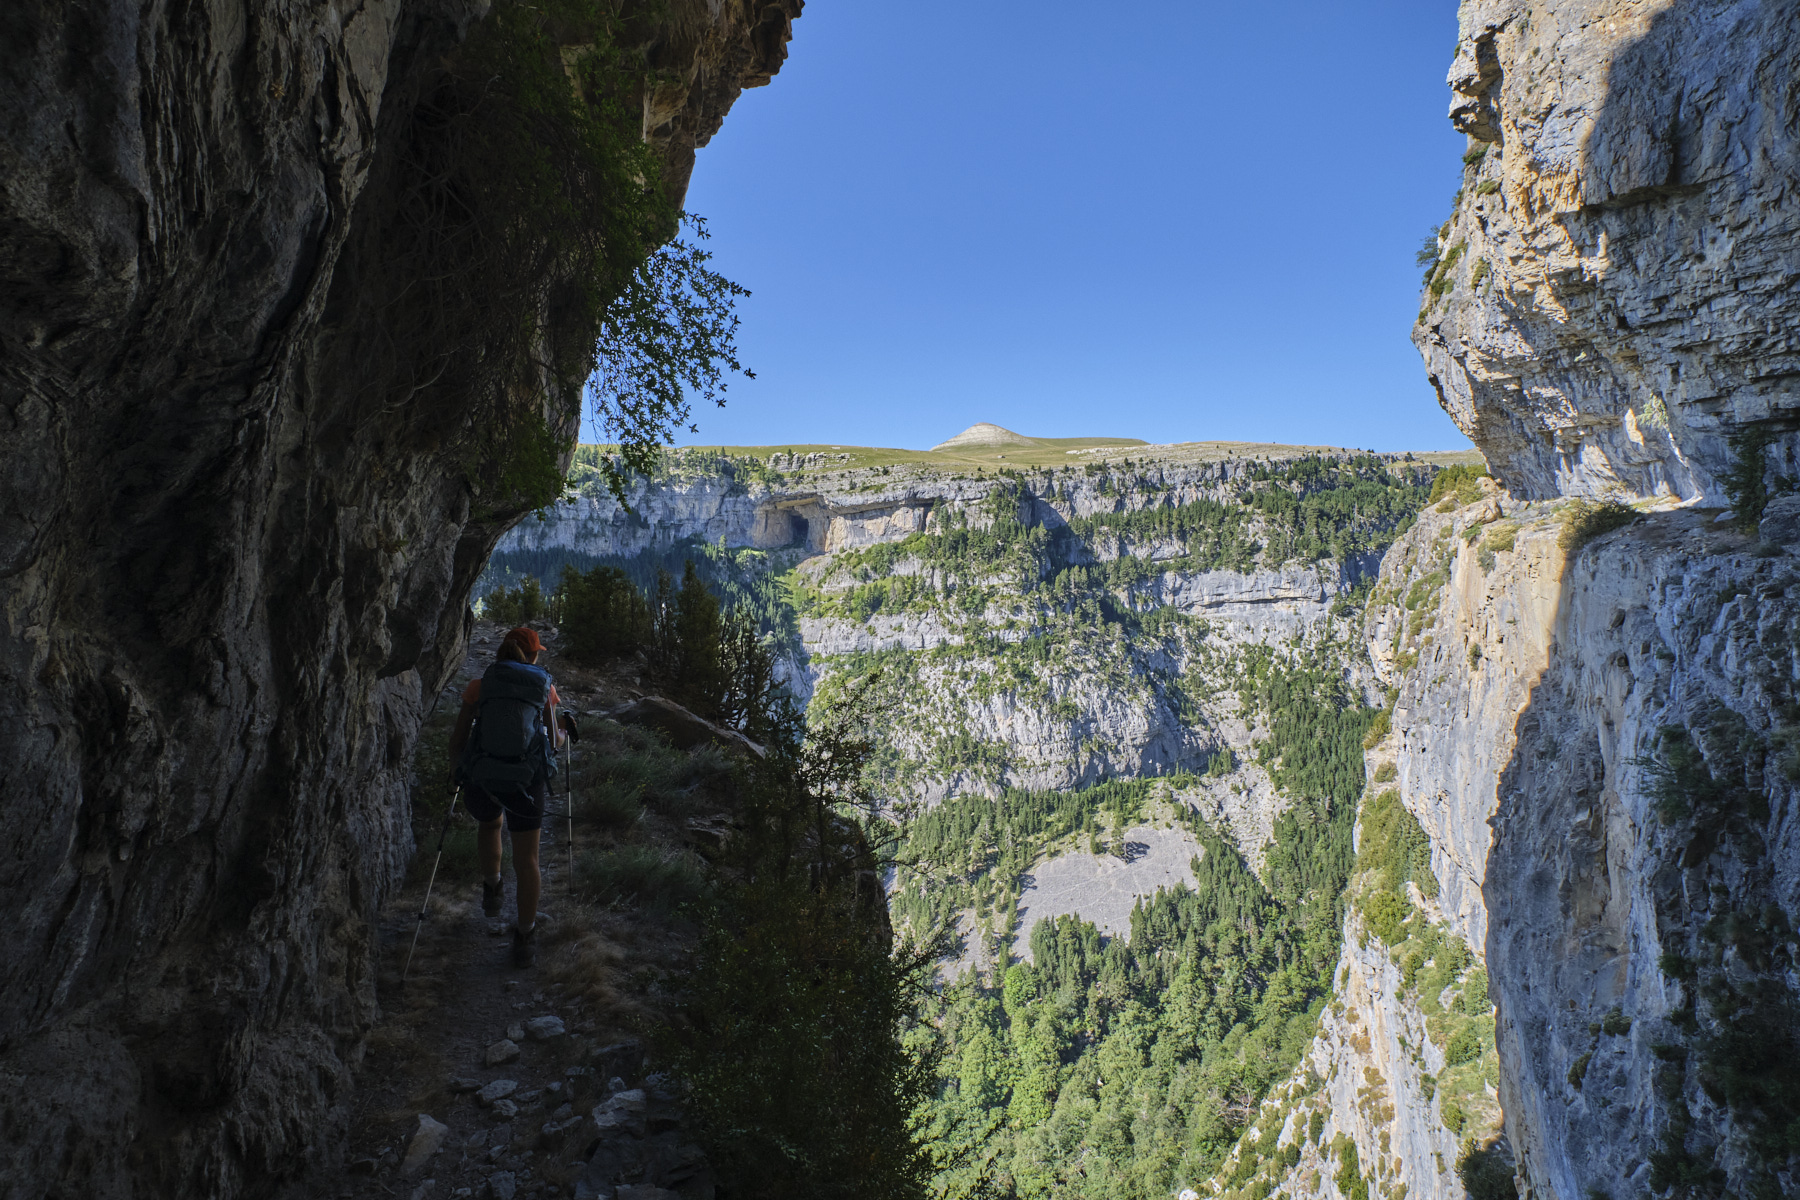
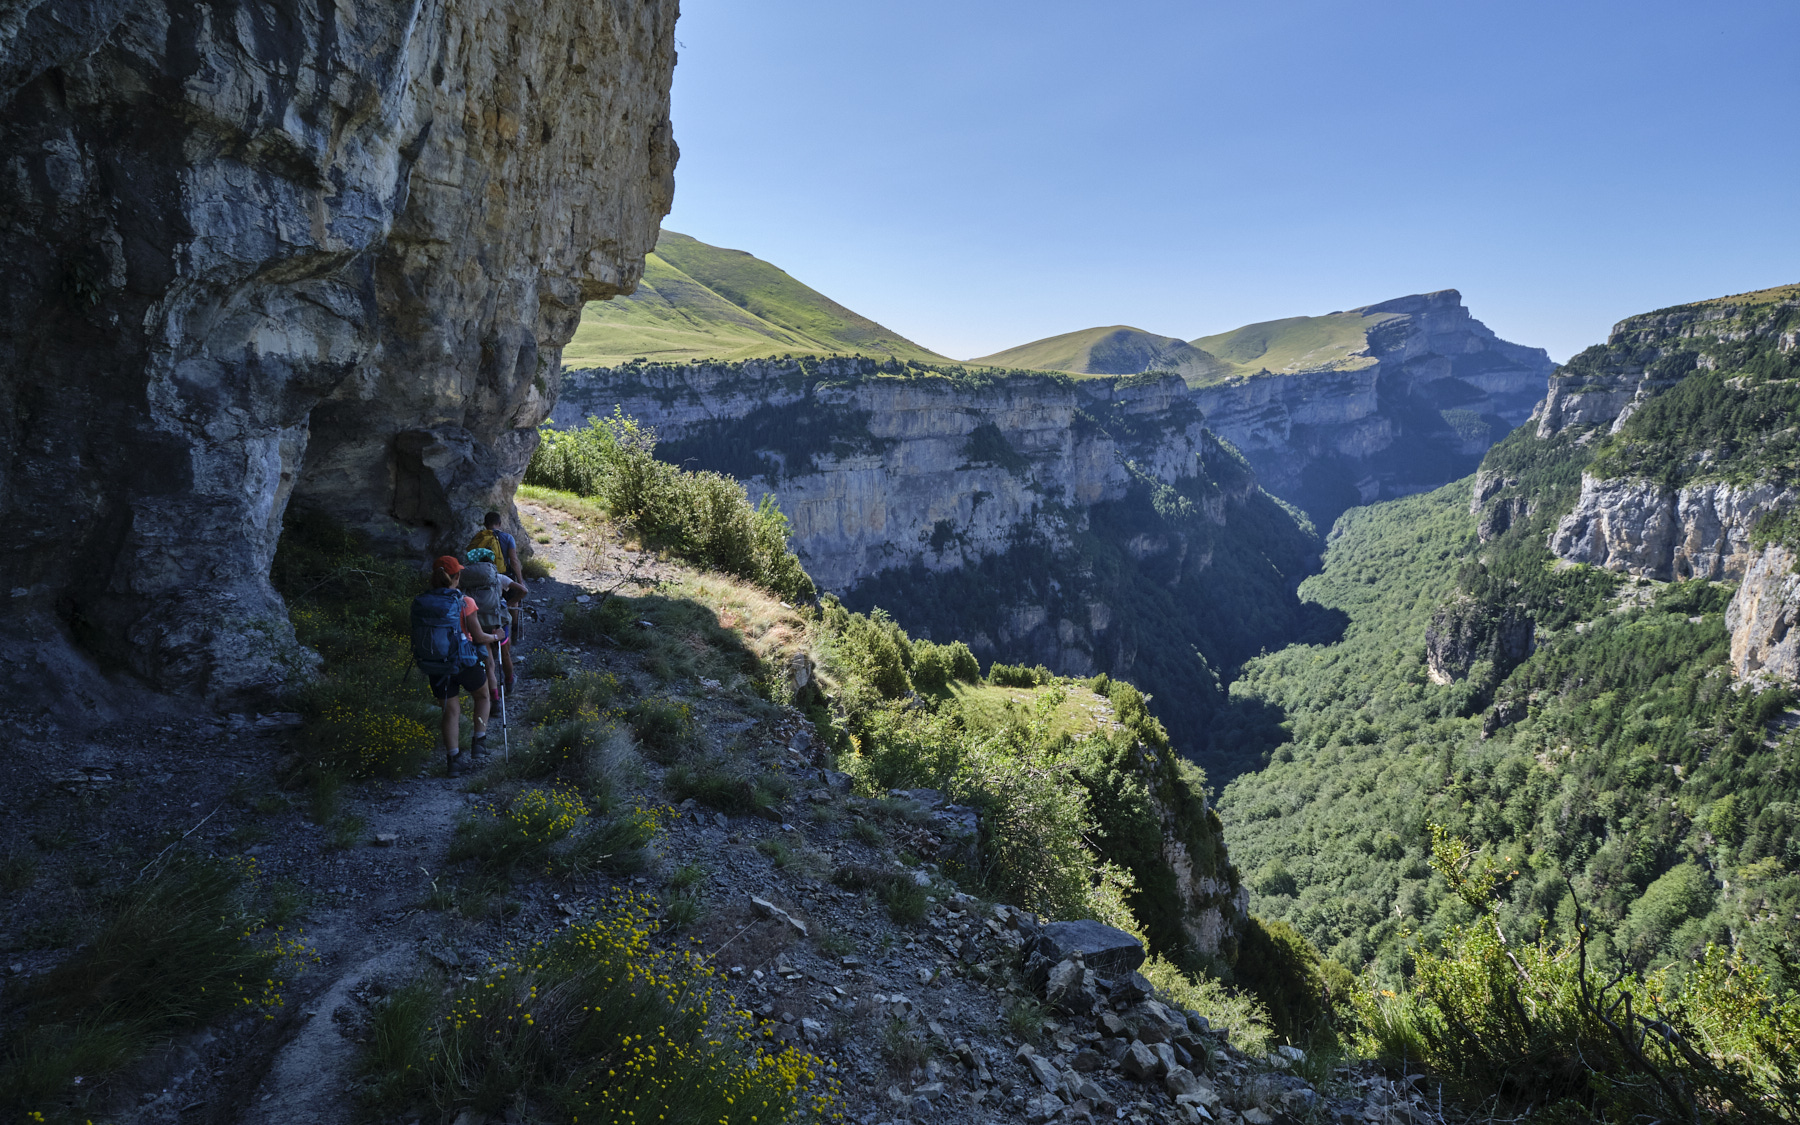
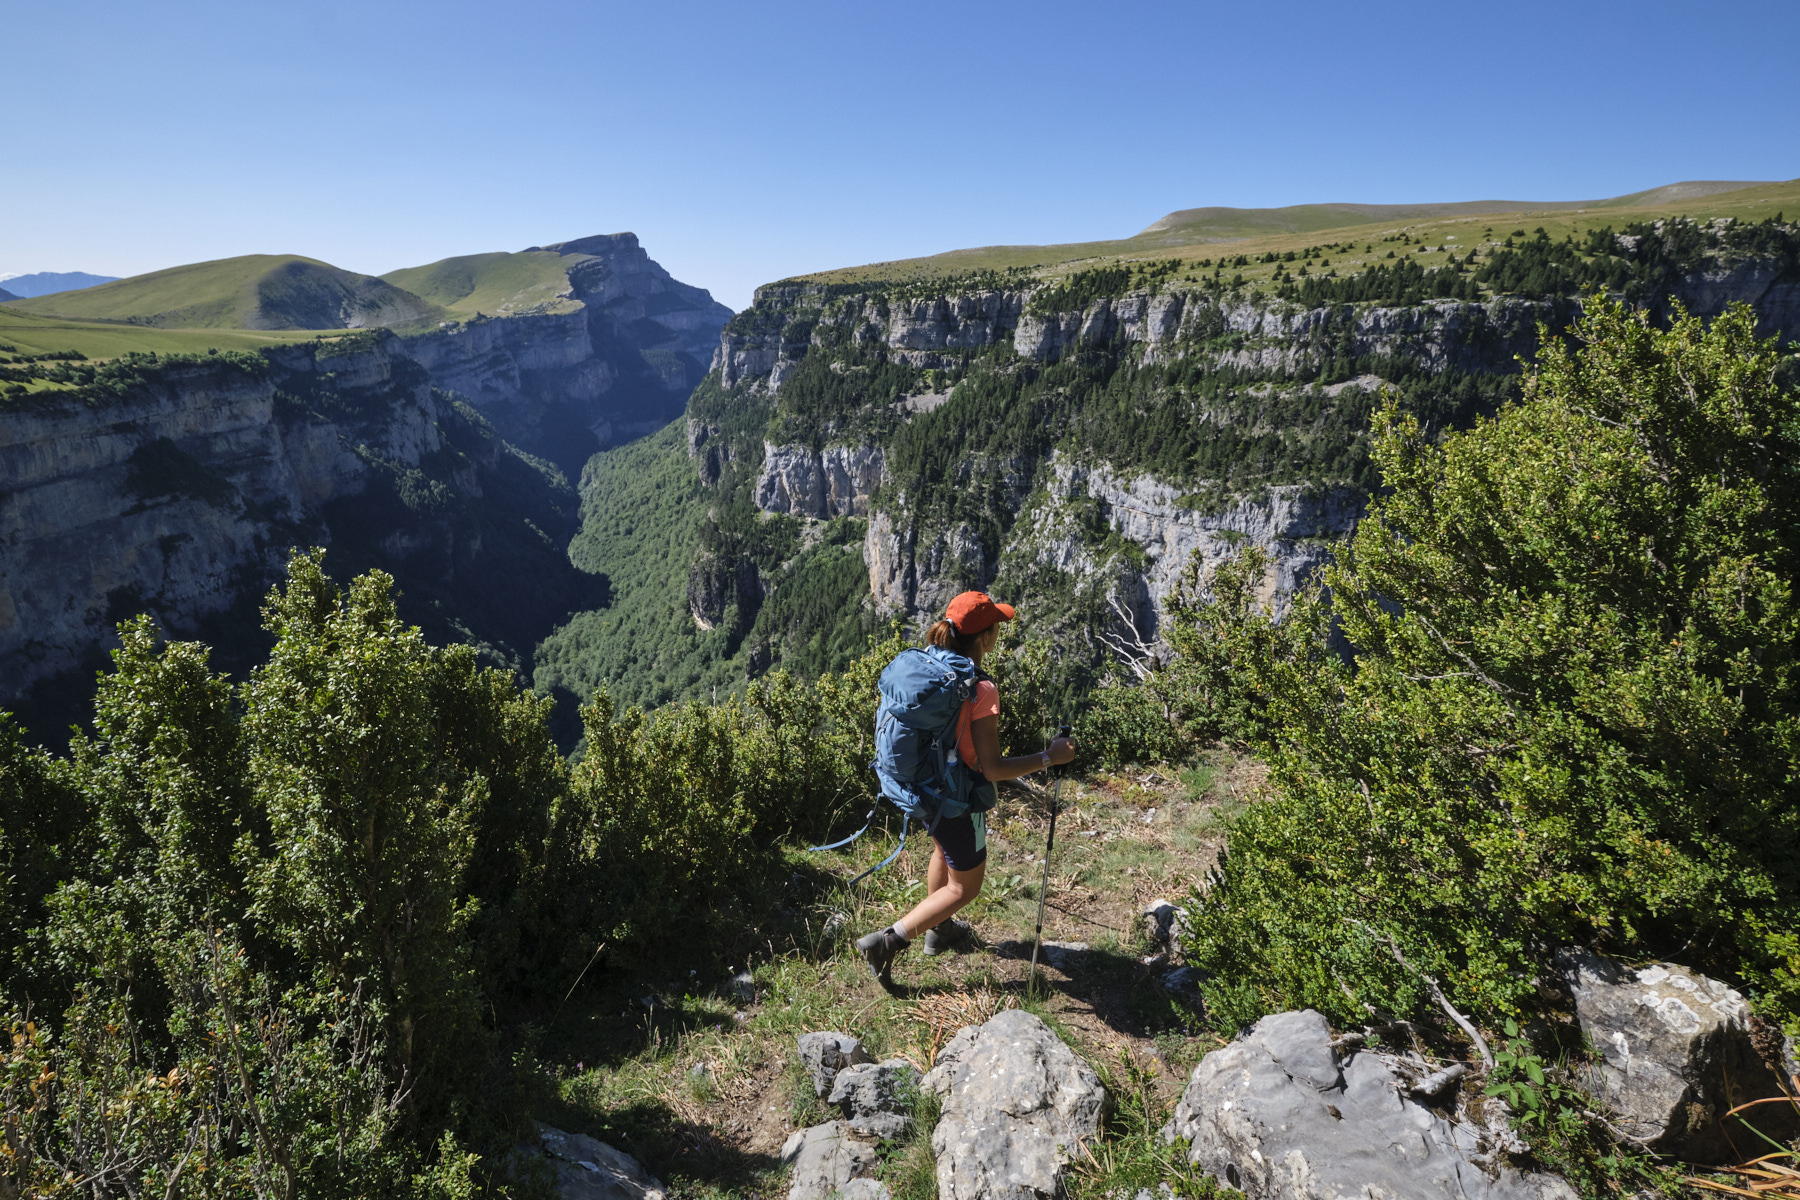
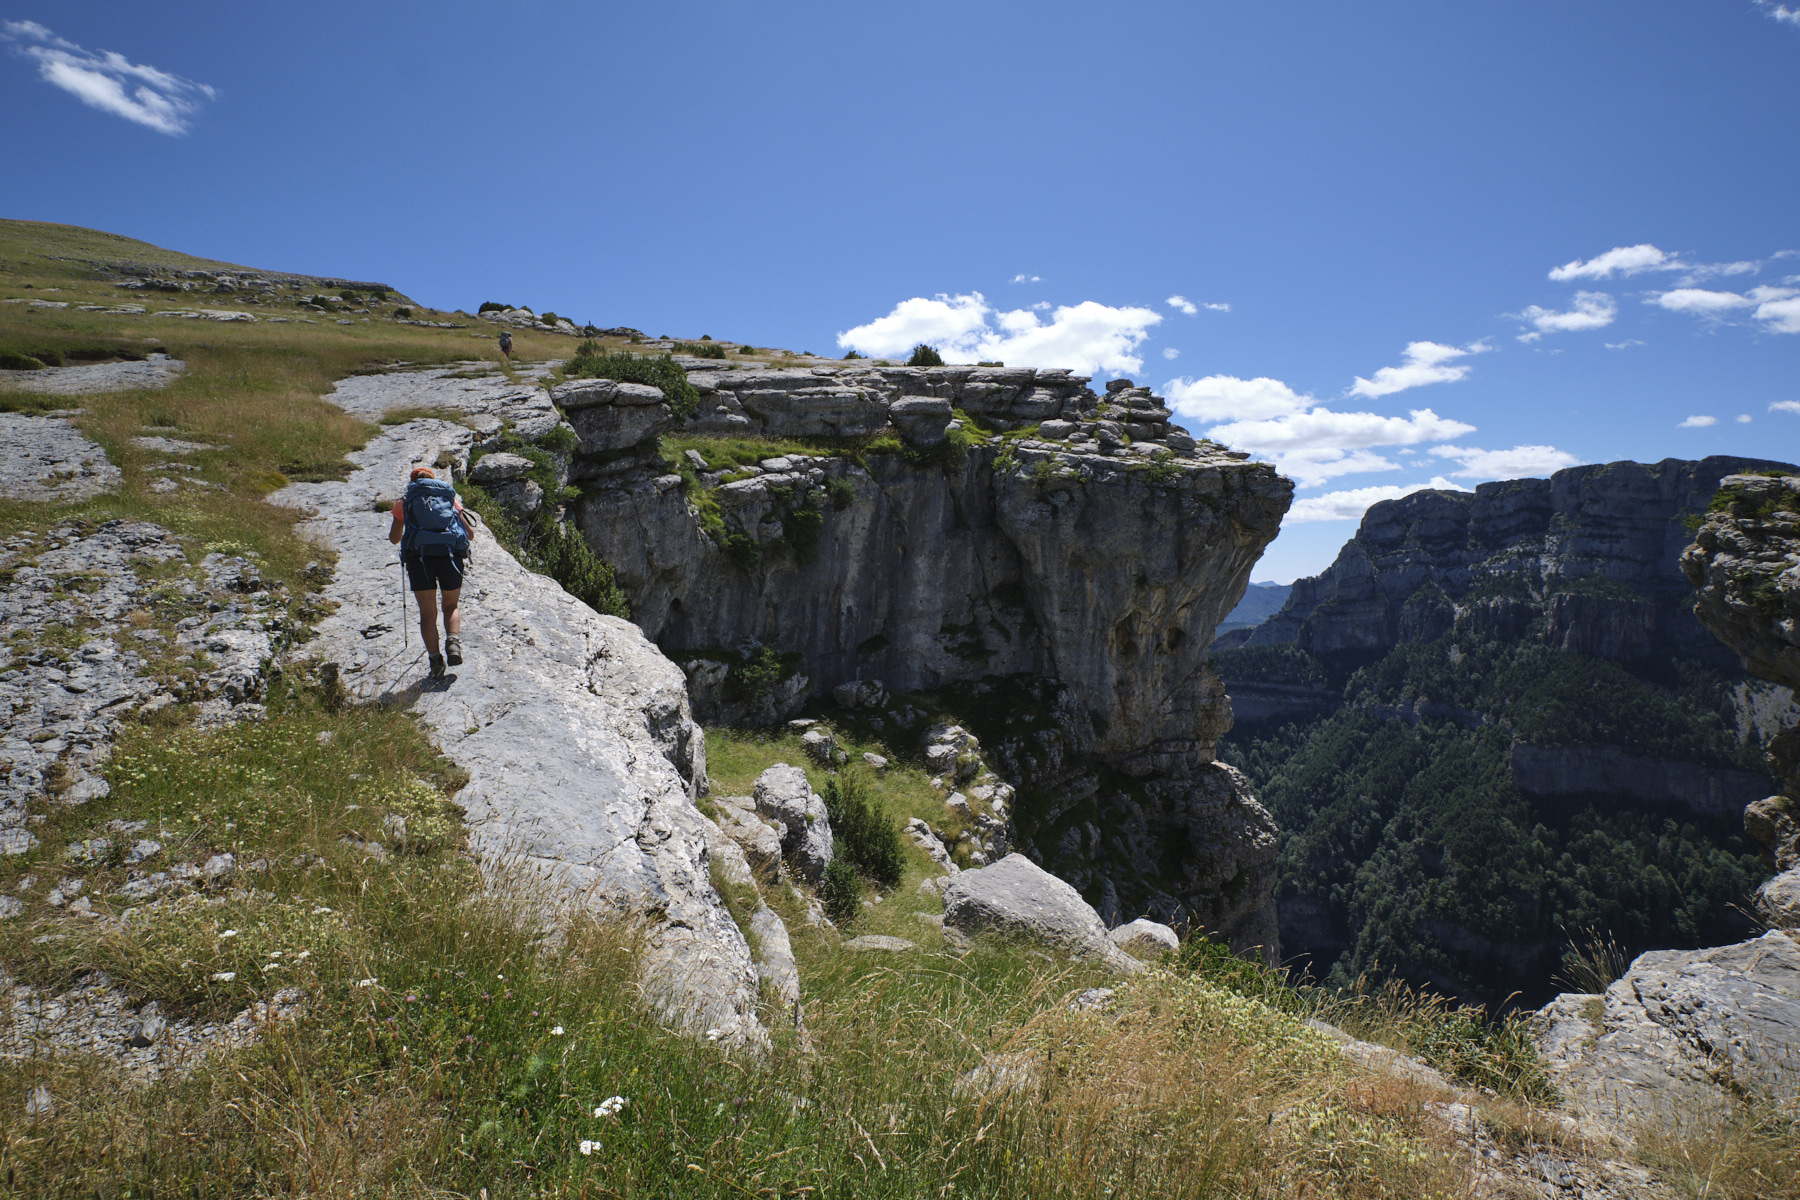
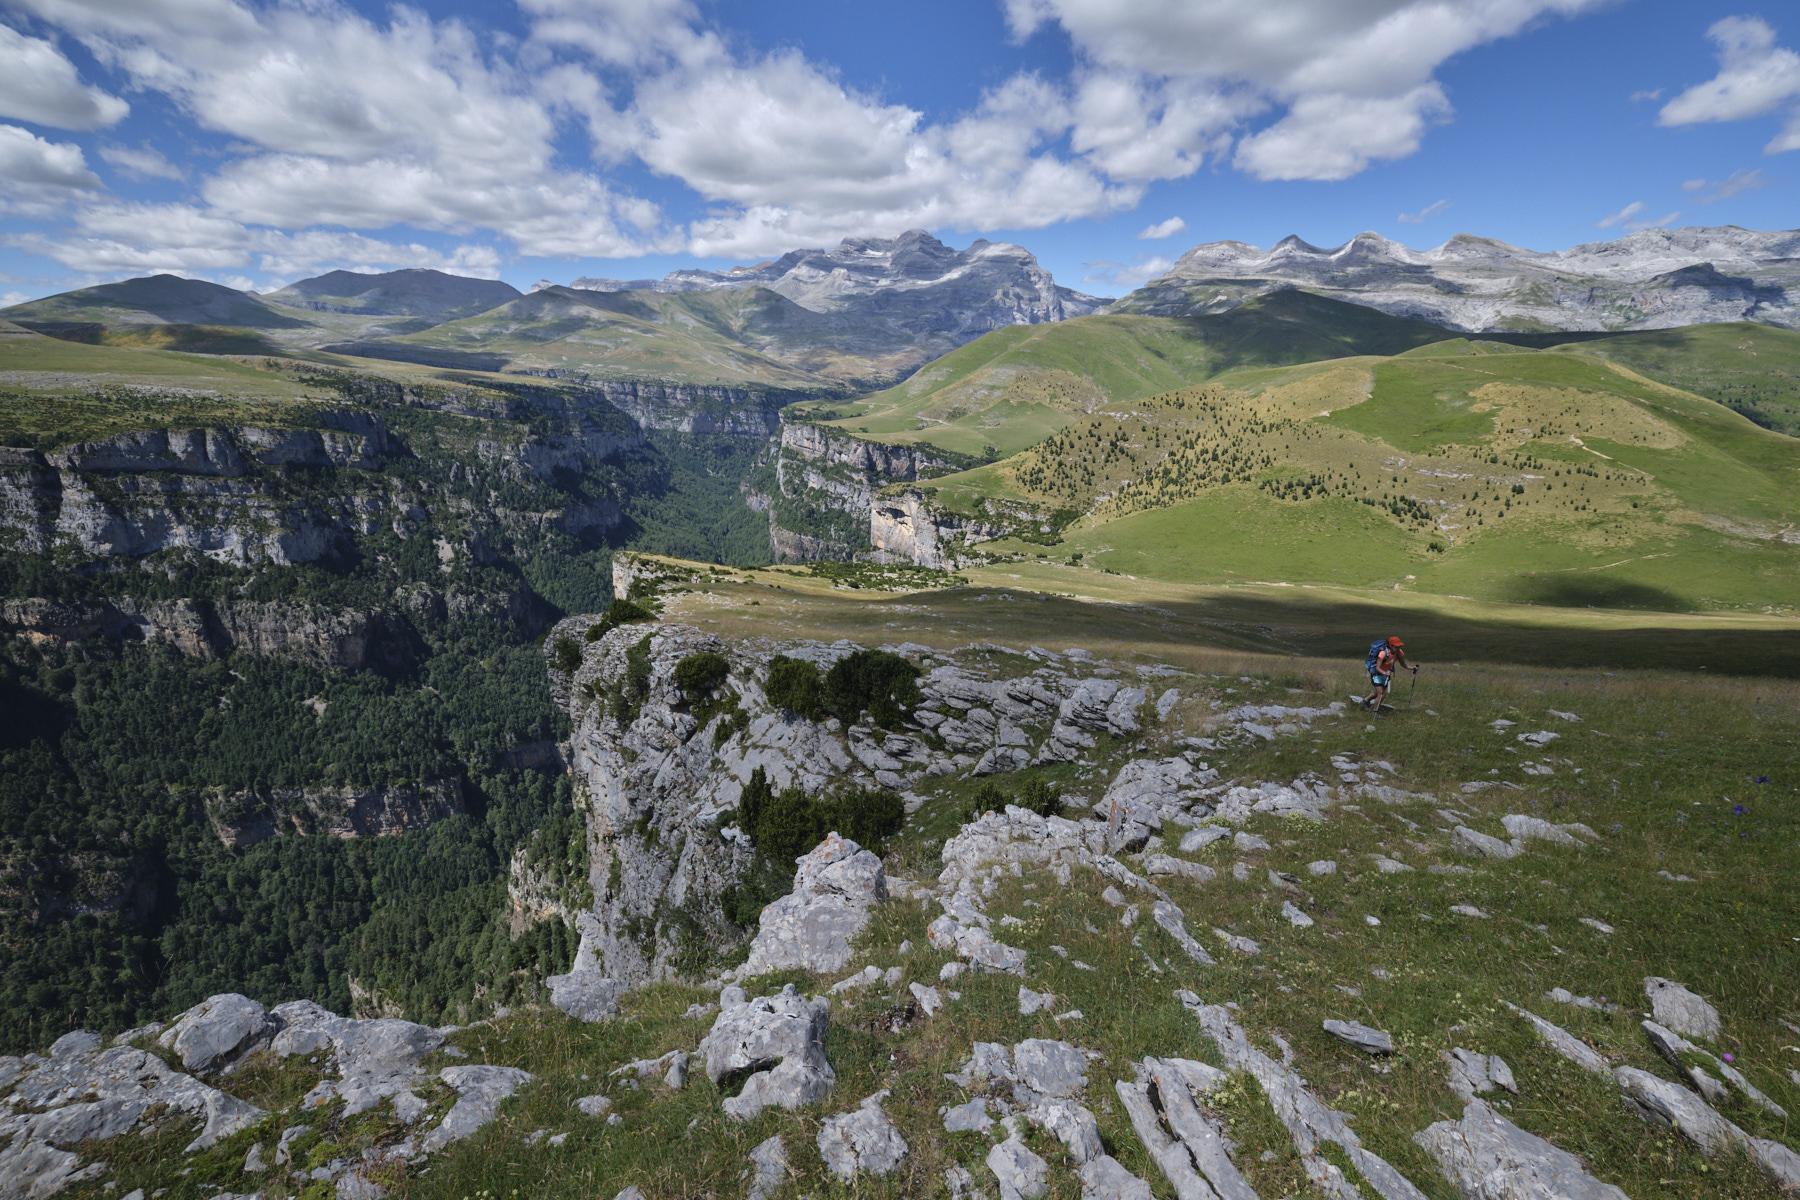
This time, head due south and descend a further level to reach the Pardina ledge. This route takes about 1 hour. Some parts are overgrown, and you'll be walking through tall grass or nettles. The path is marked out, but not always clearly visible. However, the route is obvious and follows the relief of the walls to cover the entire faja at the top of the barranco, with a few more aerial sections, but without difficulty.
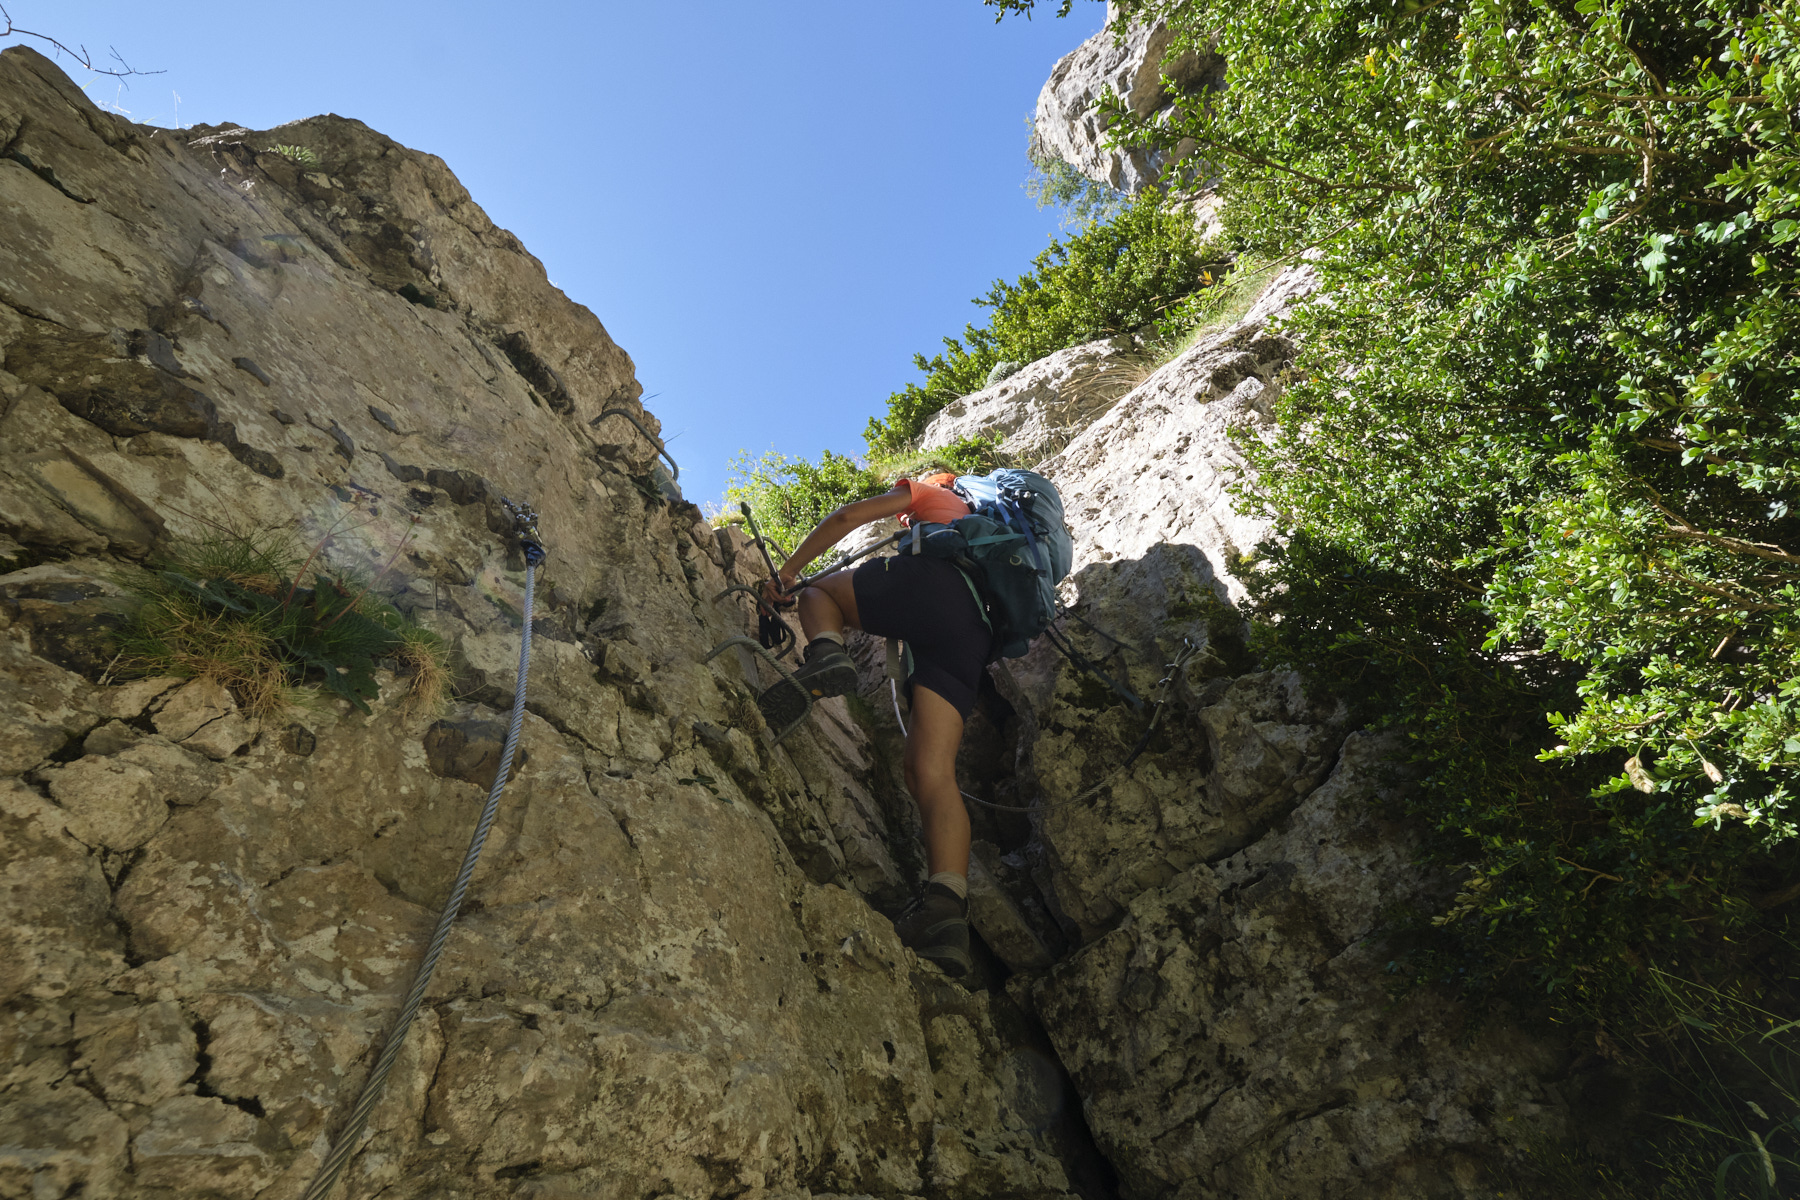
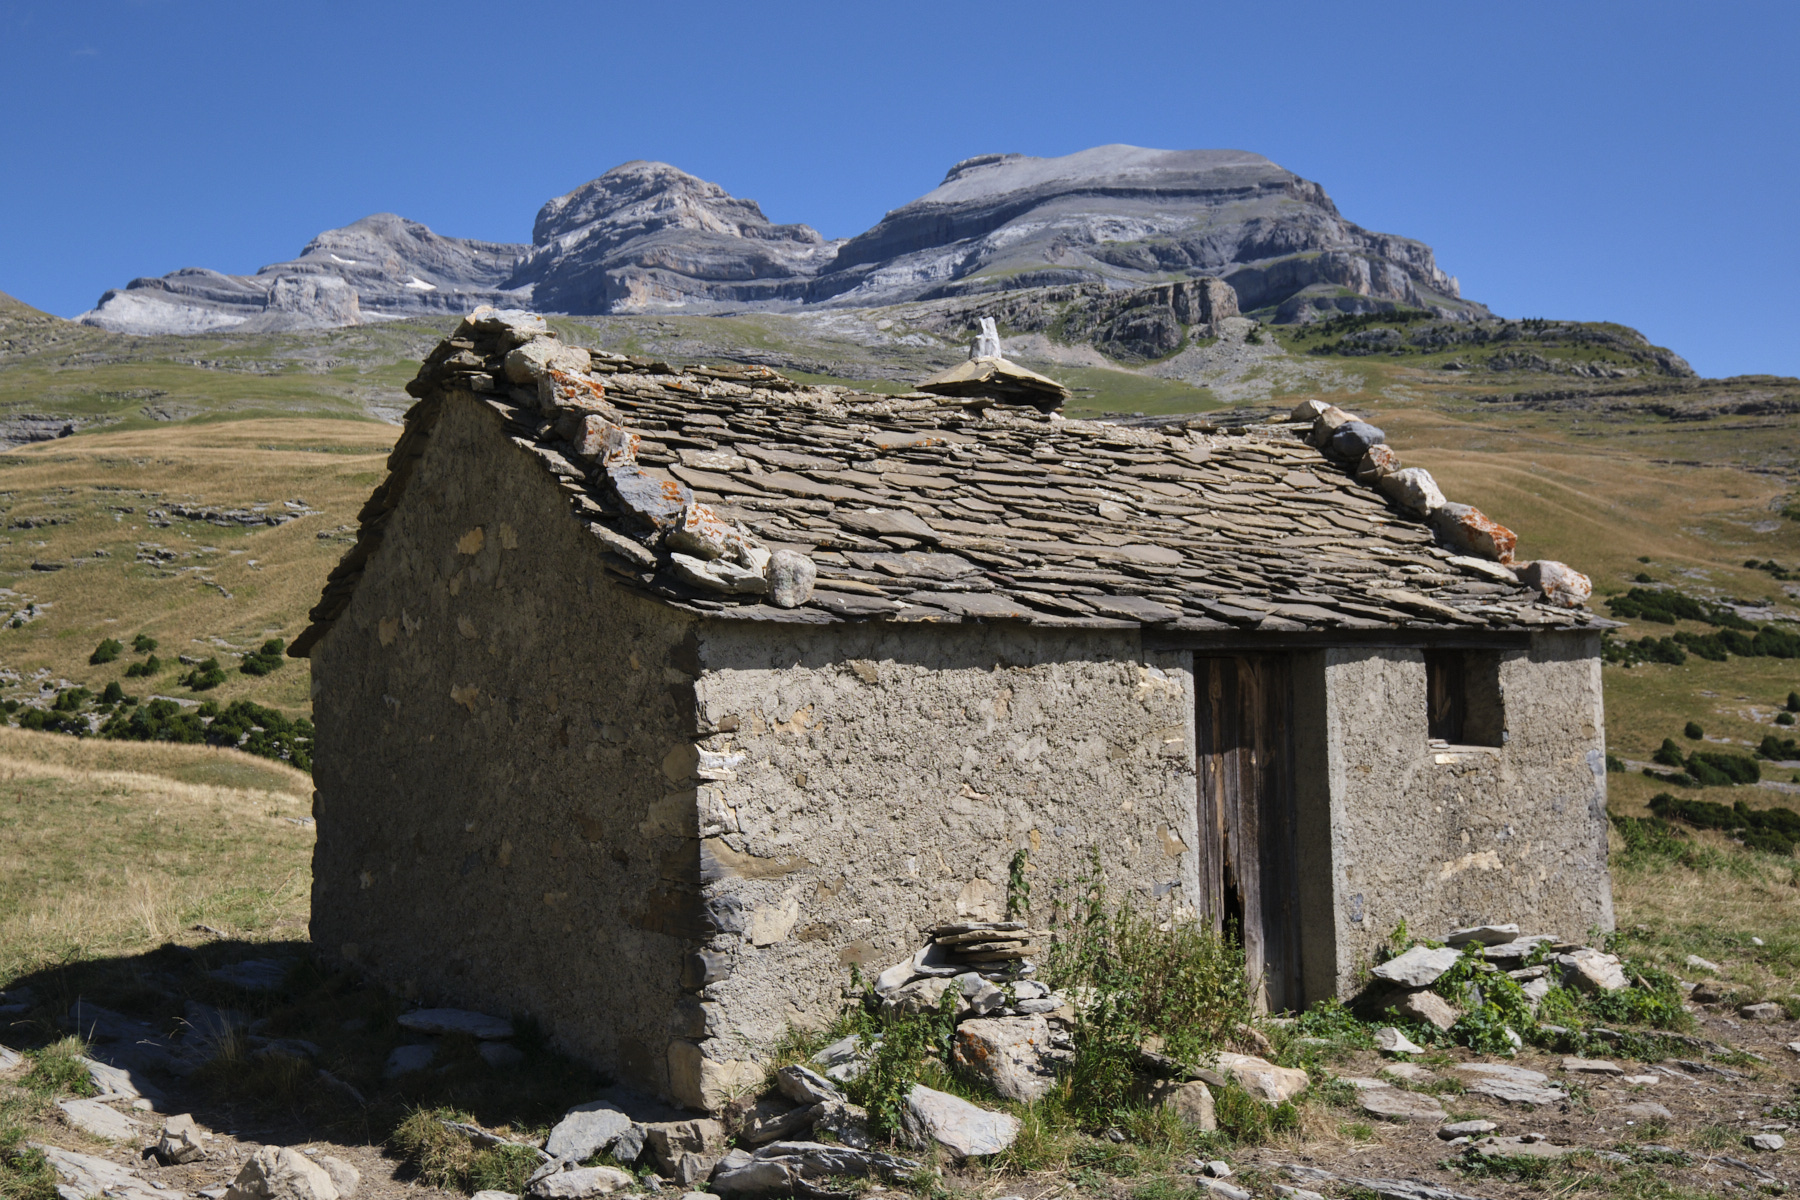
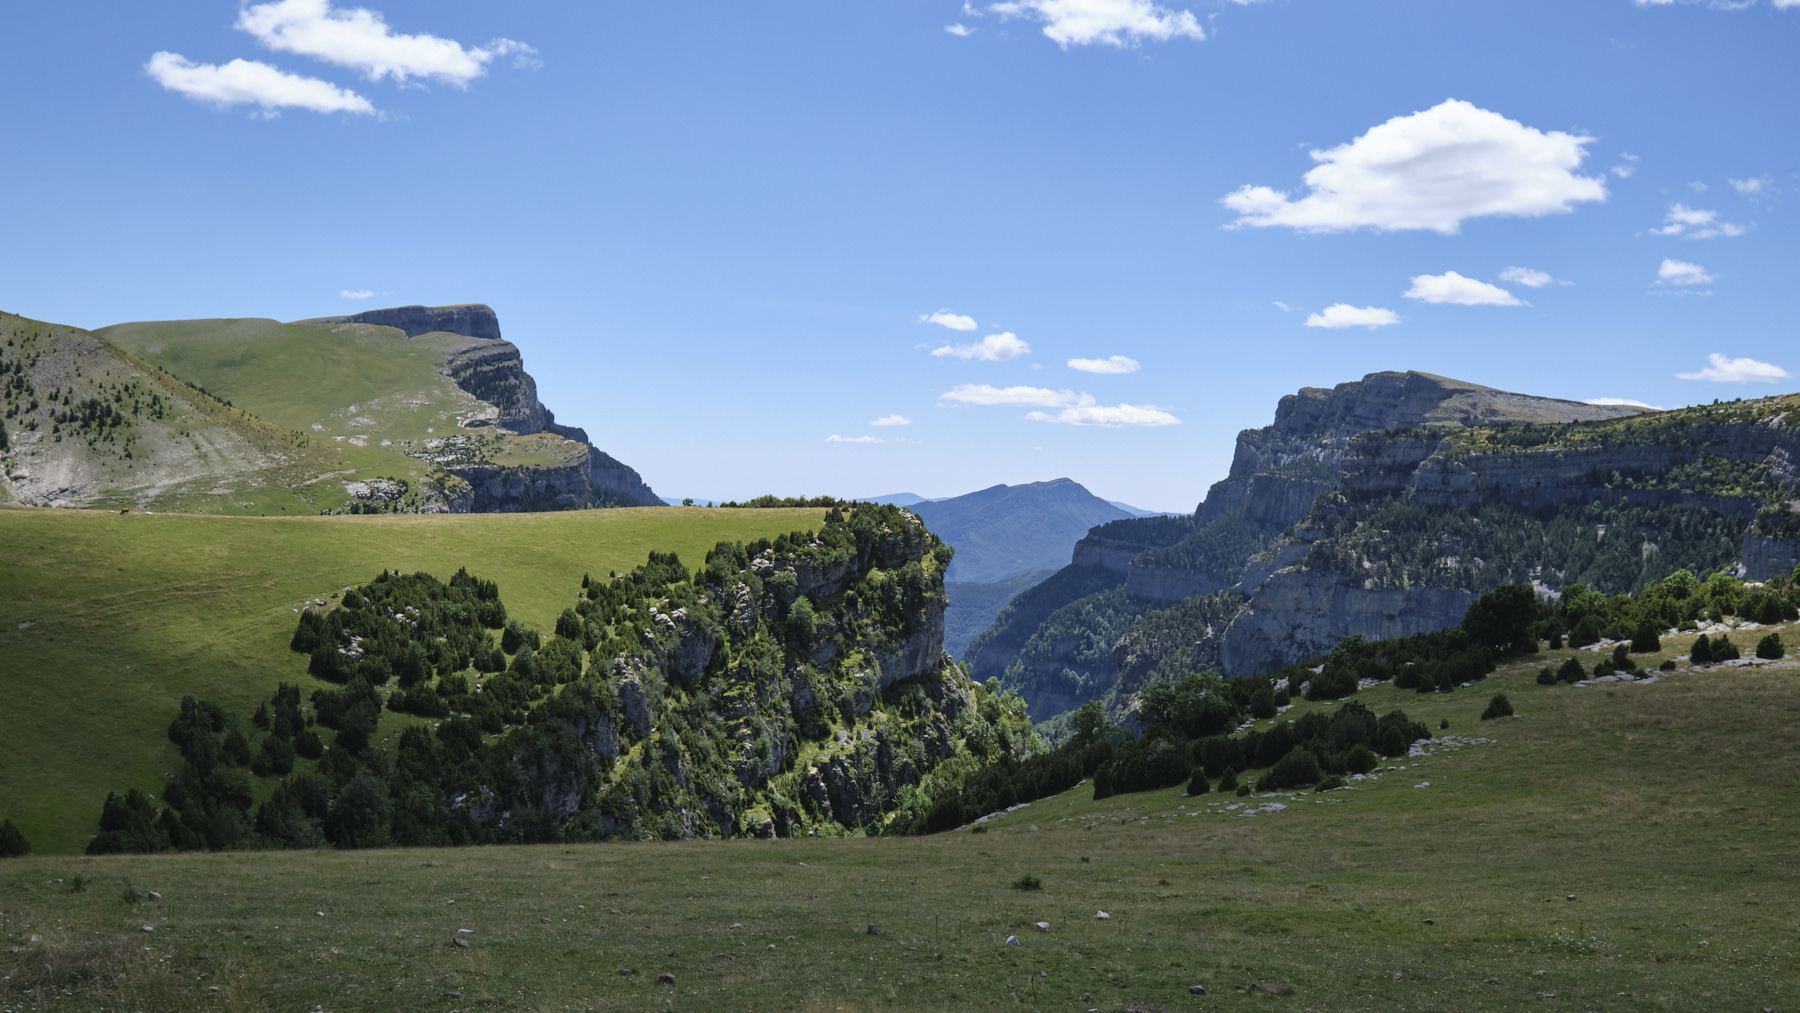
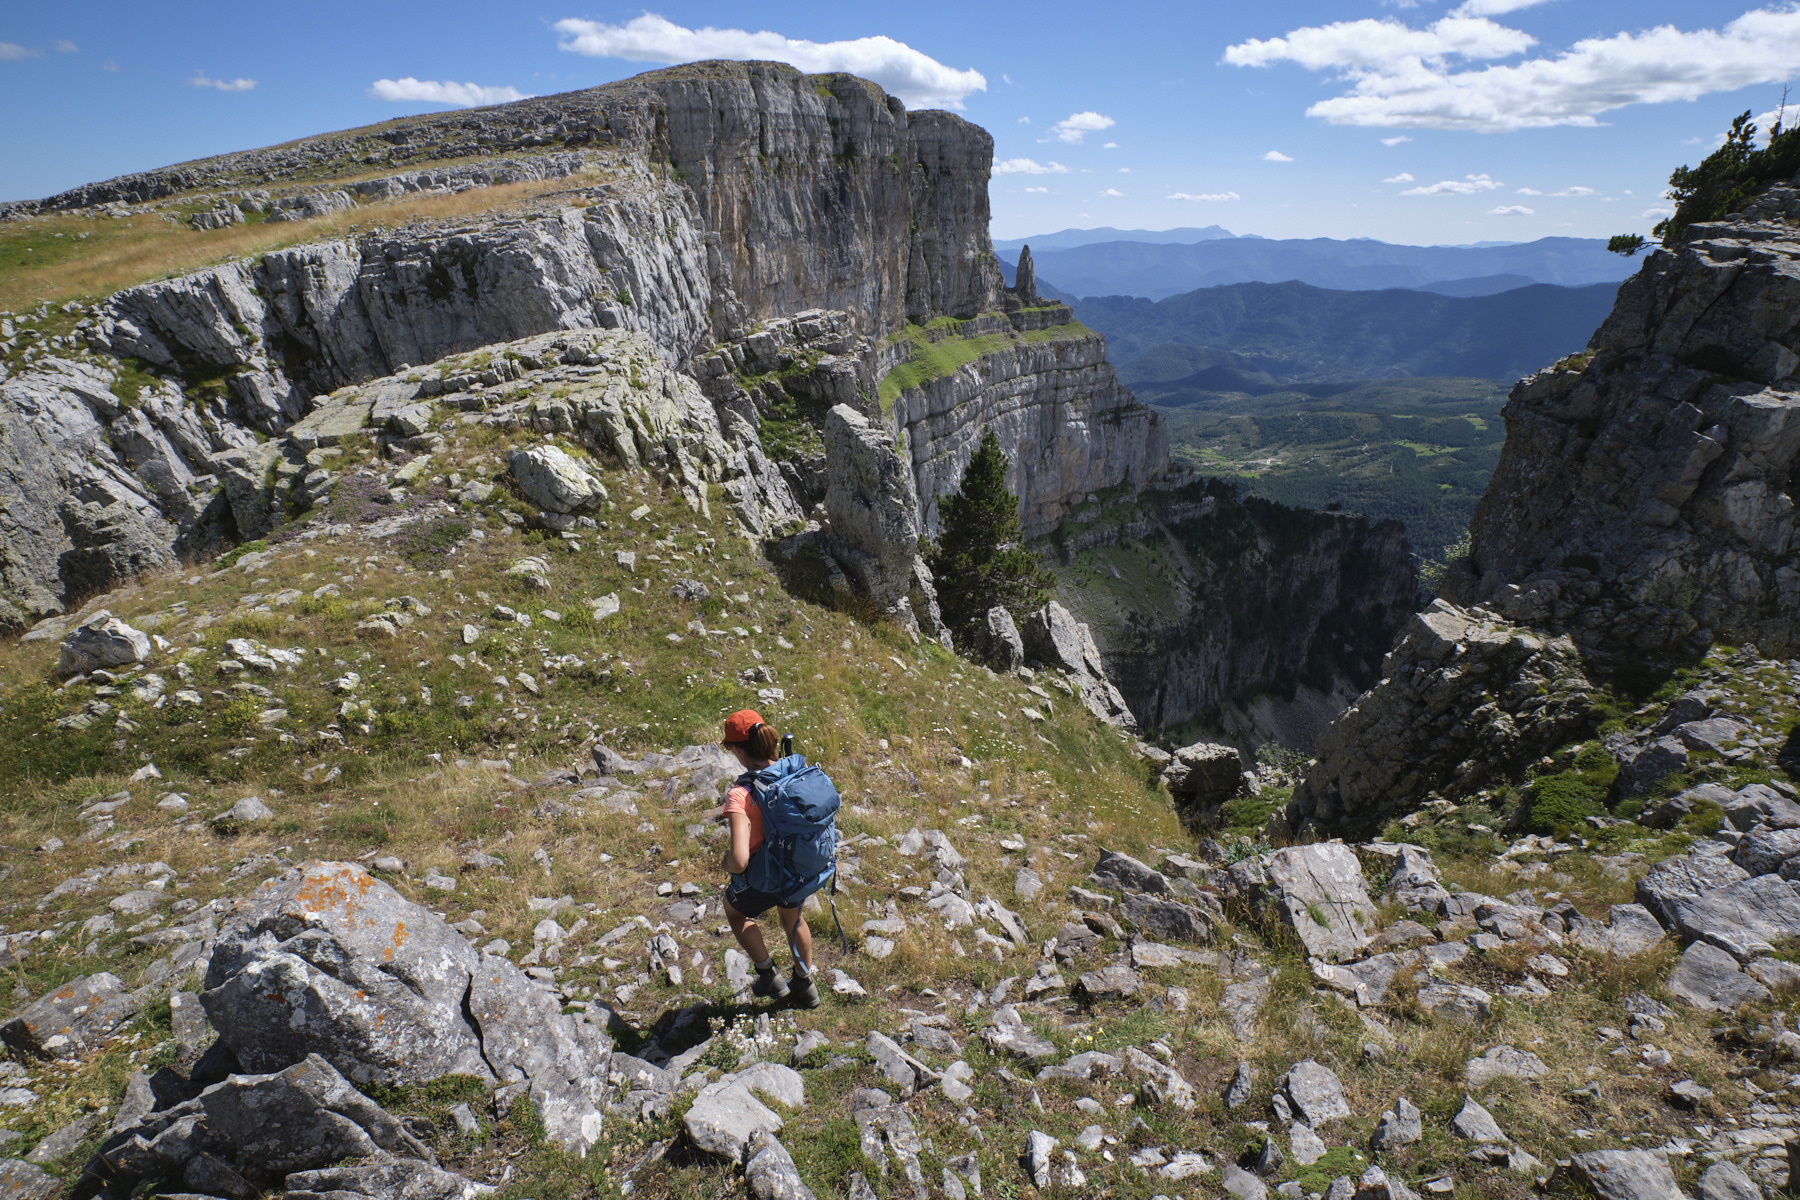
At the very end, as you leave the faja, you come to a bend that leads into the Añisclo canyon. Climb up steeply, with a number of small equipped passages (bars, cable), to emerge on the summit and walk to the small Mallata Candon house, facing Monte Perdido. You're literally on a postcard!
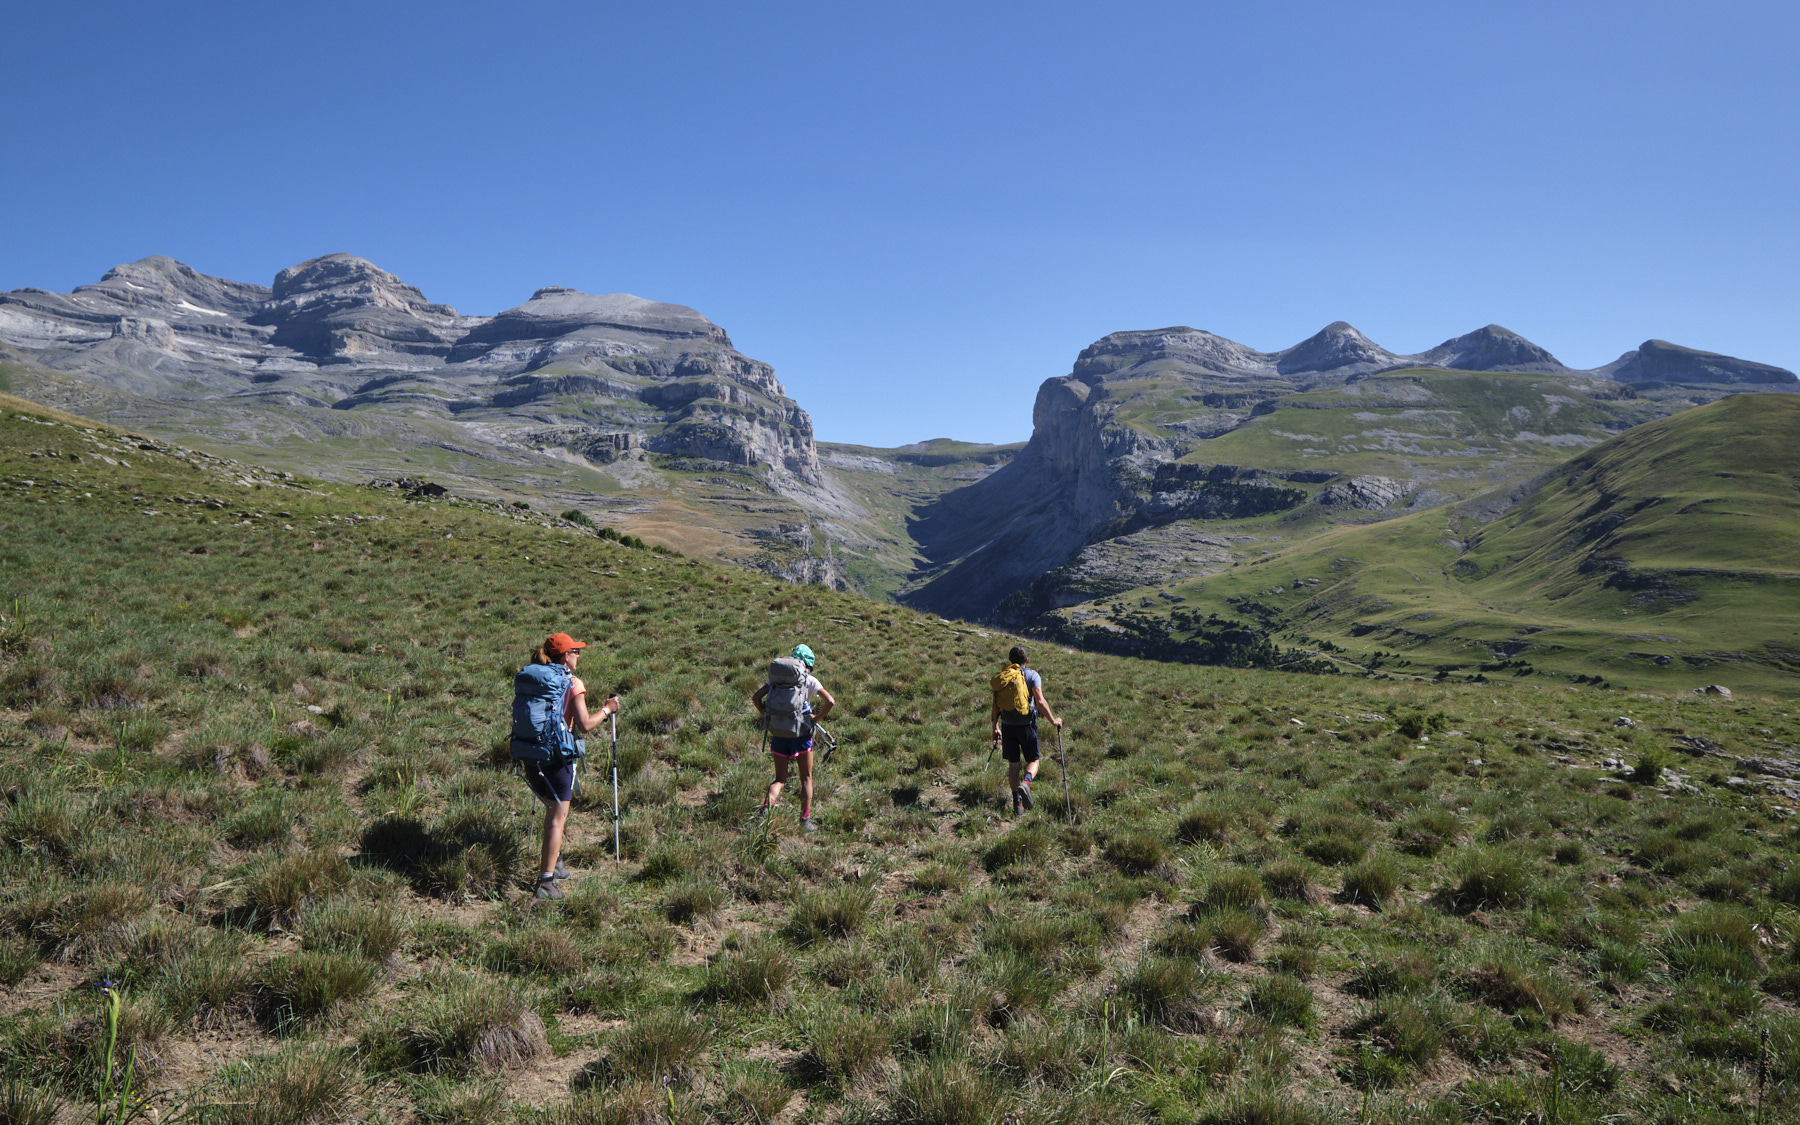
Part 3: Mallata Candon to San Vicenda hut (1720m, 2h30)
We pass Mallata Candon and walk slightly downhill through the grass towards Monte Perdido until we find the Carduso refuge, a splendid little stone building. From here, descend through the grass to reach the Caprariza torrent (not Liana as indicated on the map), which we cross on a beautiful little stone bridge (bathing possible here).
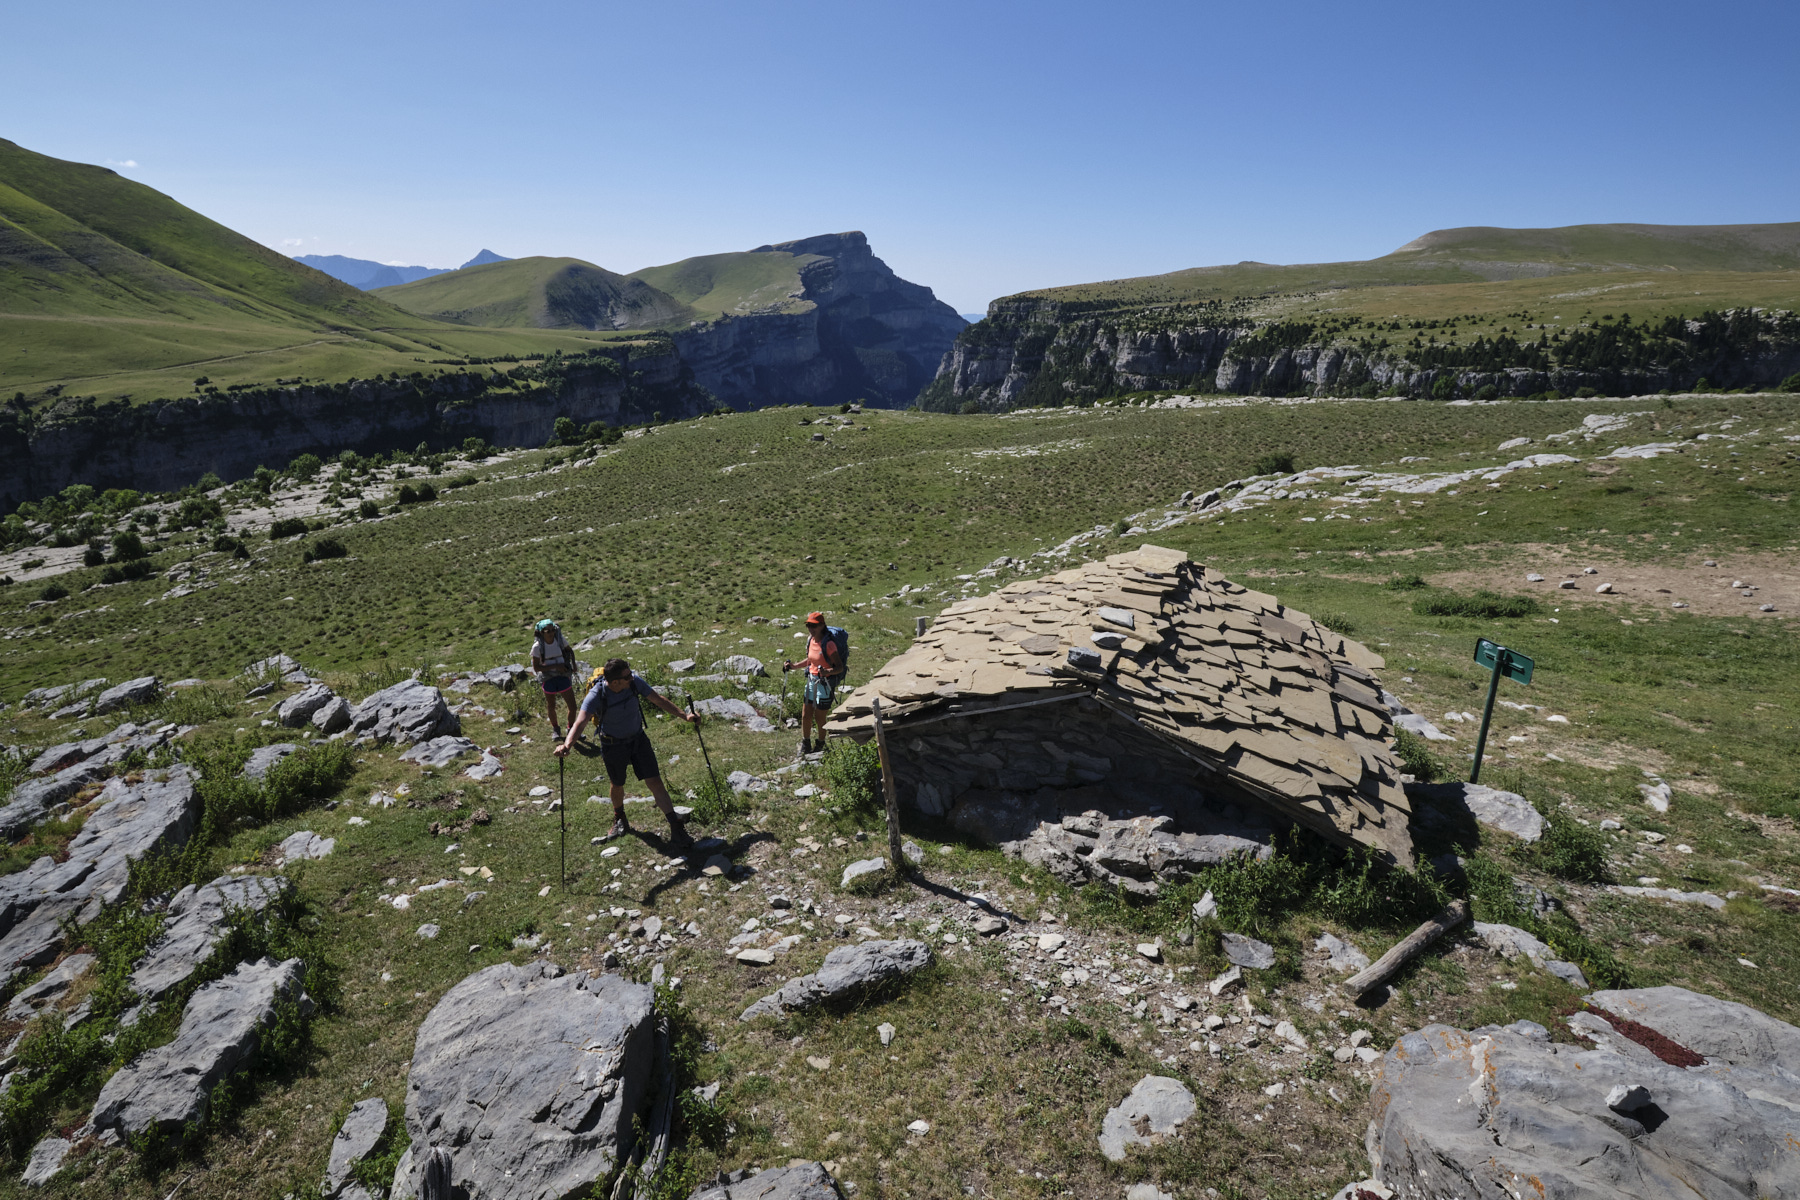
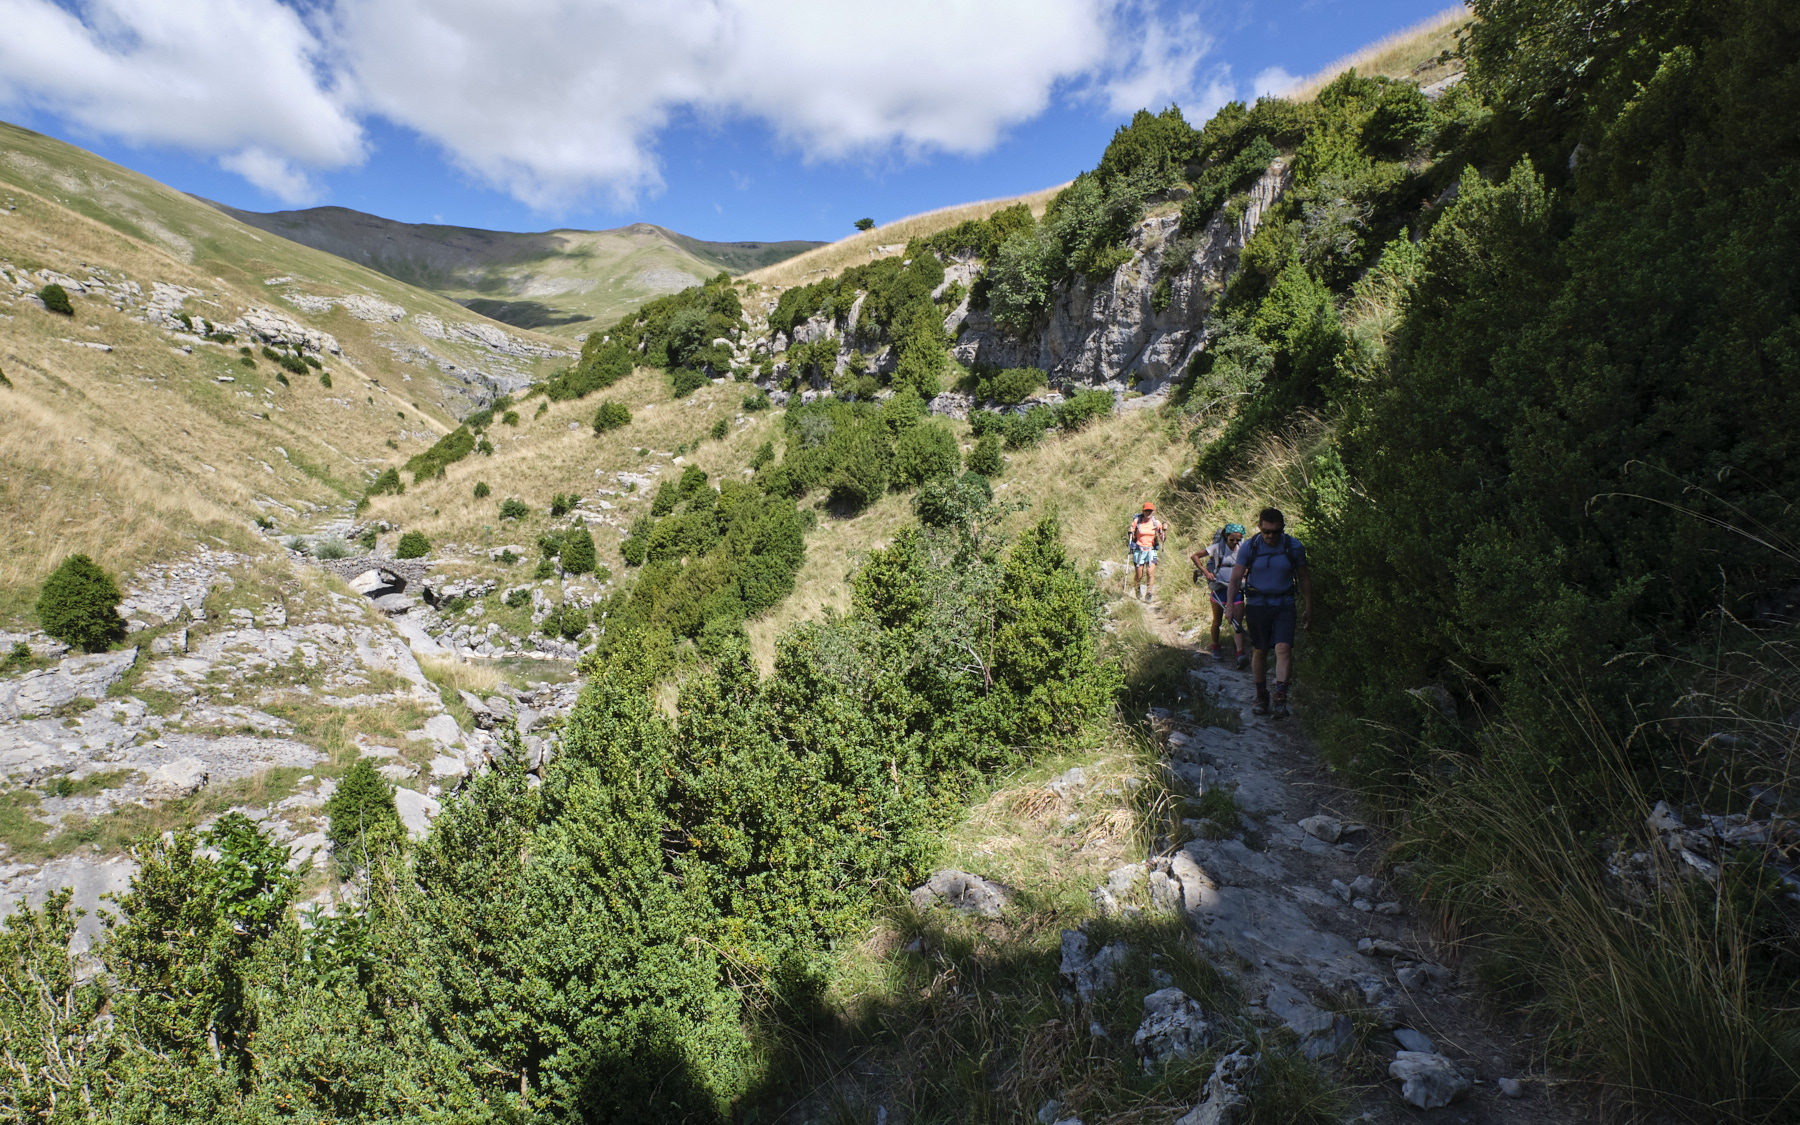
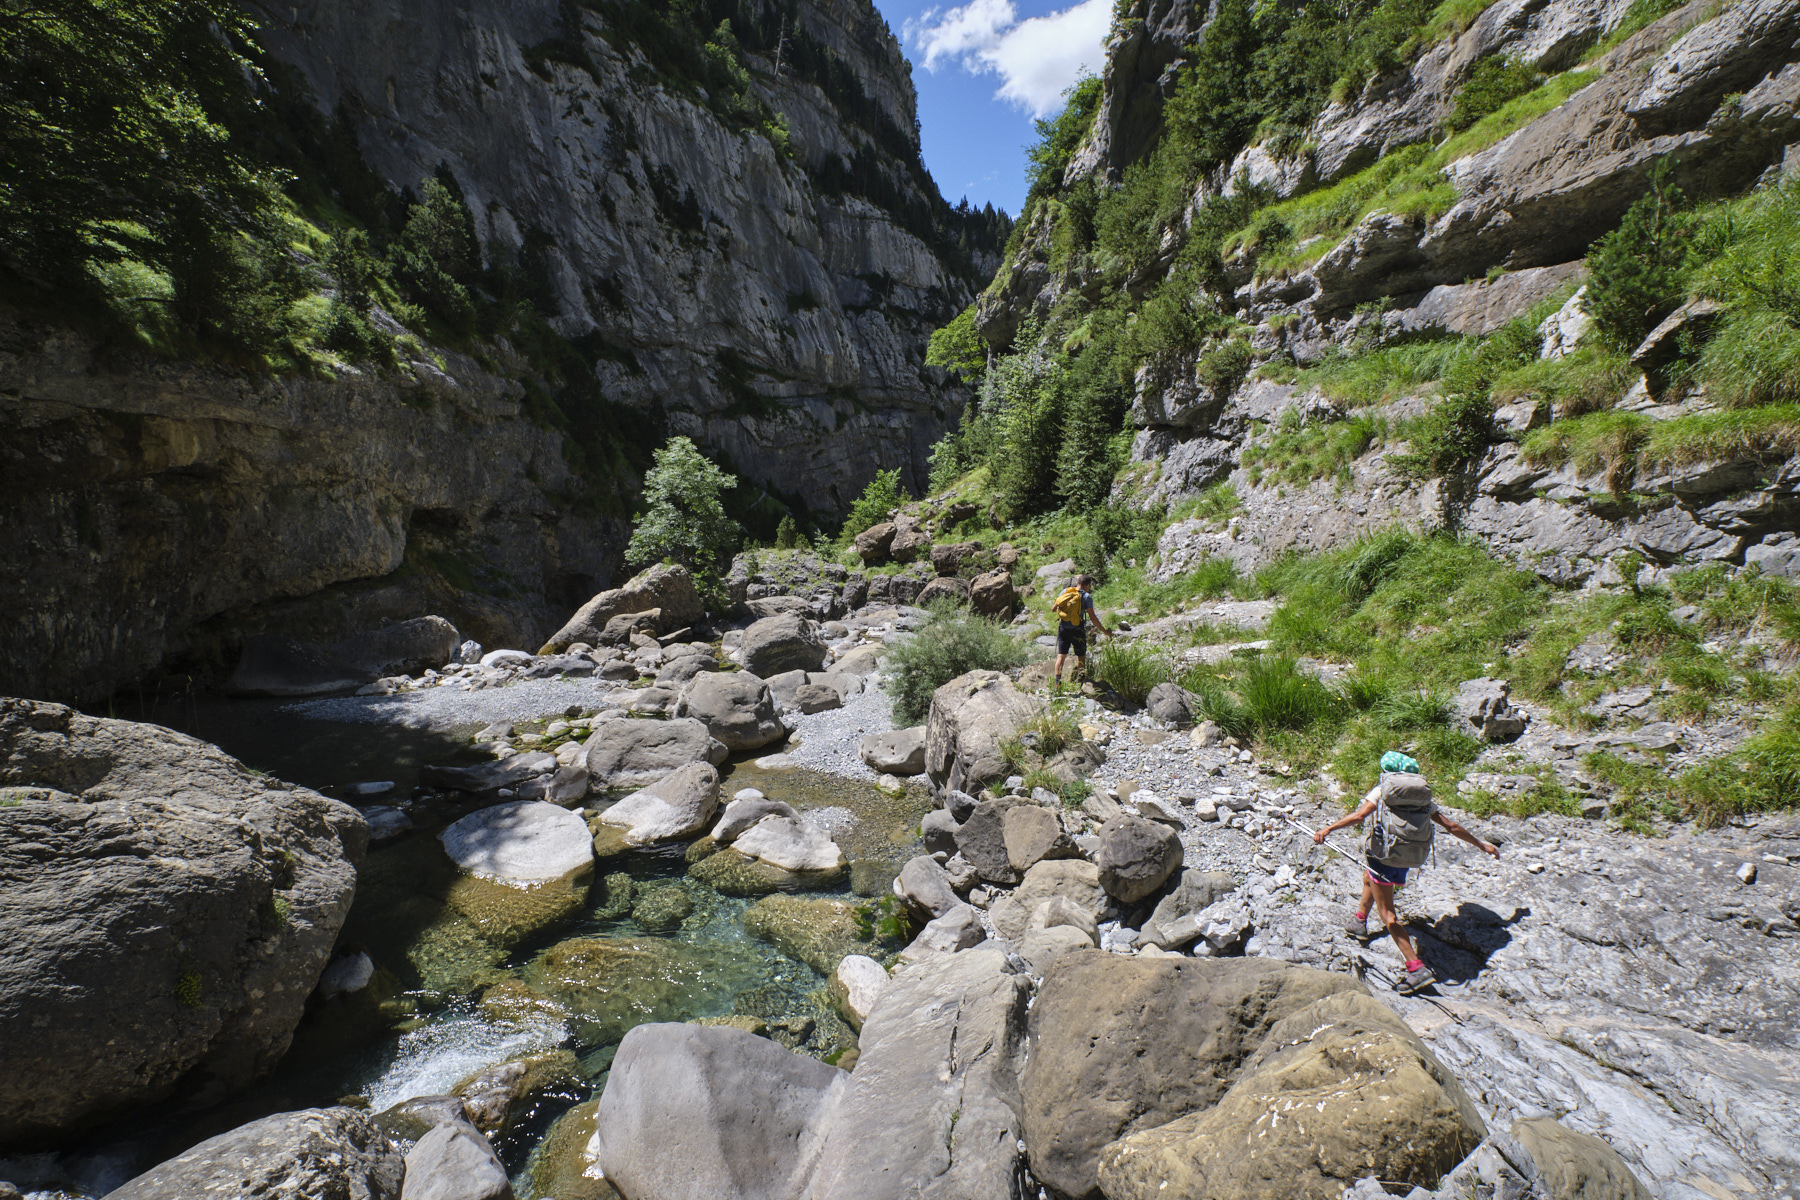
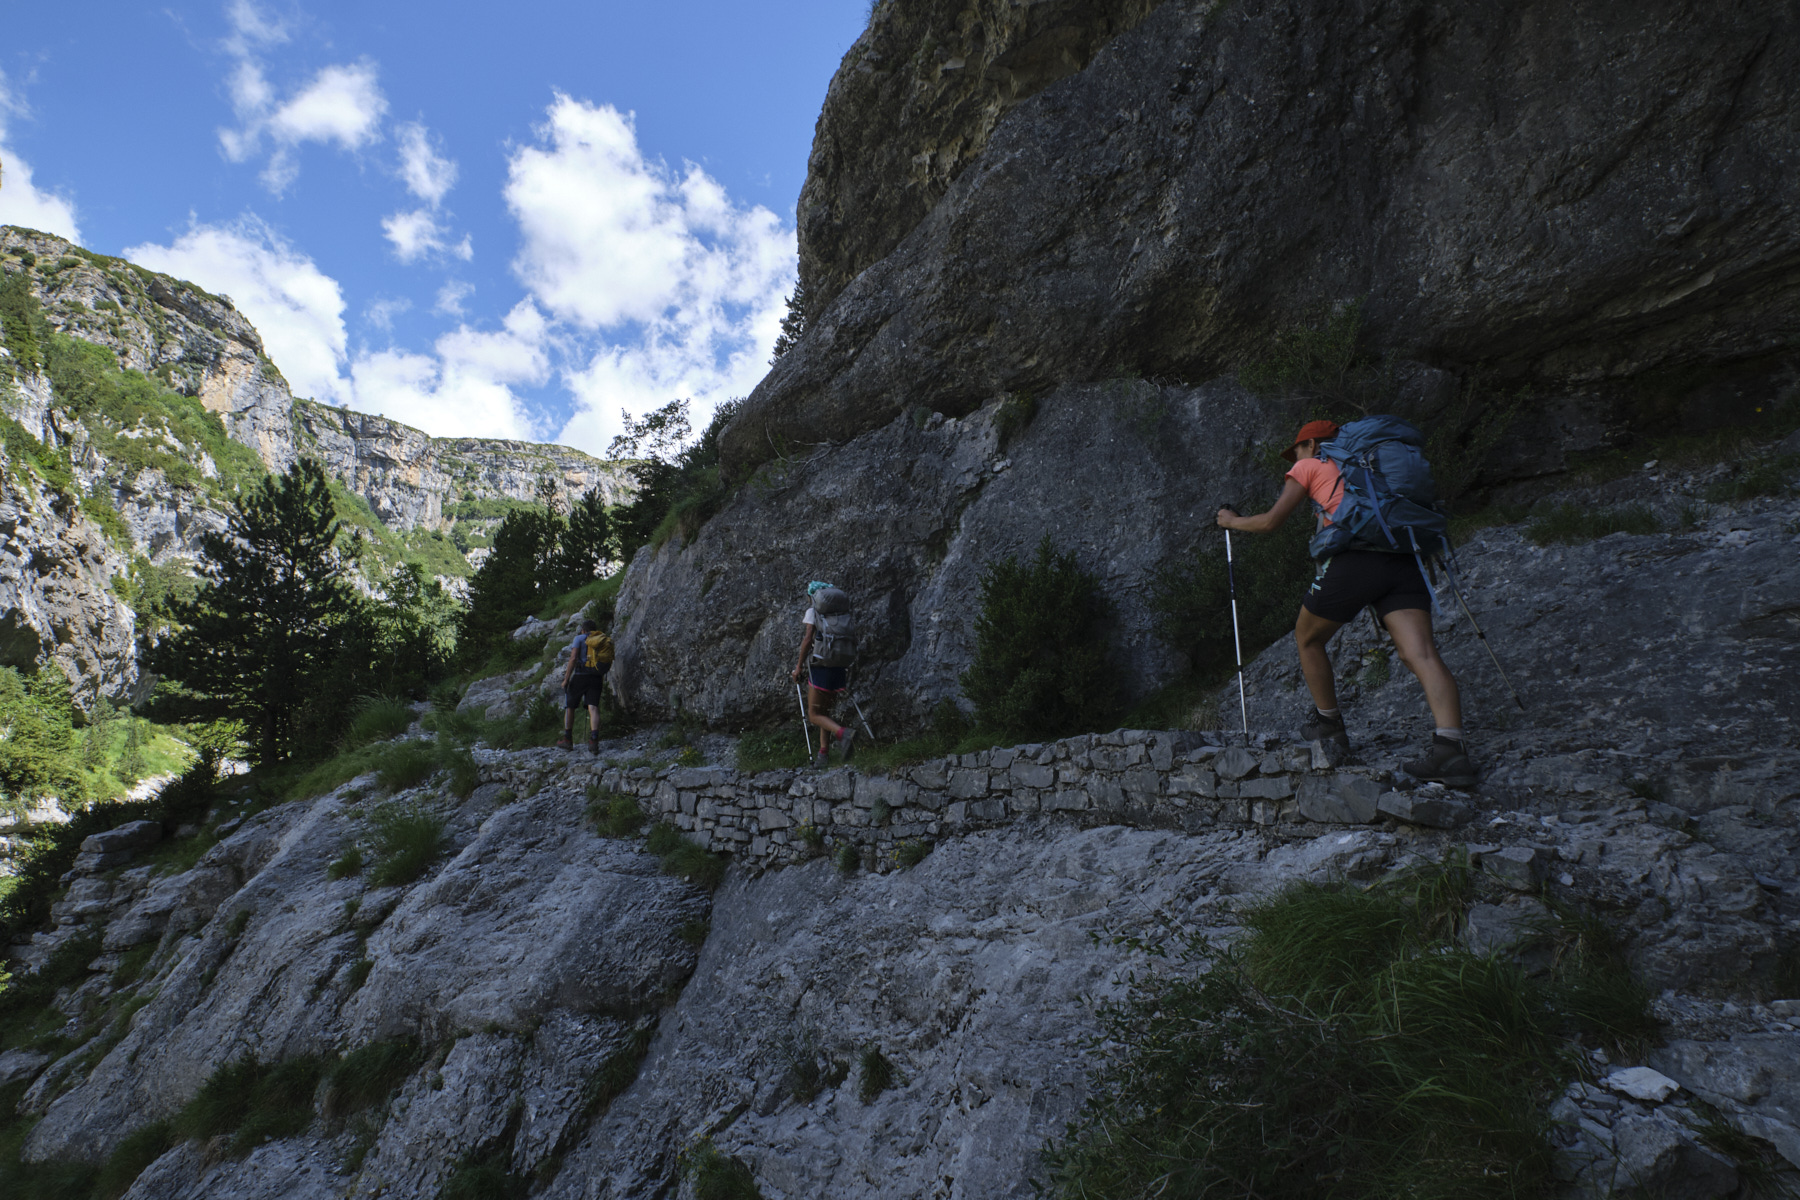
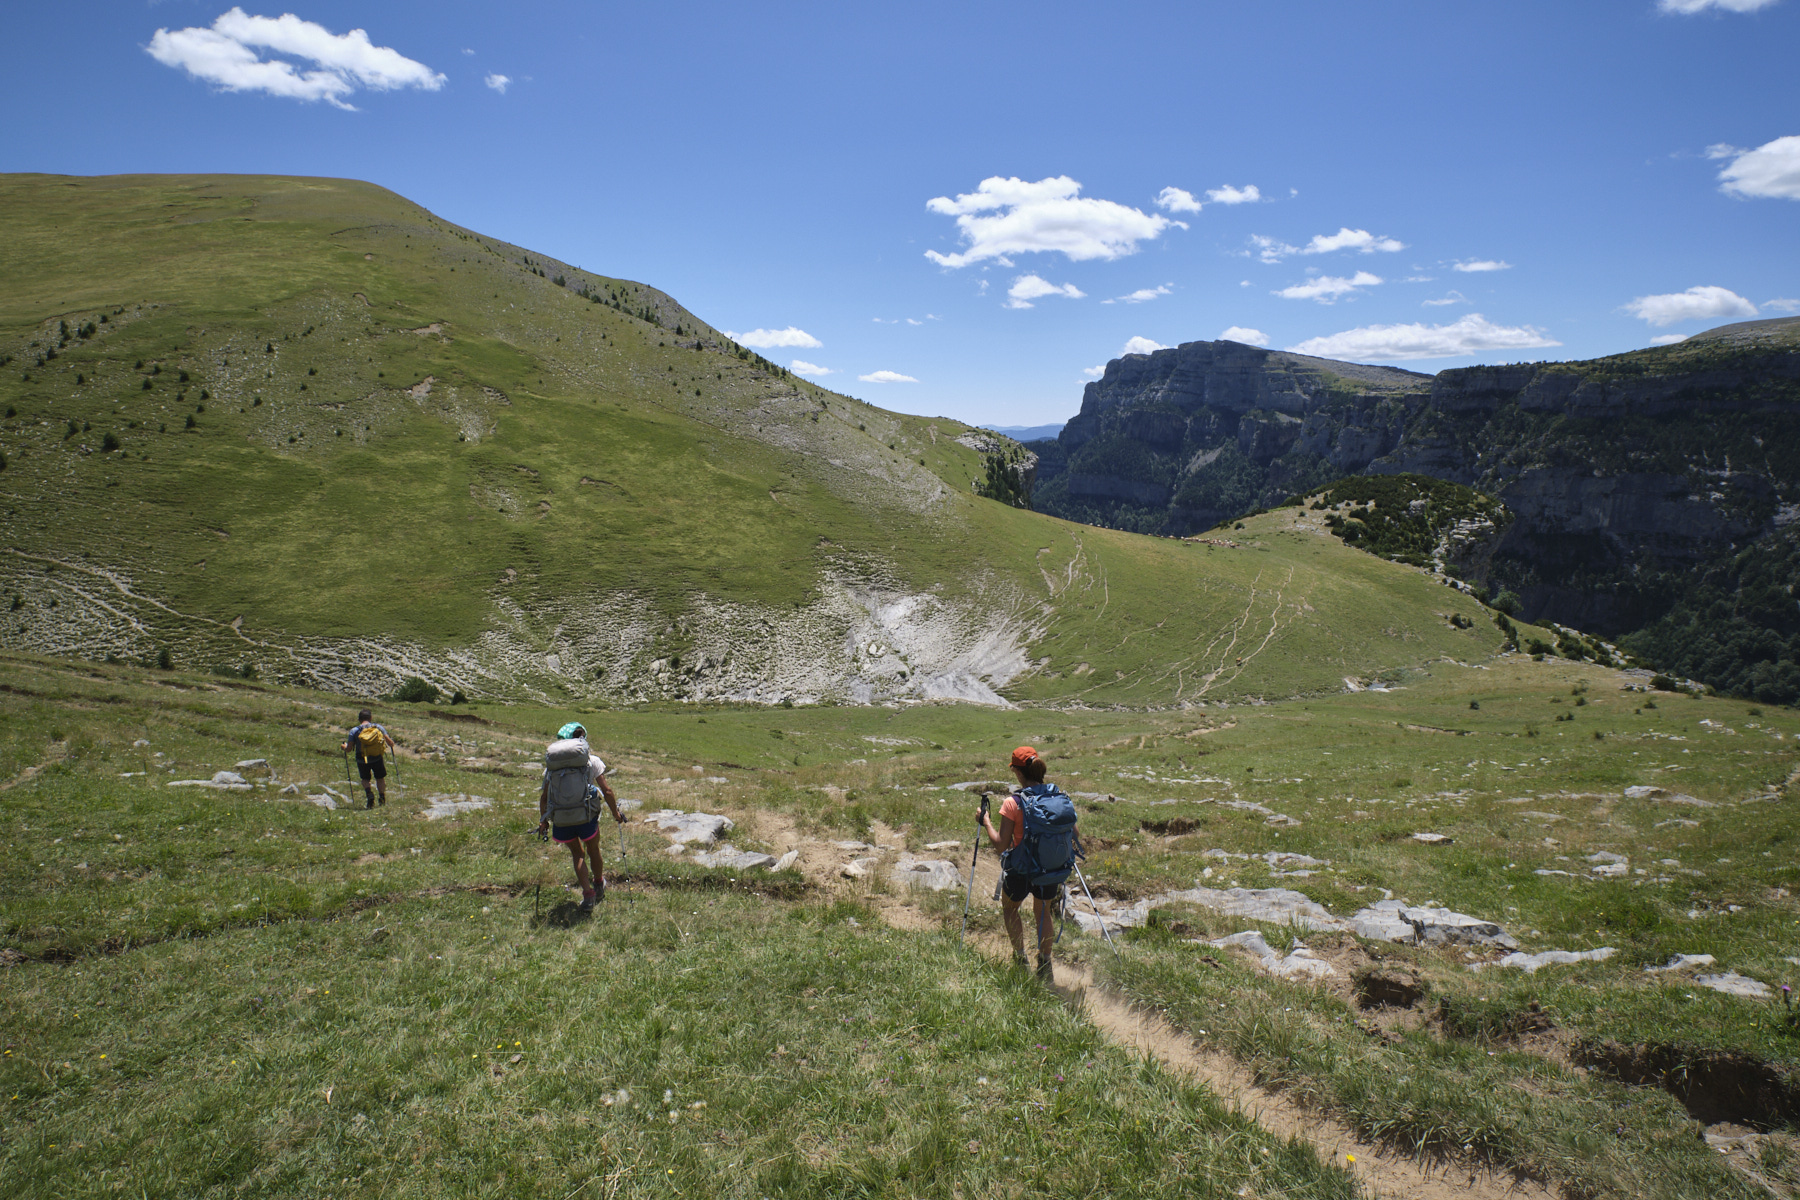
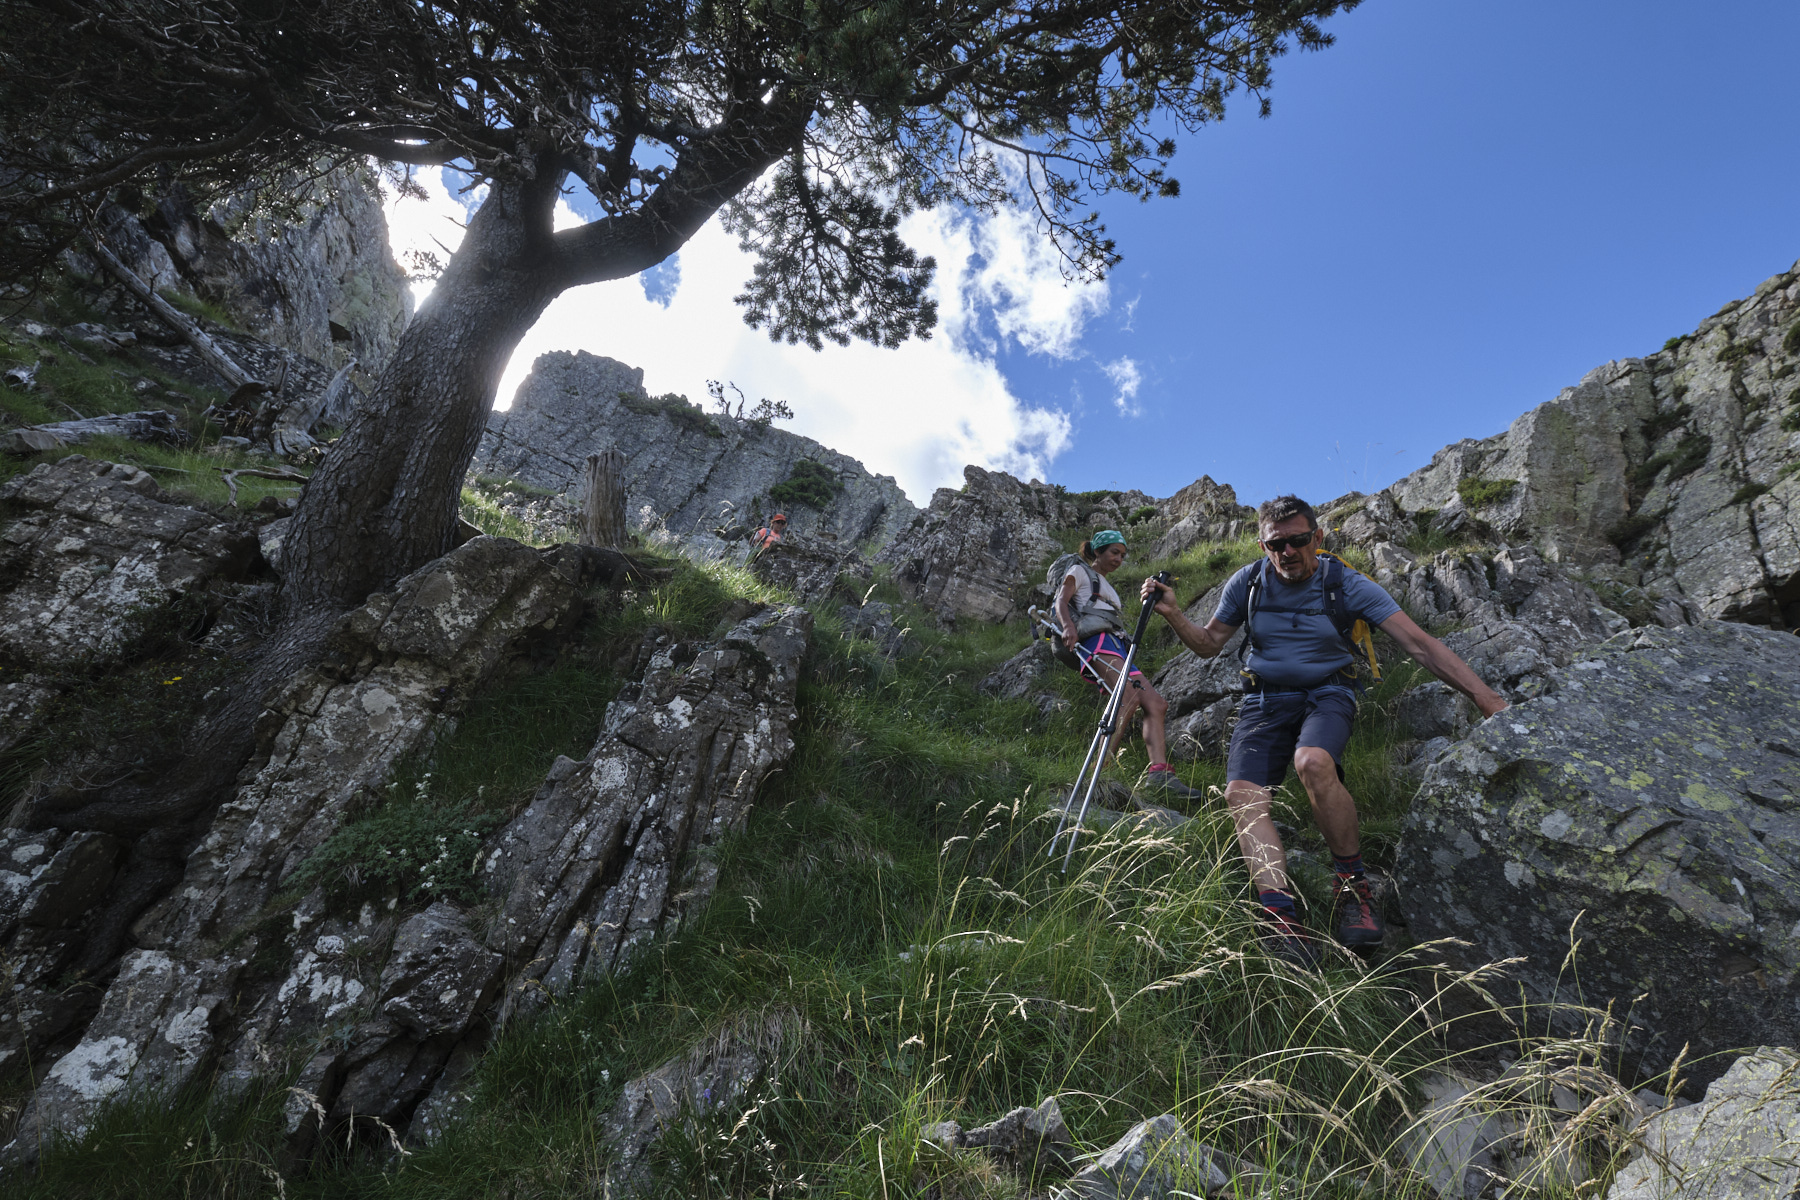
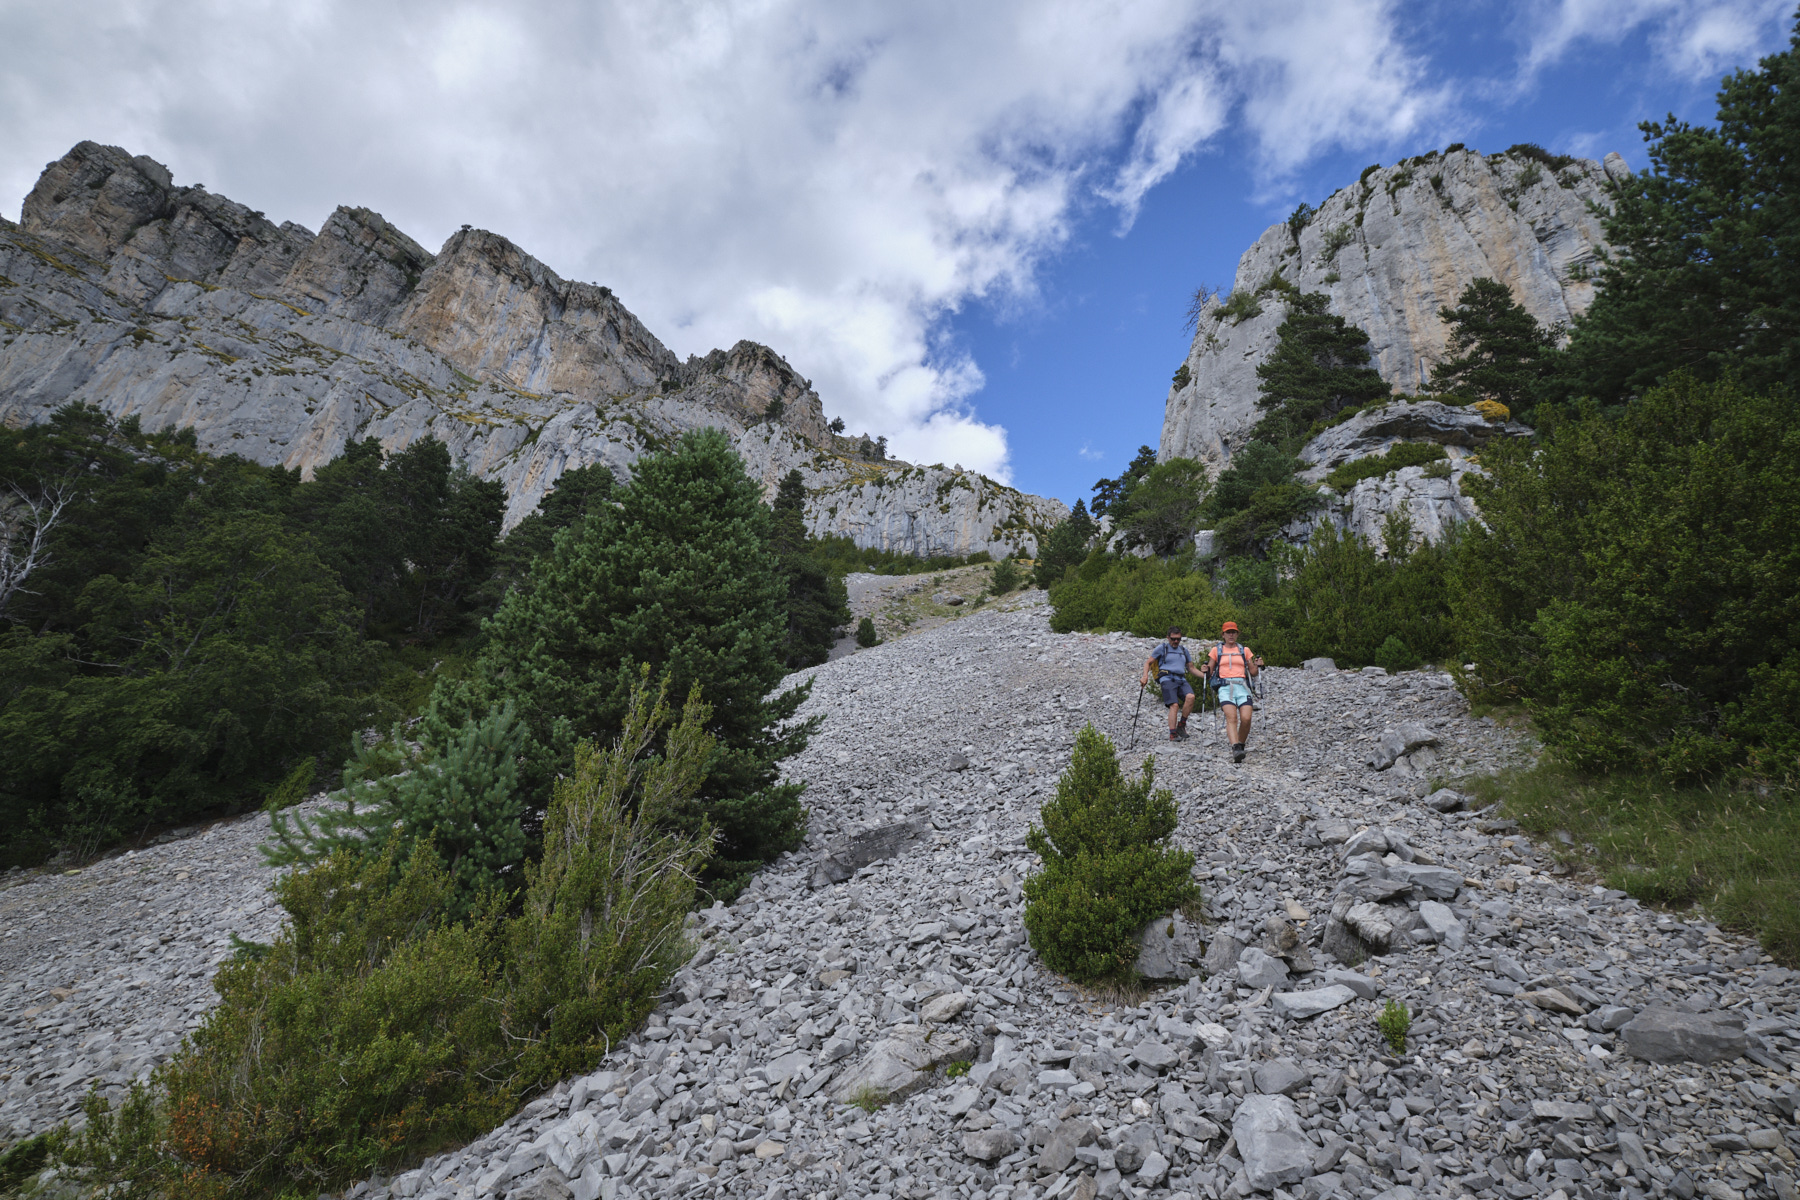
From here on, the trickiest section begins, on a path that is difficult to see, despite a few cairns and the steepness of the descent to the bottom of the canyon. Stay on the path that runs along the Caprariza barranco on the left bank, then switch east onto the grassy slopes. Keep a close eye on the GPS track and cairns to stay on the path as it descends the walls, with a few passages to be de-escalated, and find your way to the bottom.
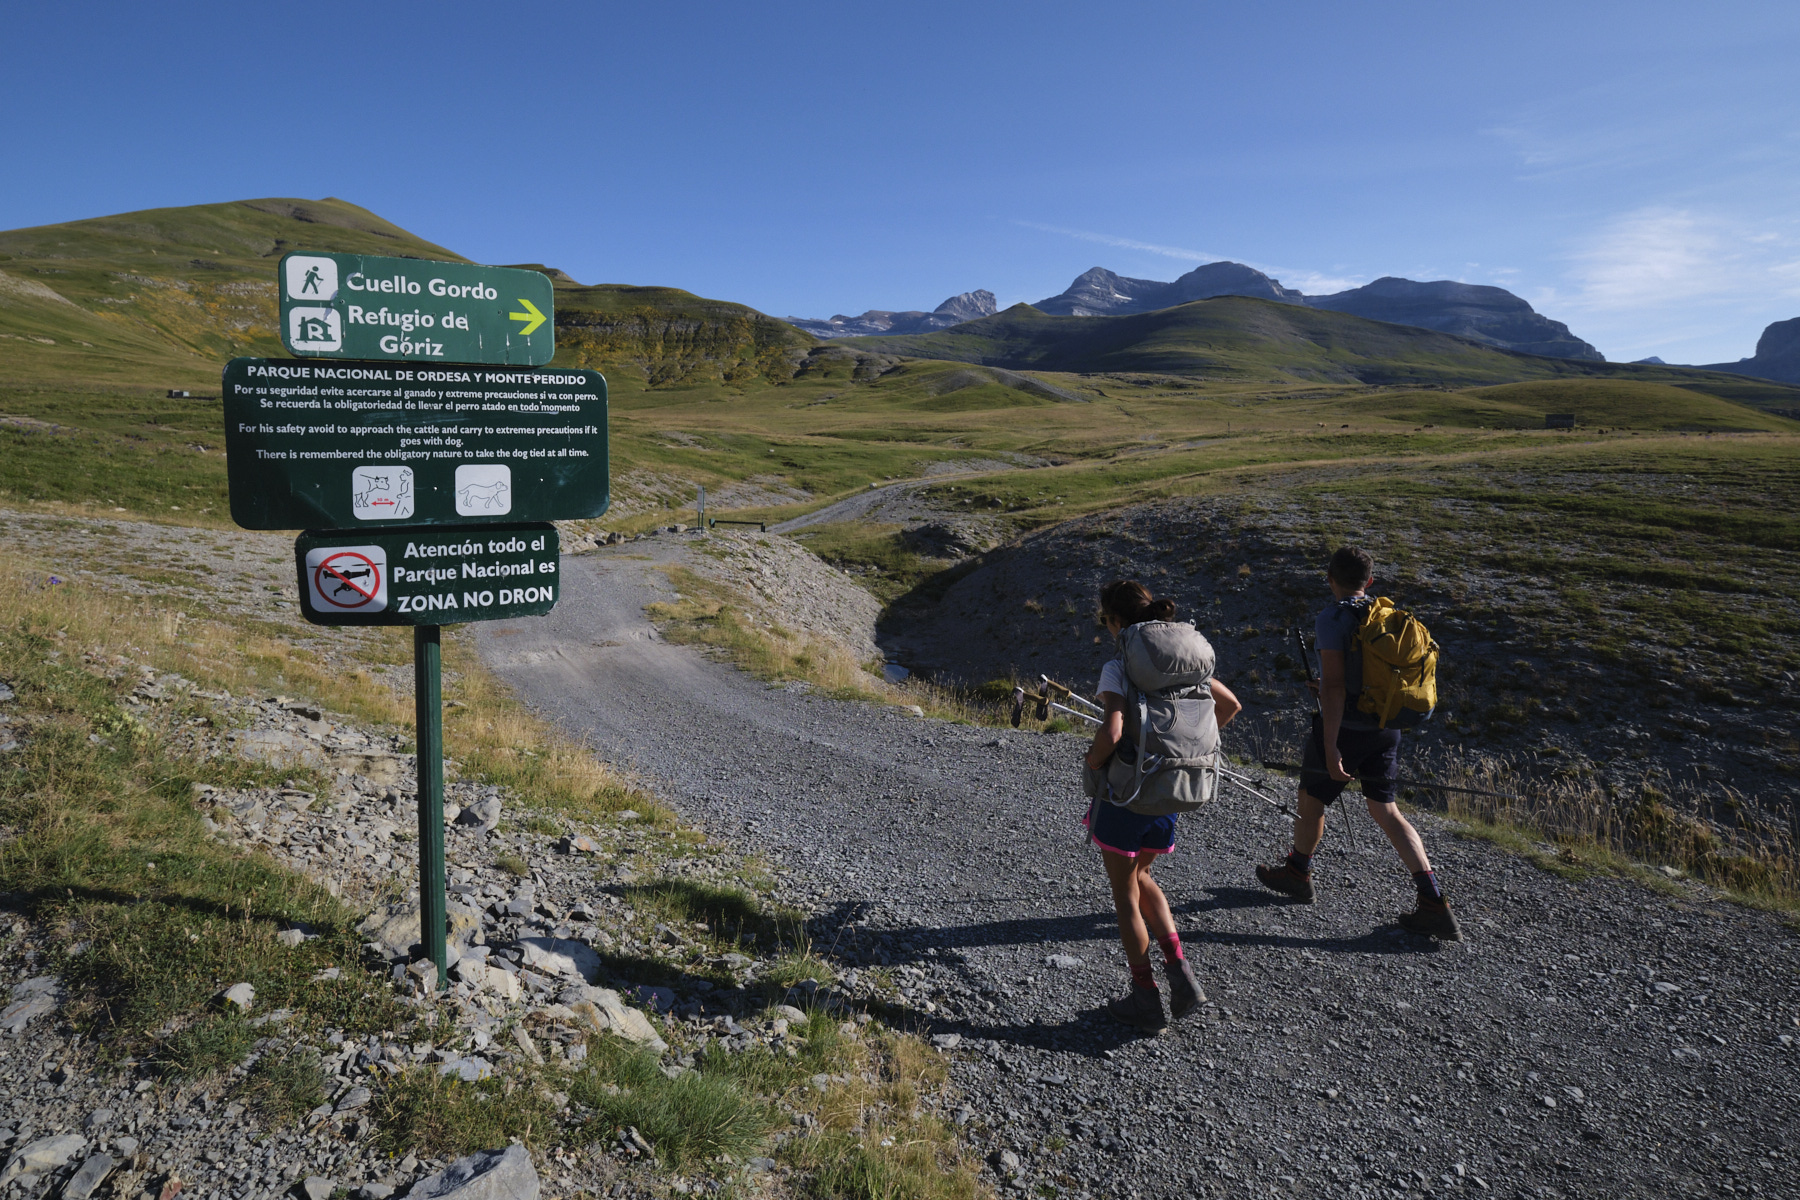
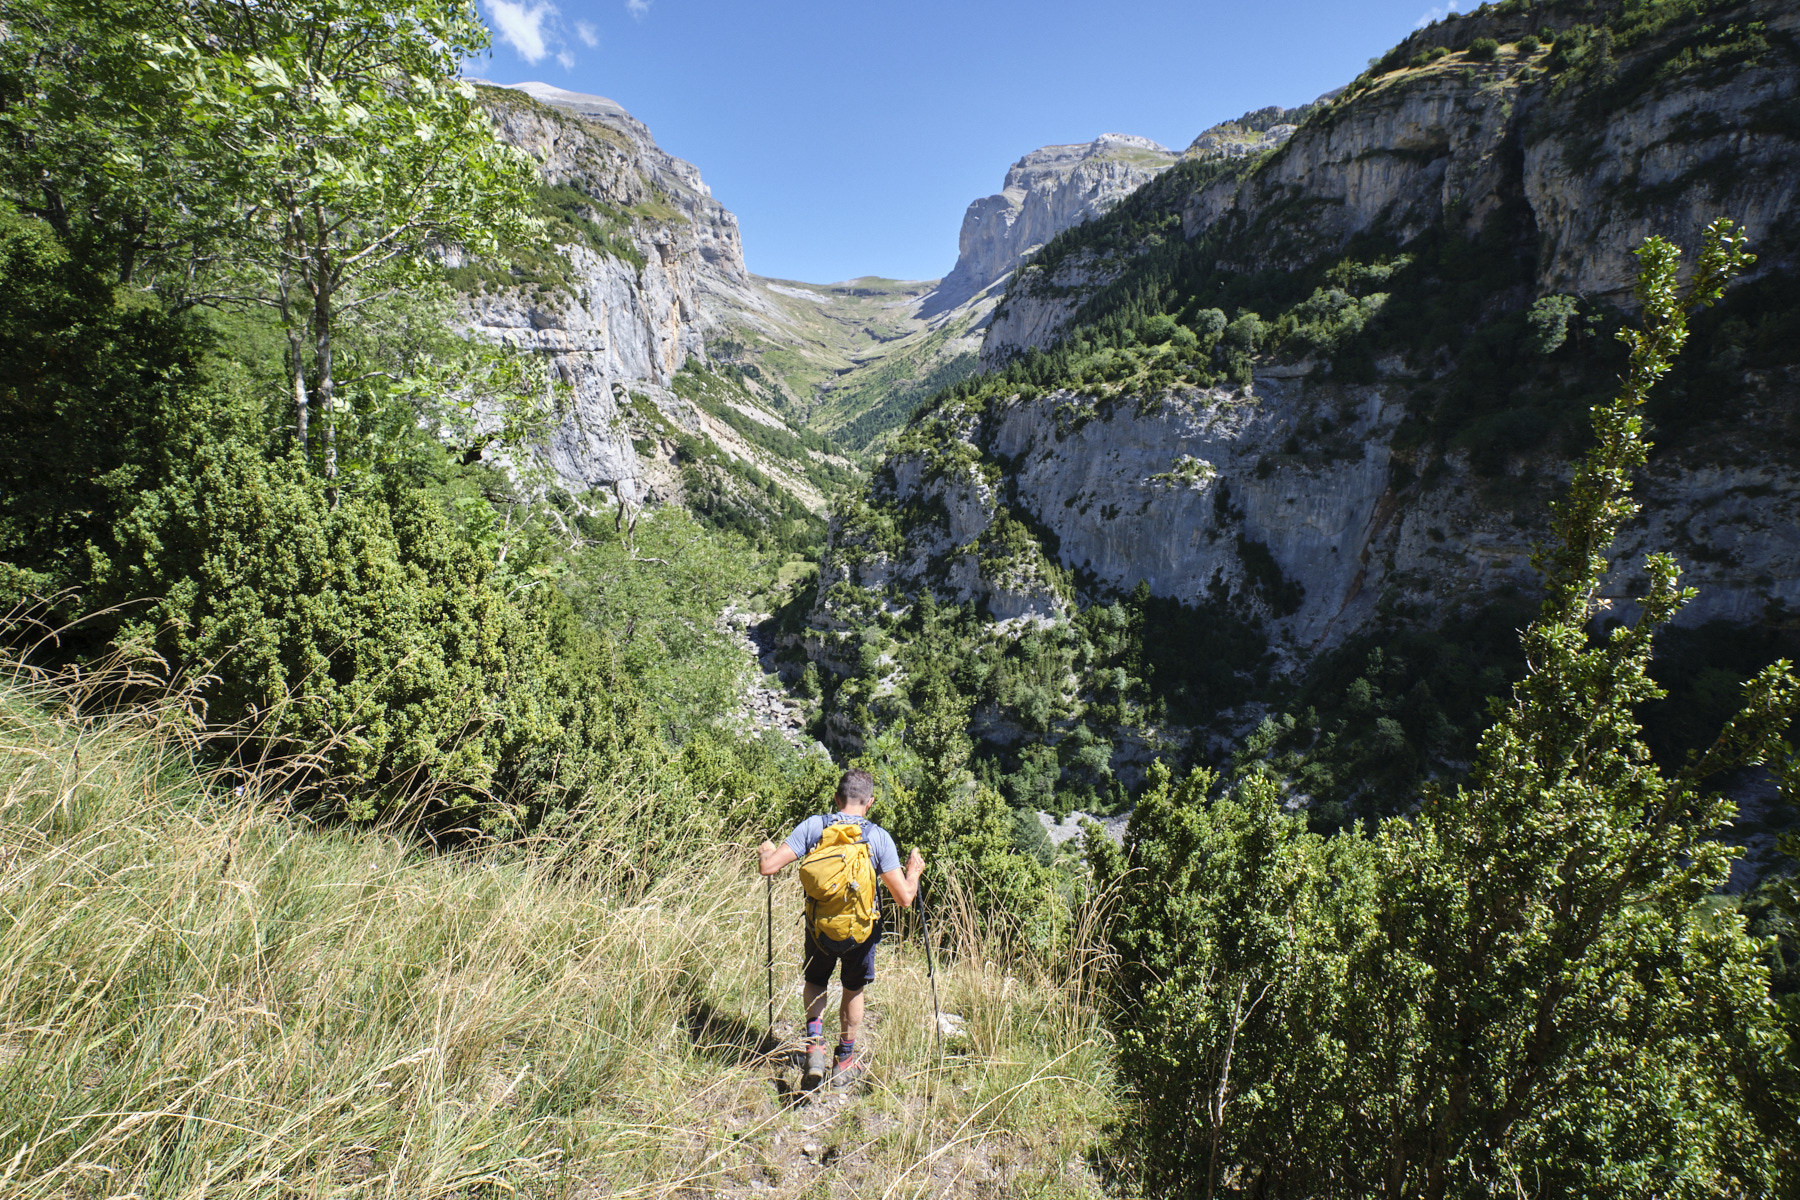
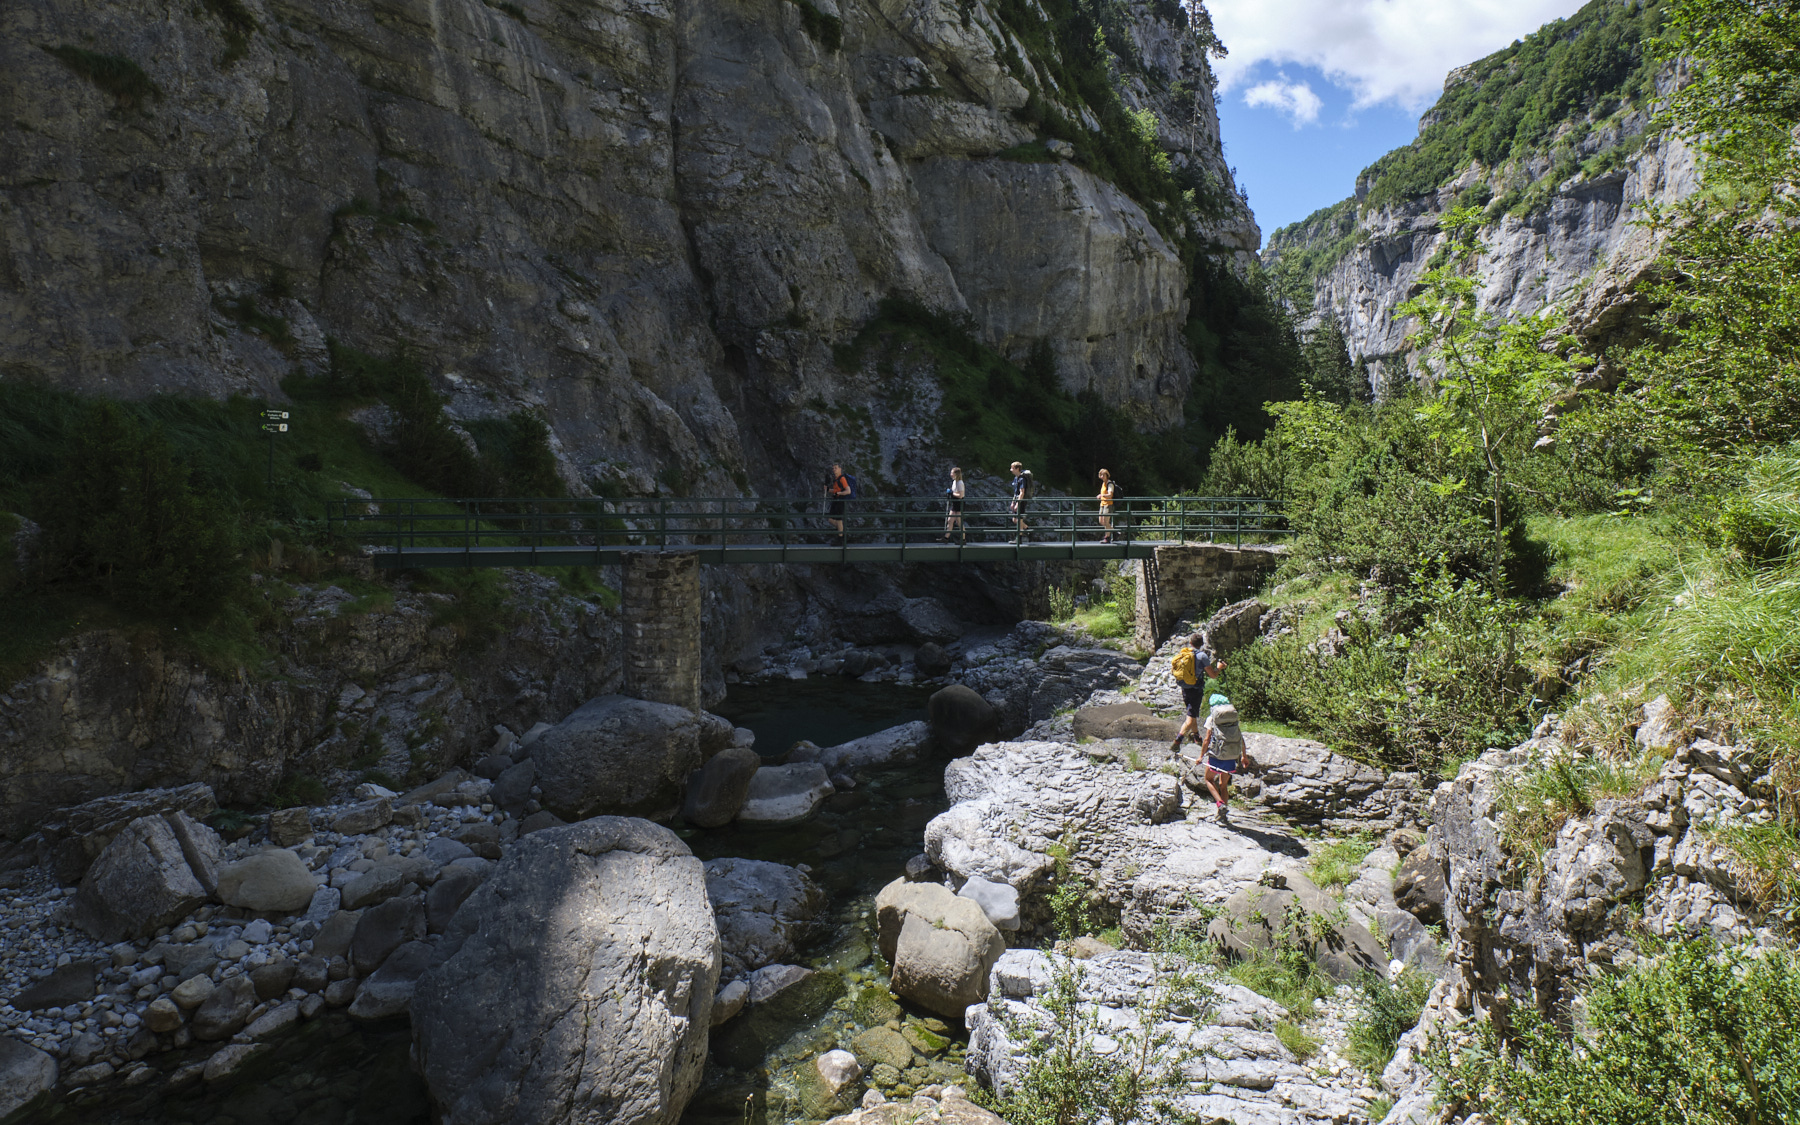
Once you reach the Rio Bellos, turn right and follow the torrent. You finally reach a section equipped with clavijas, and then cross the torrent on a footbridge. Go up the opposite side towards Fuente Blanca (sign), then back along the path until it forks to the right towards San Vicenda and Montaña de Sesa (sign). After 20 minutes of steep ascent, you'll find yourself on the opposite rim of the canyon. Follow this path until it forks towards Escuain on the left and Sestrales, Bestué on the right. Turn right and walk along the path which becomes a track, smooth and flat, to the San Vicenda refuge.
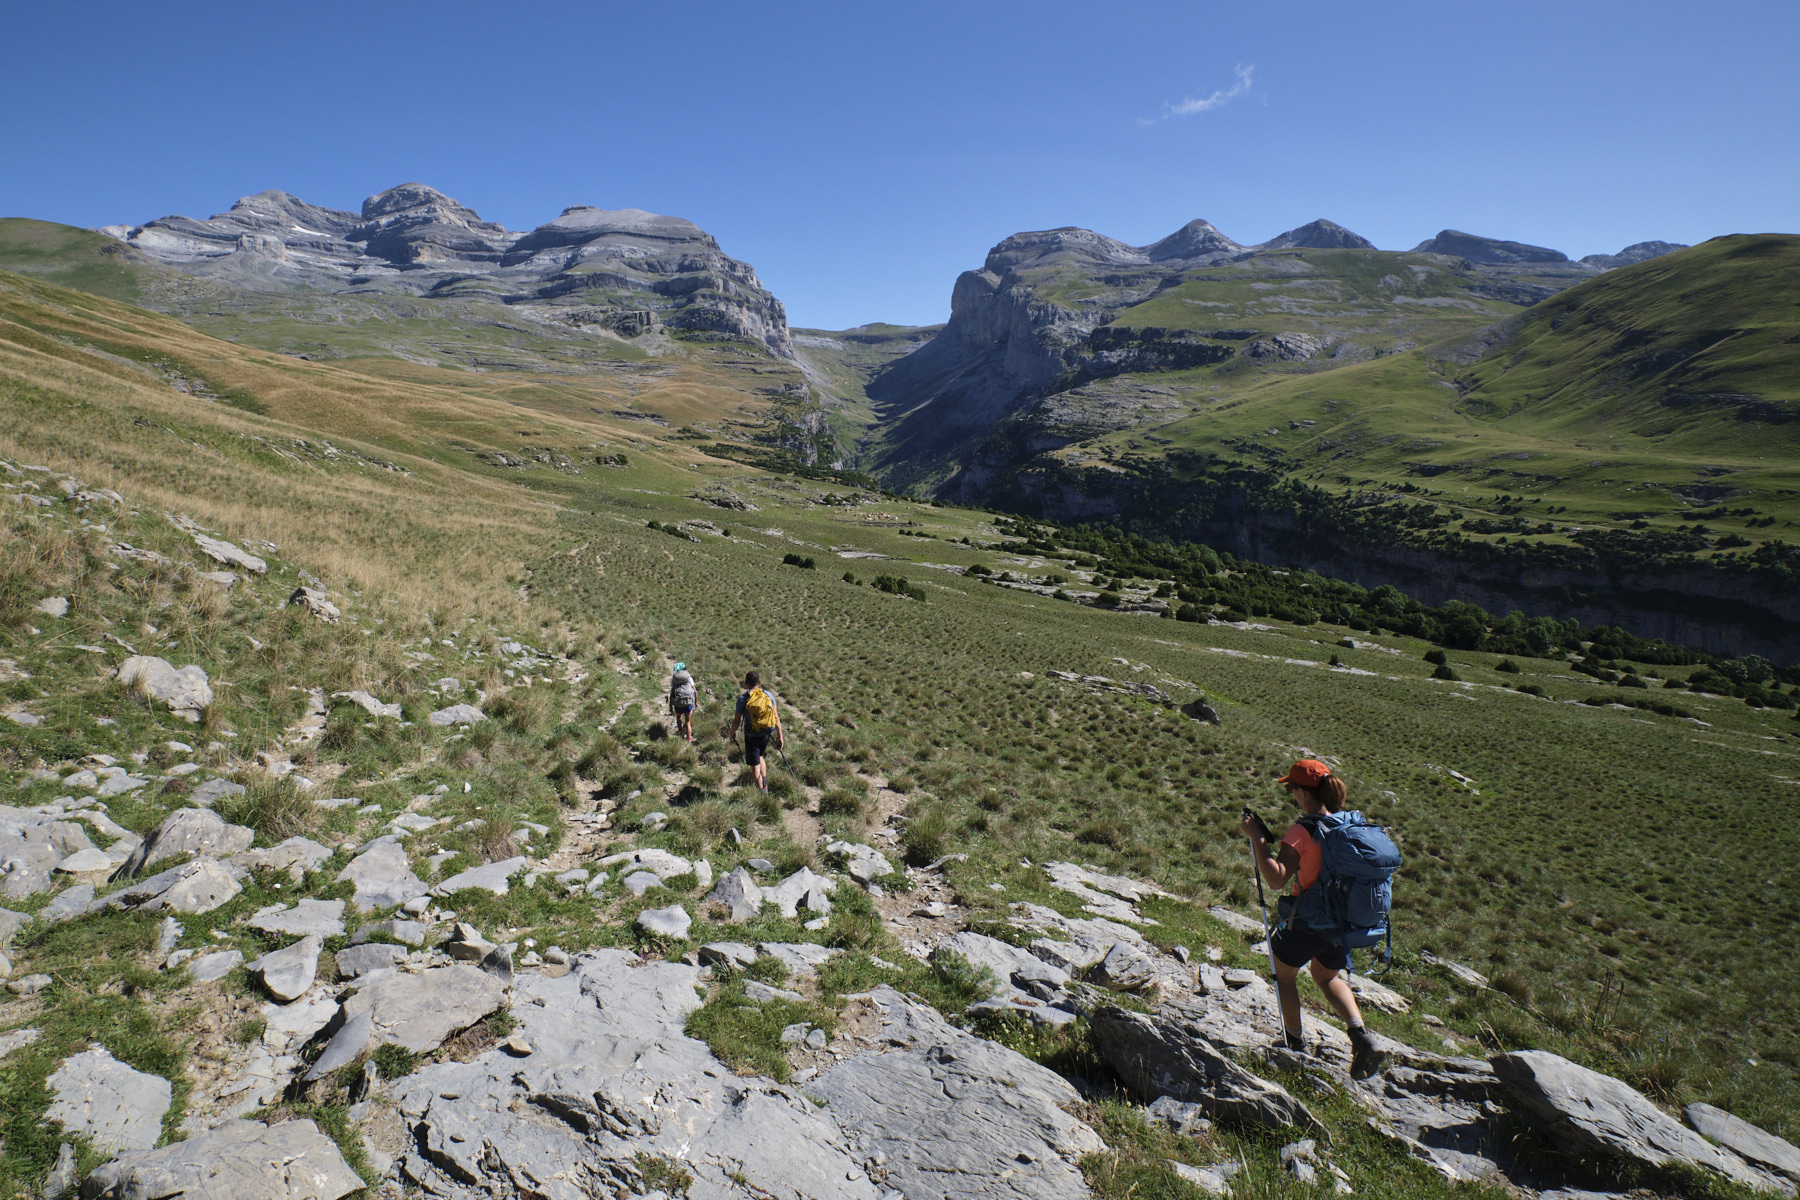
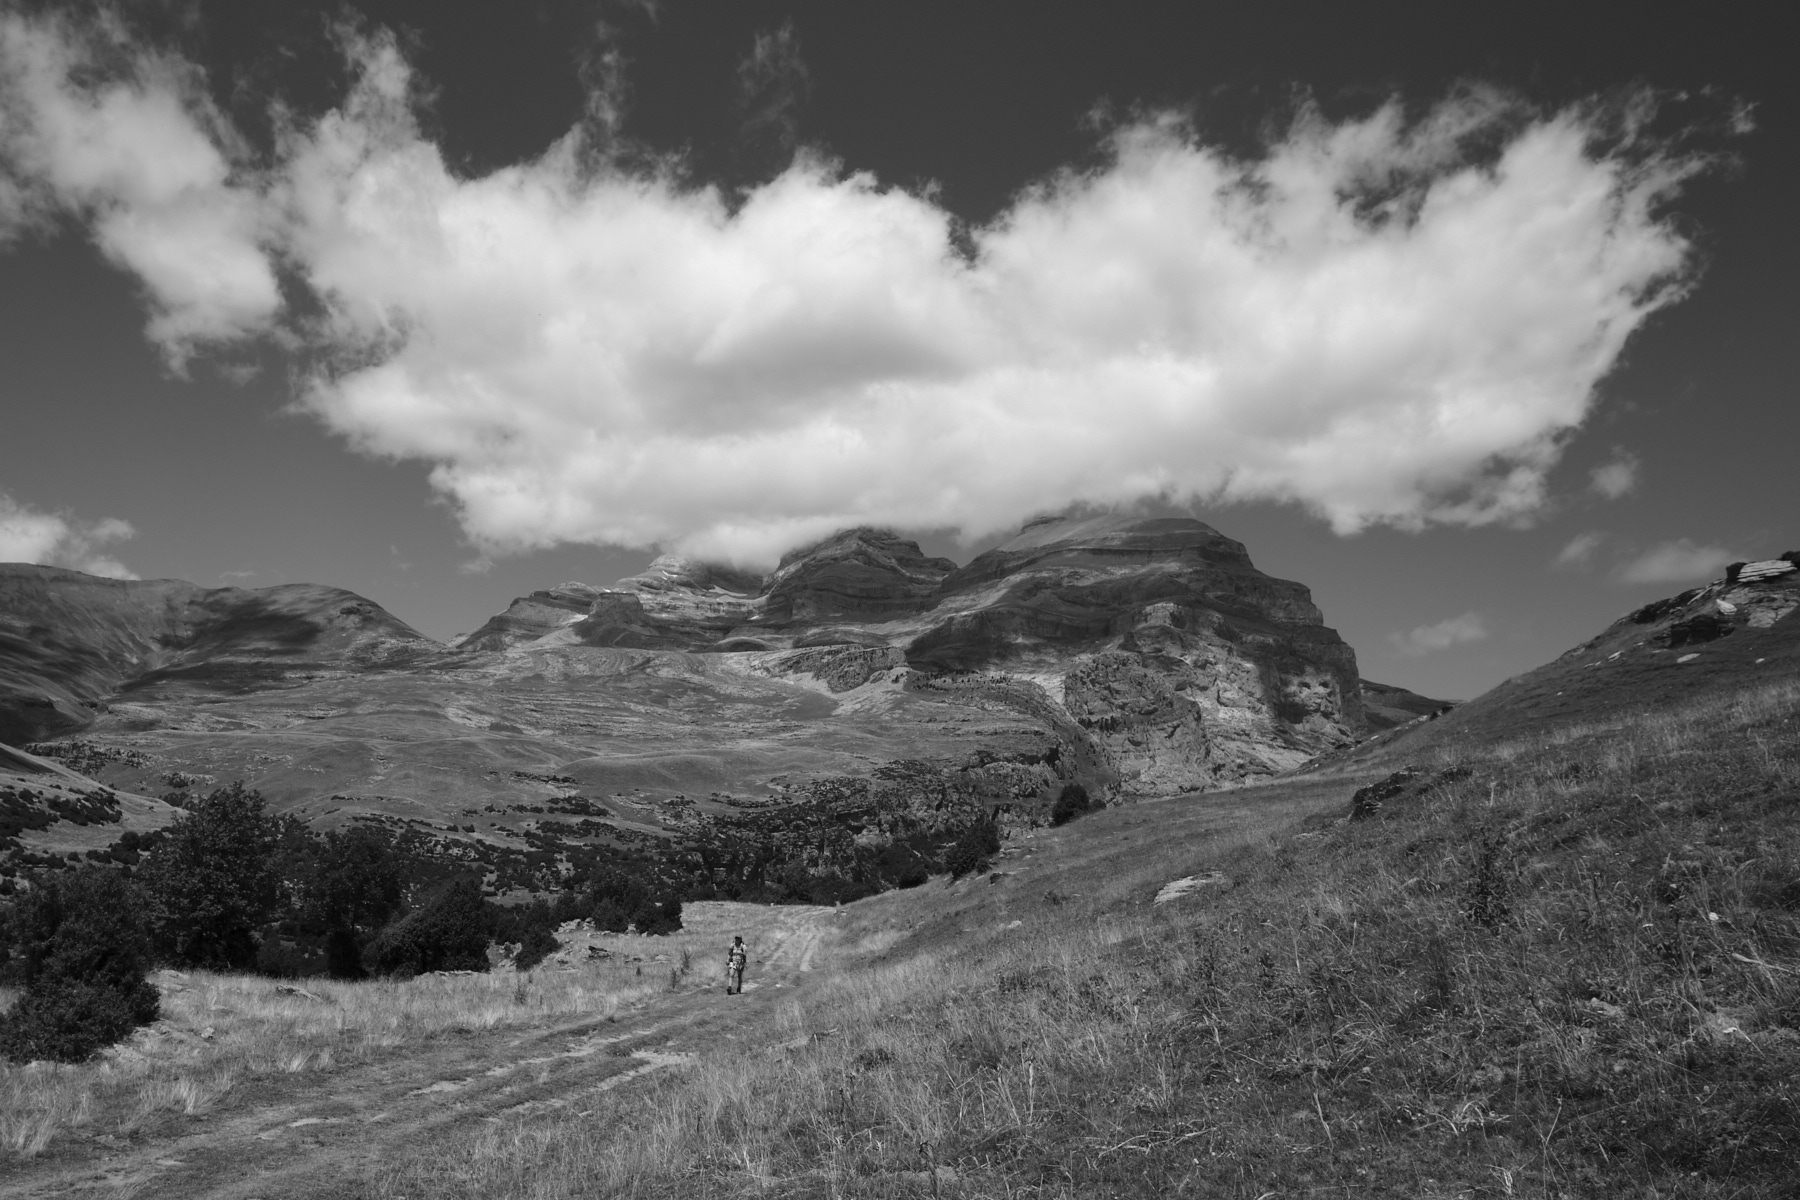
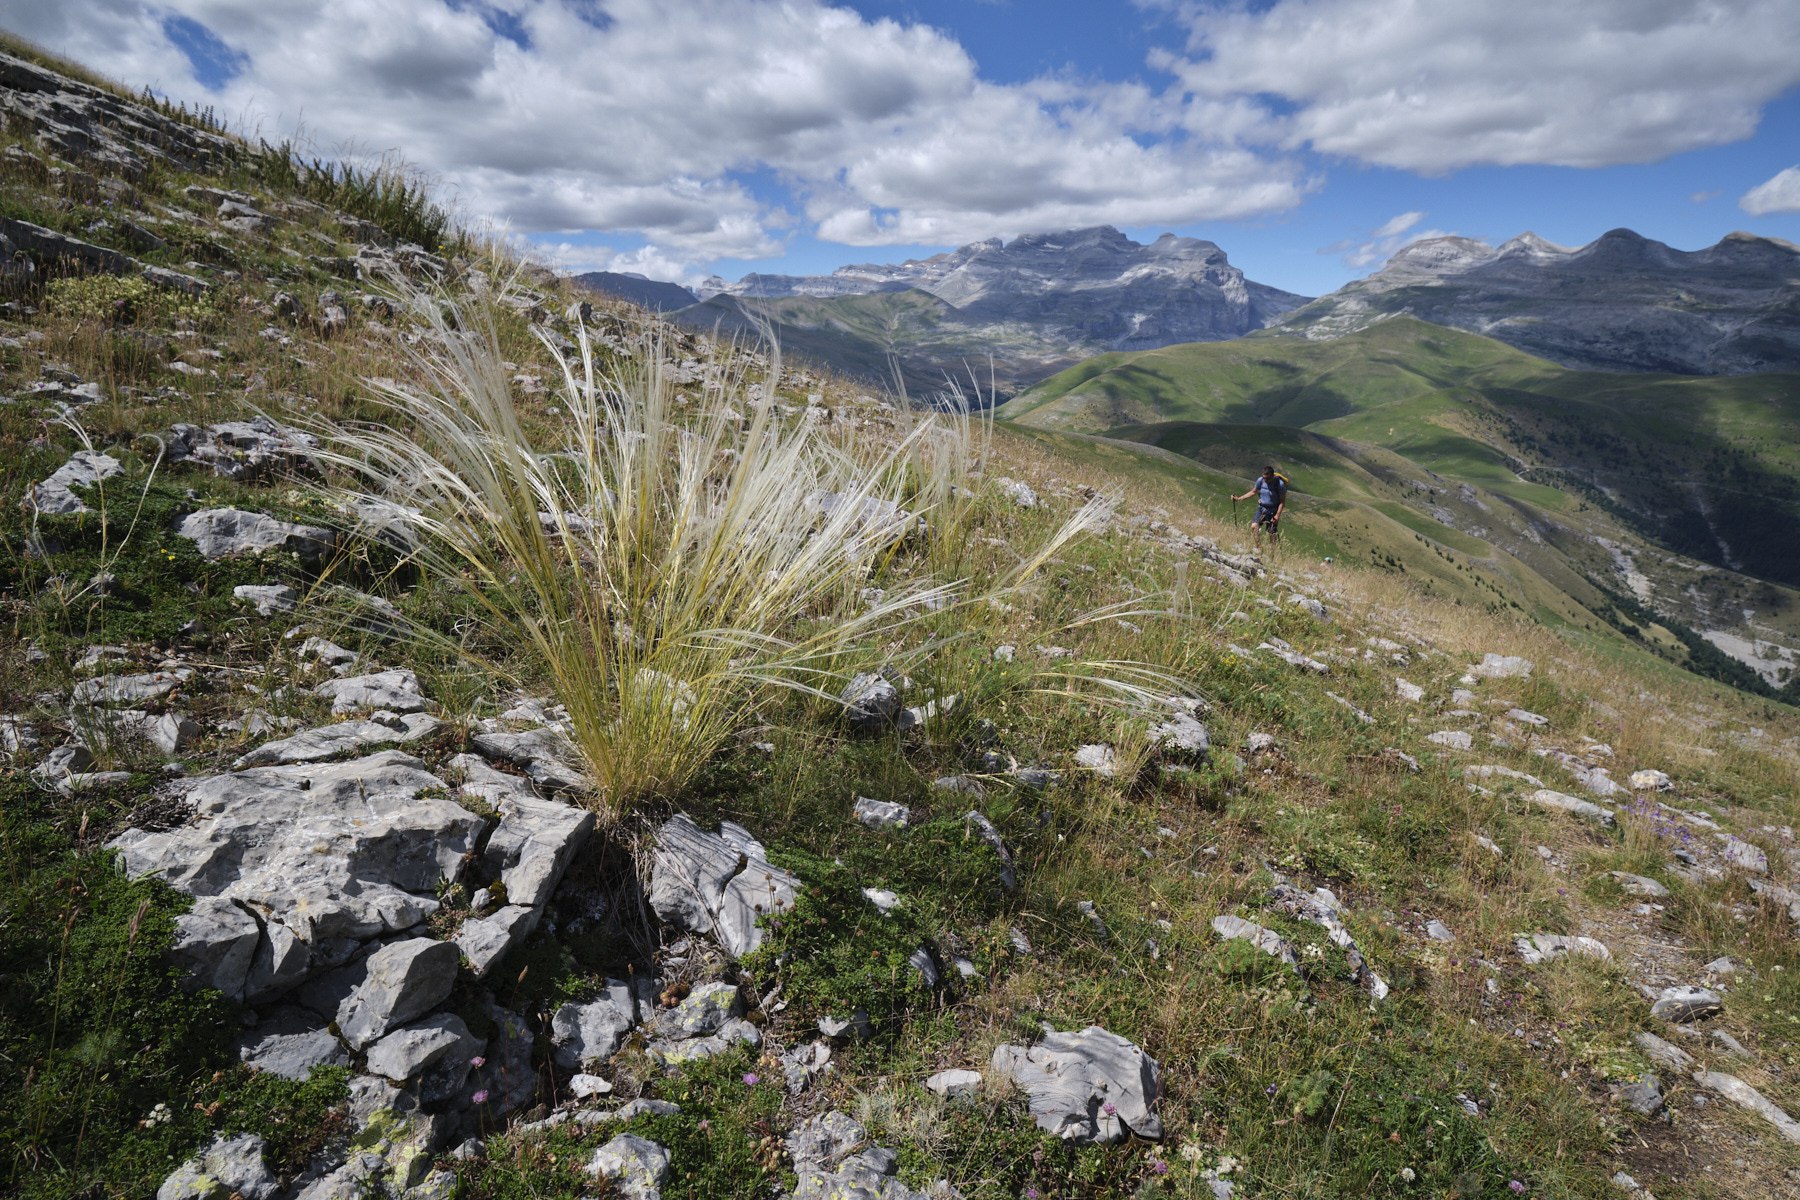
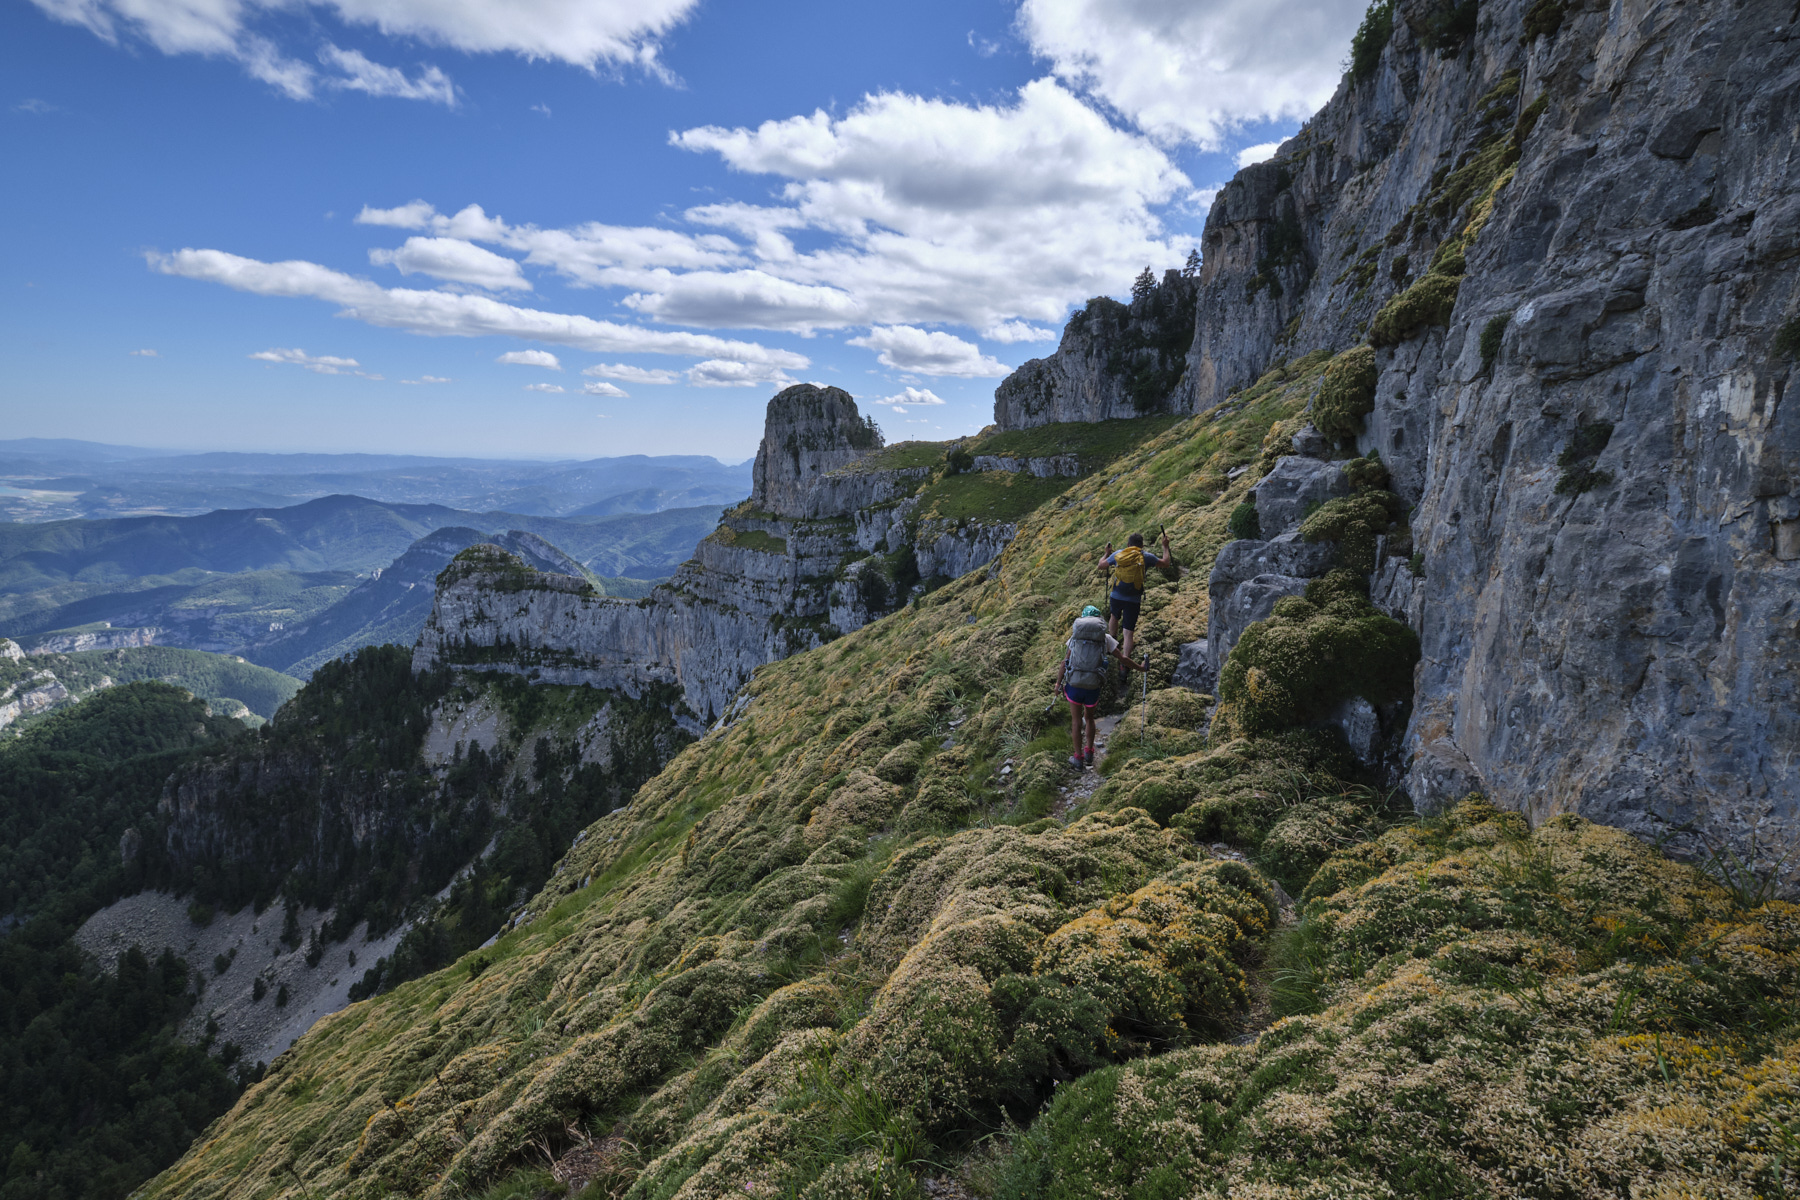
Part 4: San Vicenda refuge to Sestral Alto (2101m, 2h)
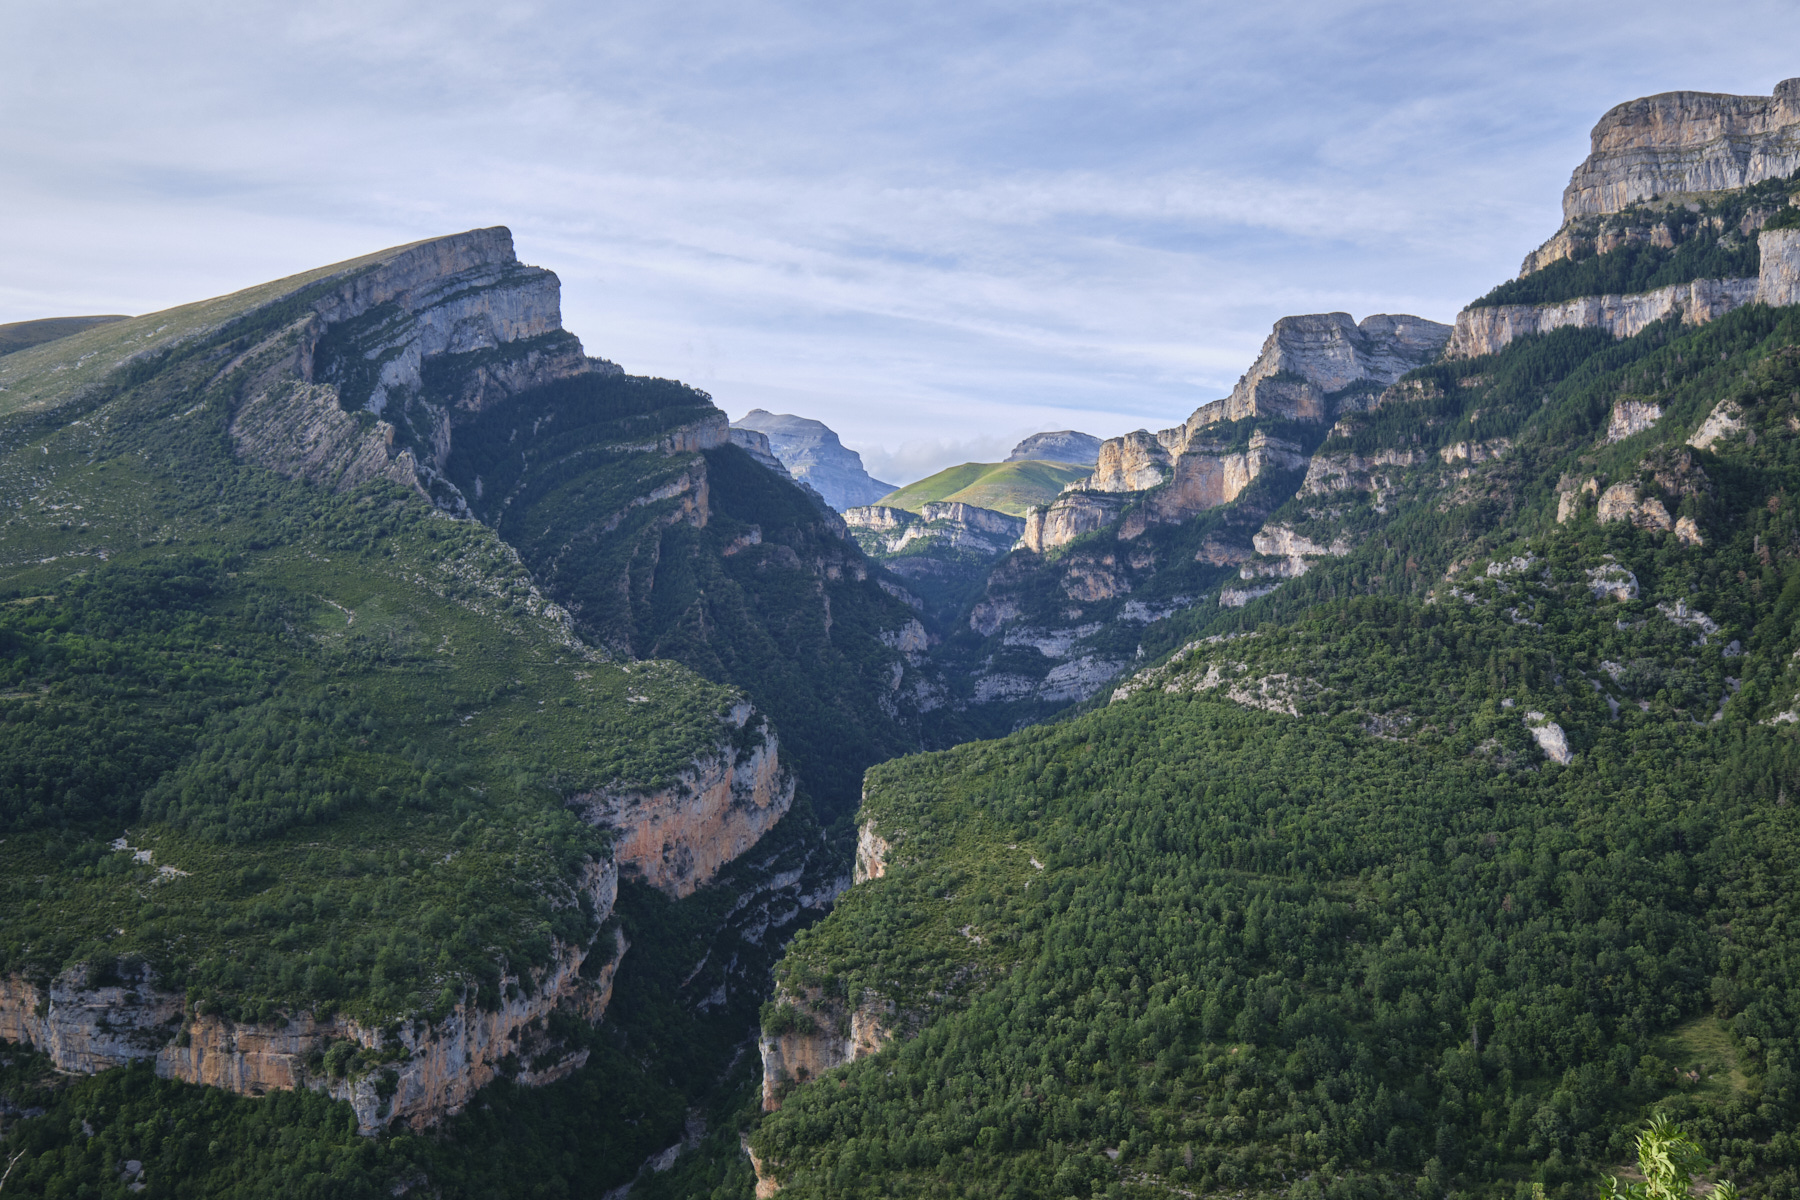
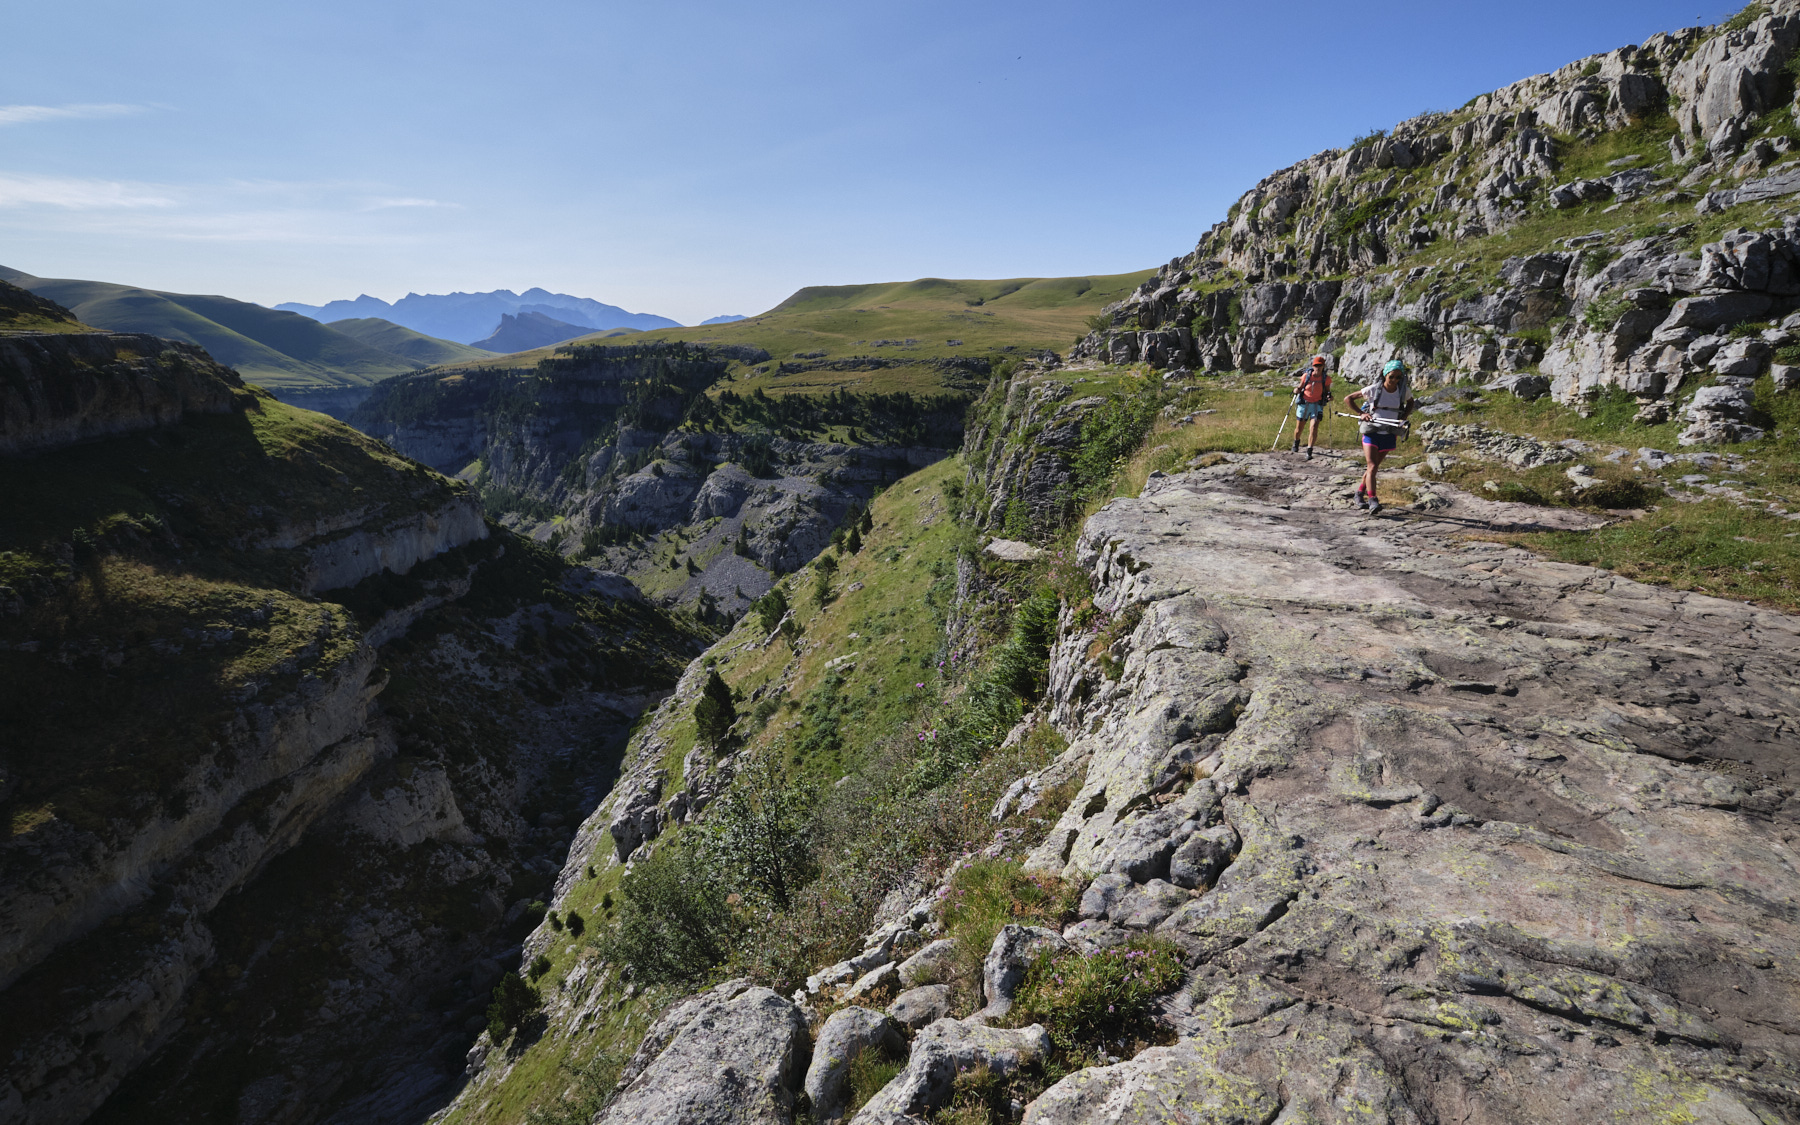
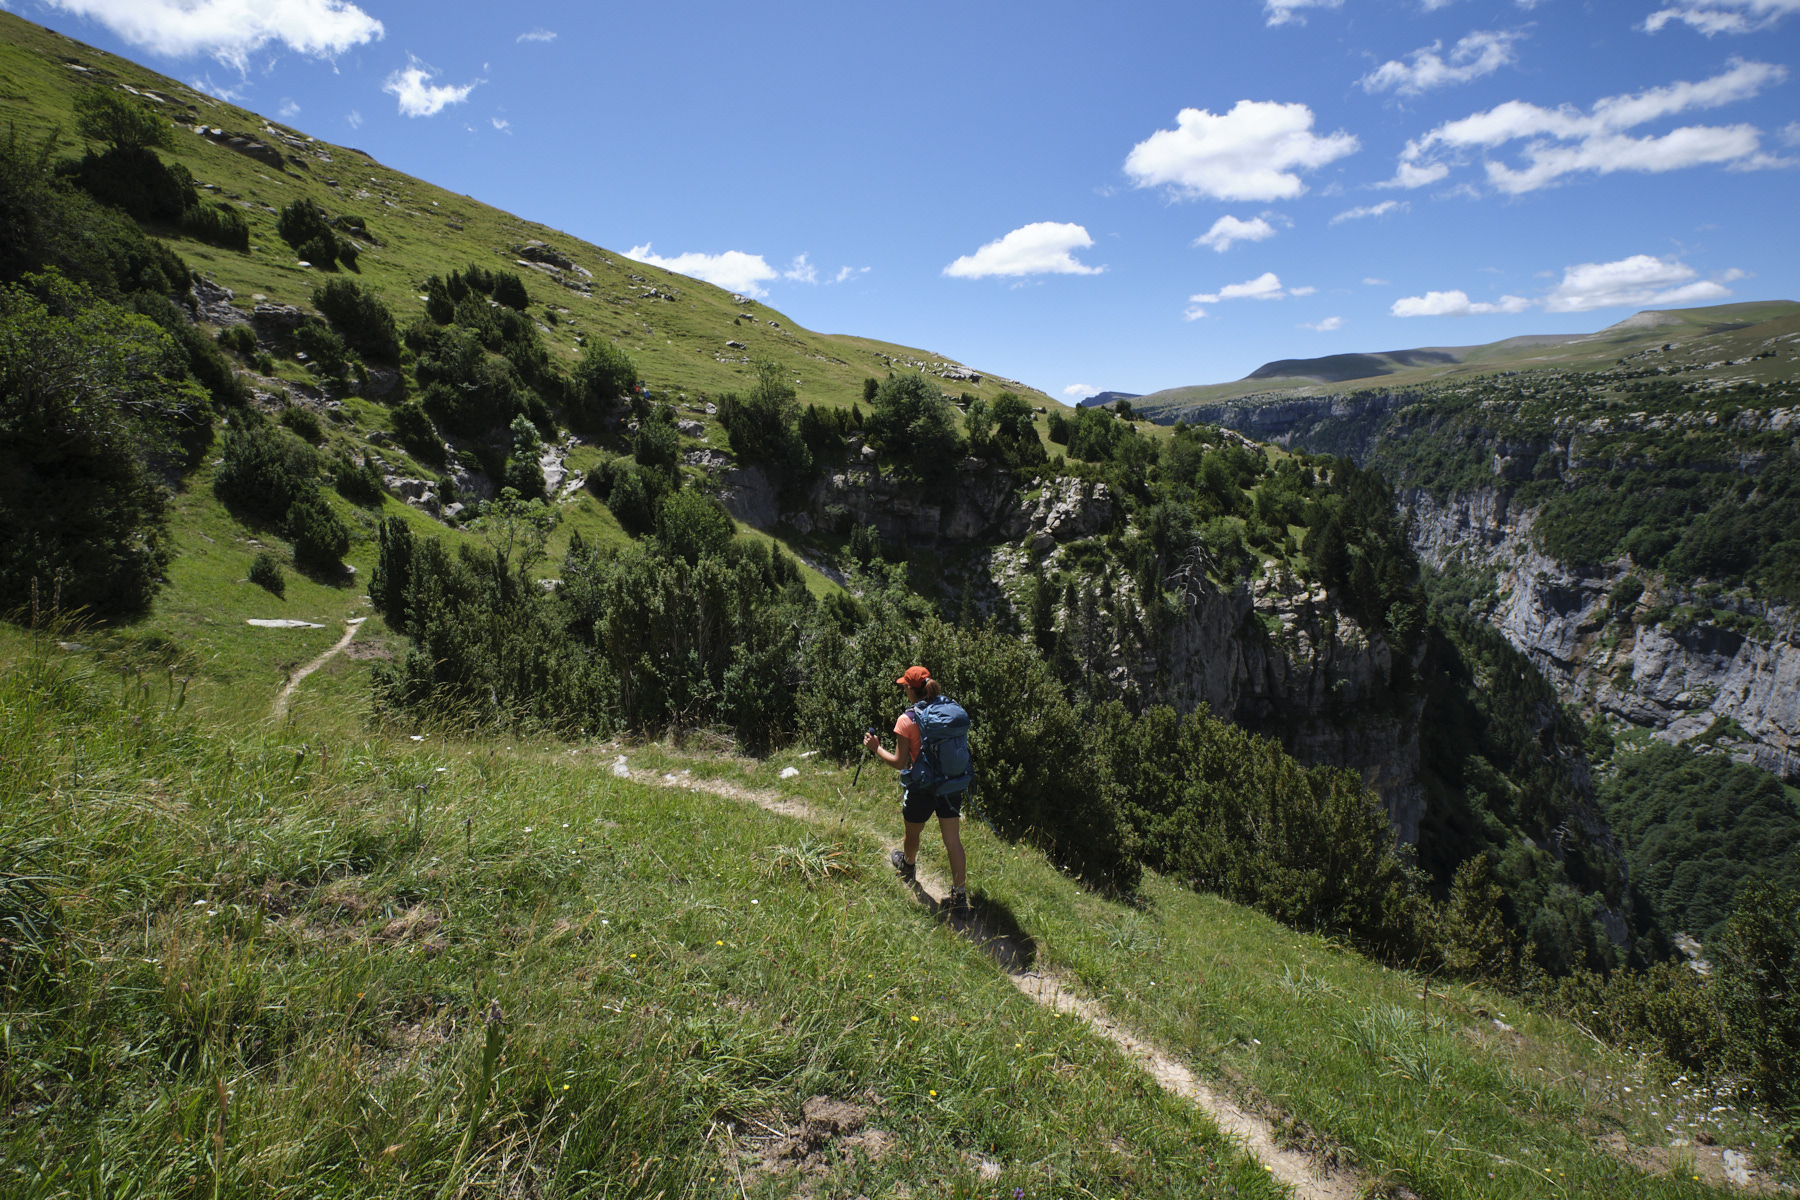
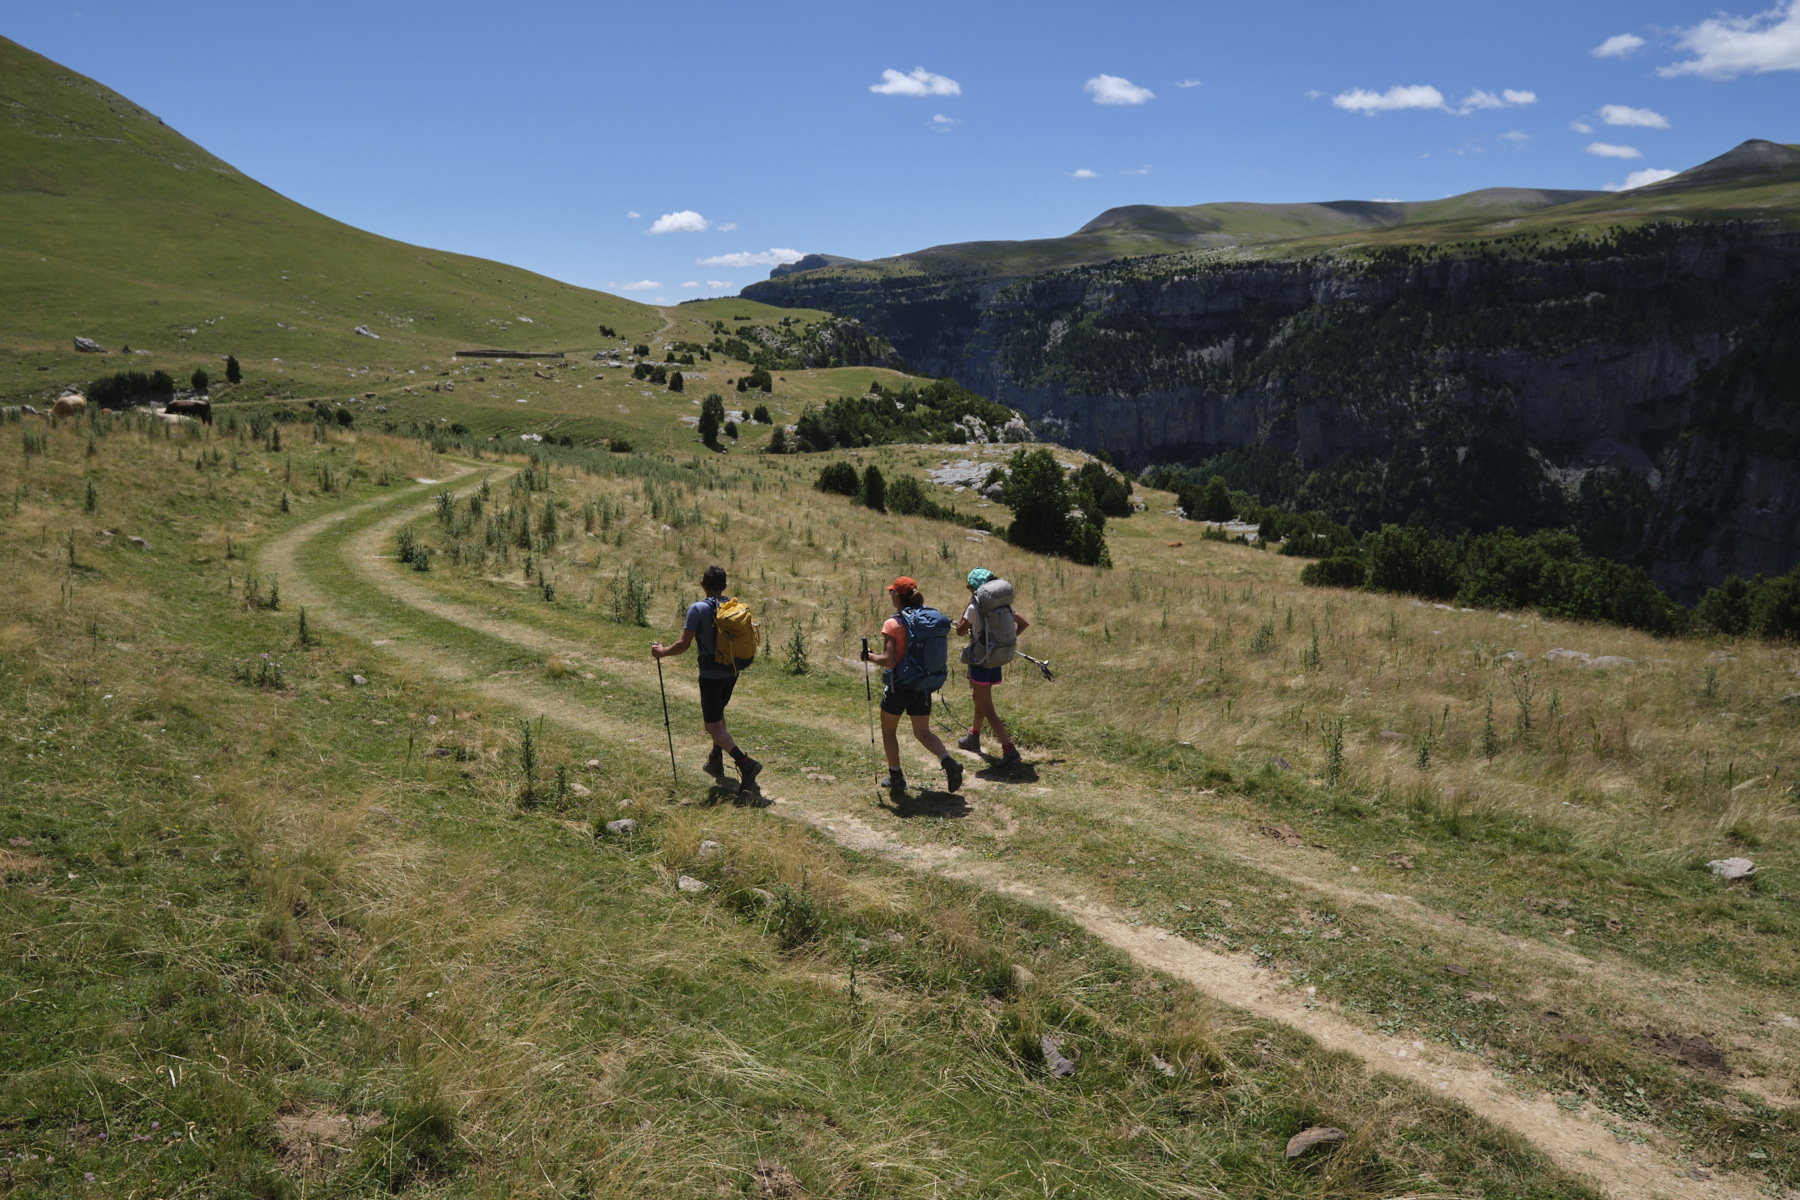
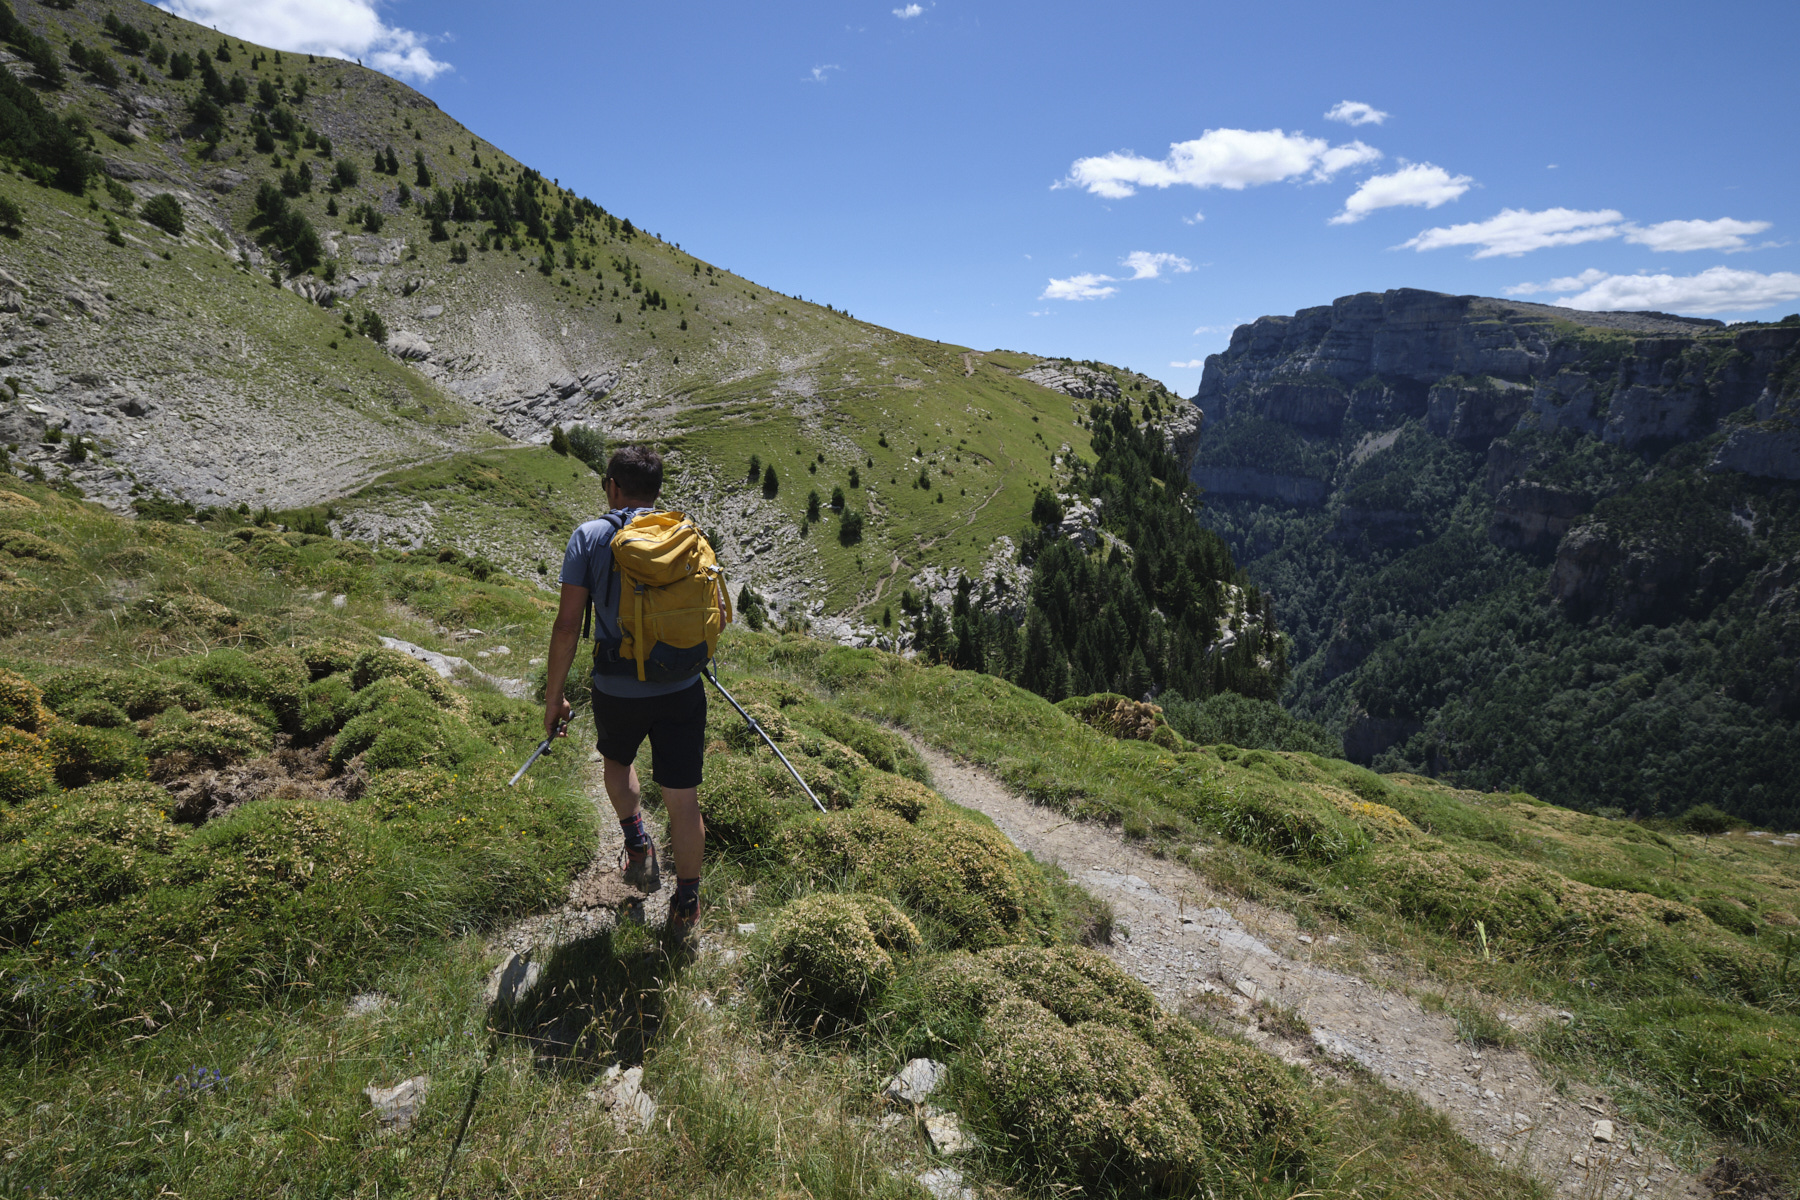
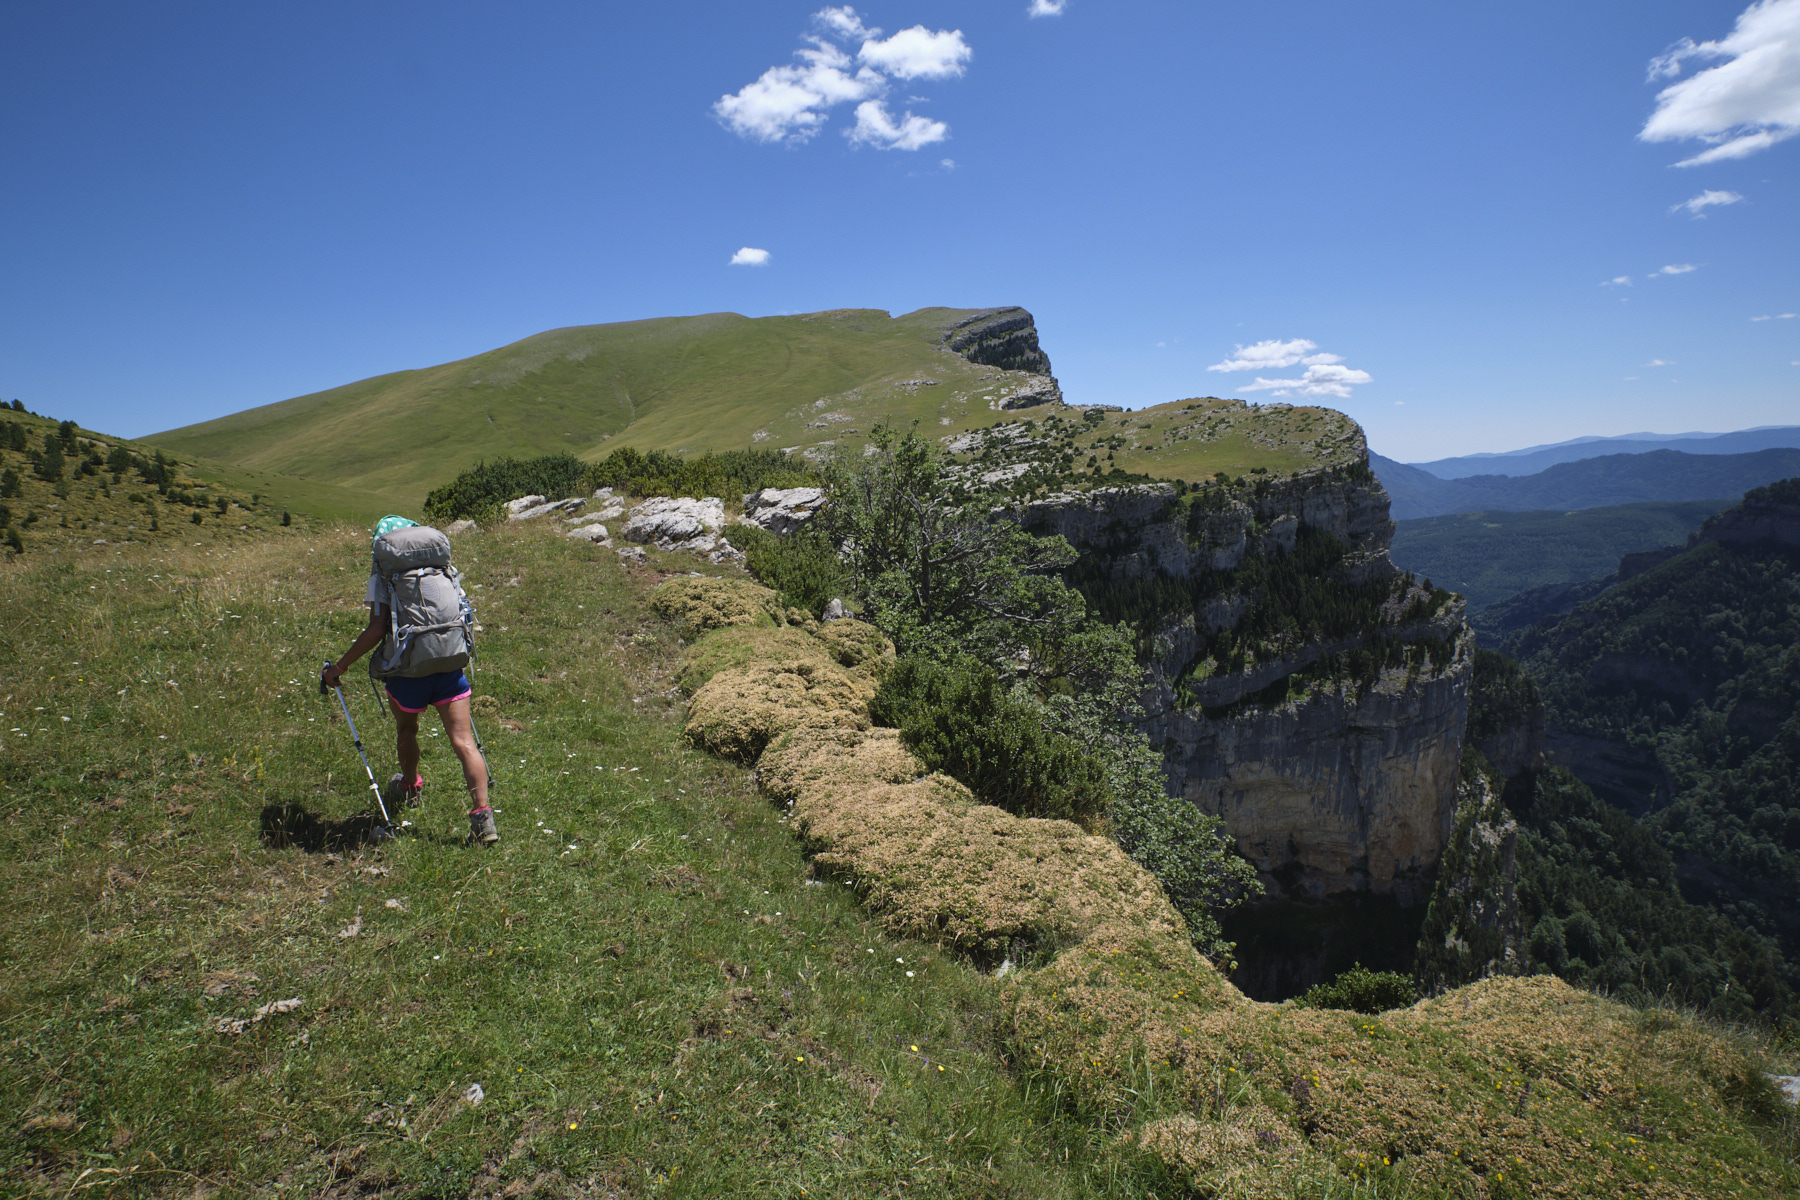
Continuing on the trail for a while, the backdrop of Monte Perdido gradually recedes at our backs and the steep walls of the Sestrales and the exit from the Añisclo canyon take shape before us. After several long hairpin bends and before turning east towards Bestué, fork at a sign stuck in a rock pile. The path is not really visible, but you have to descend a little to climb up a wide shoulder, then descend again a little to climb a large grassy slope and head straight for the edge of the cliffs. You're already overlooking the canyon, and the views towards the top of the canyon and Monte Perdido are very impressive.
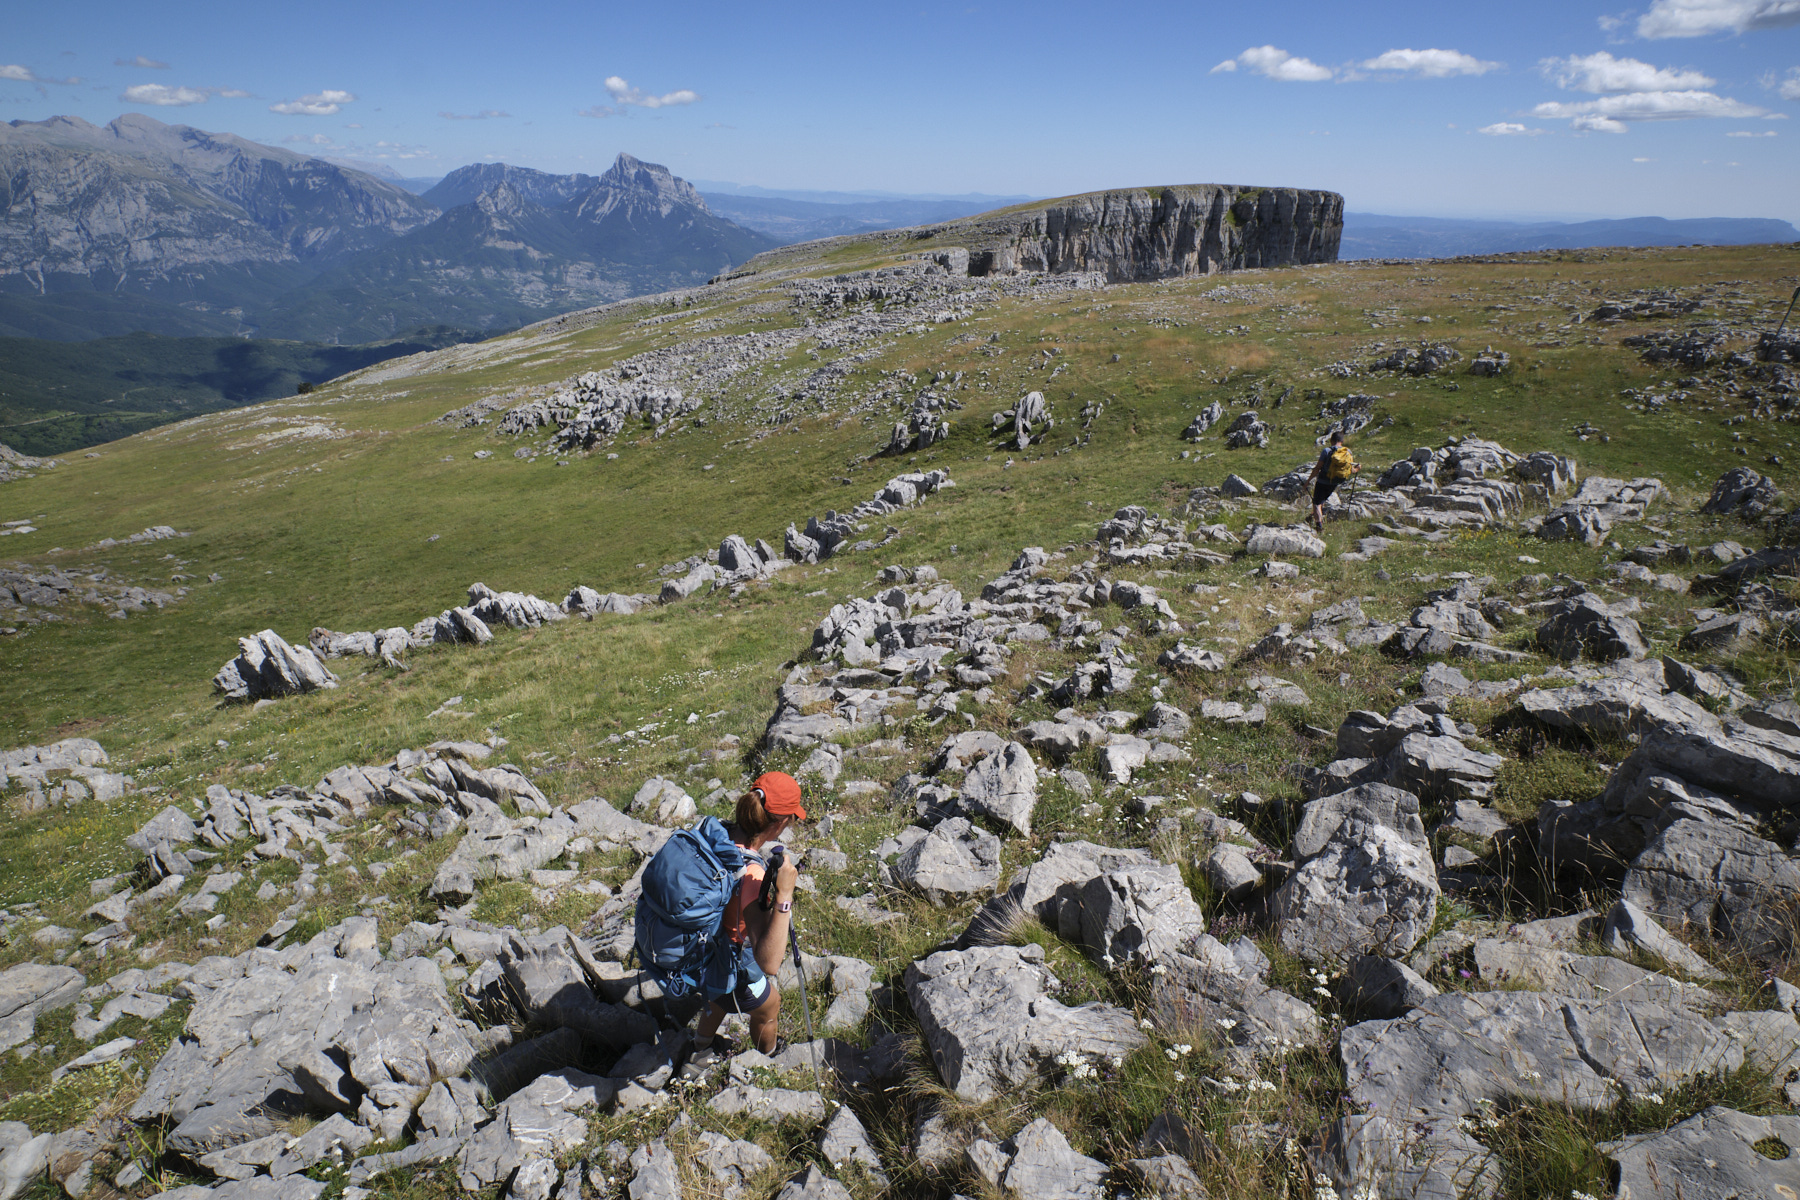
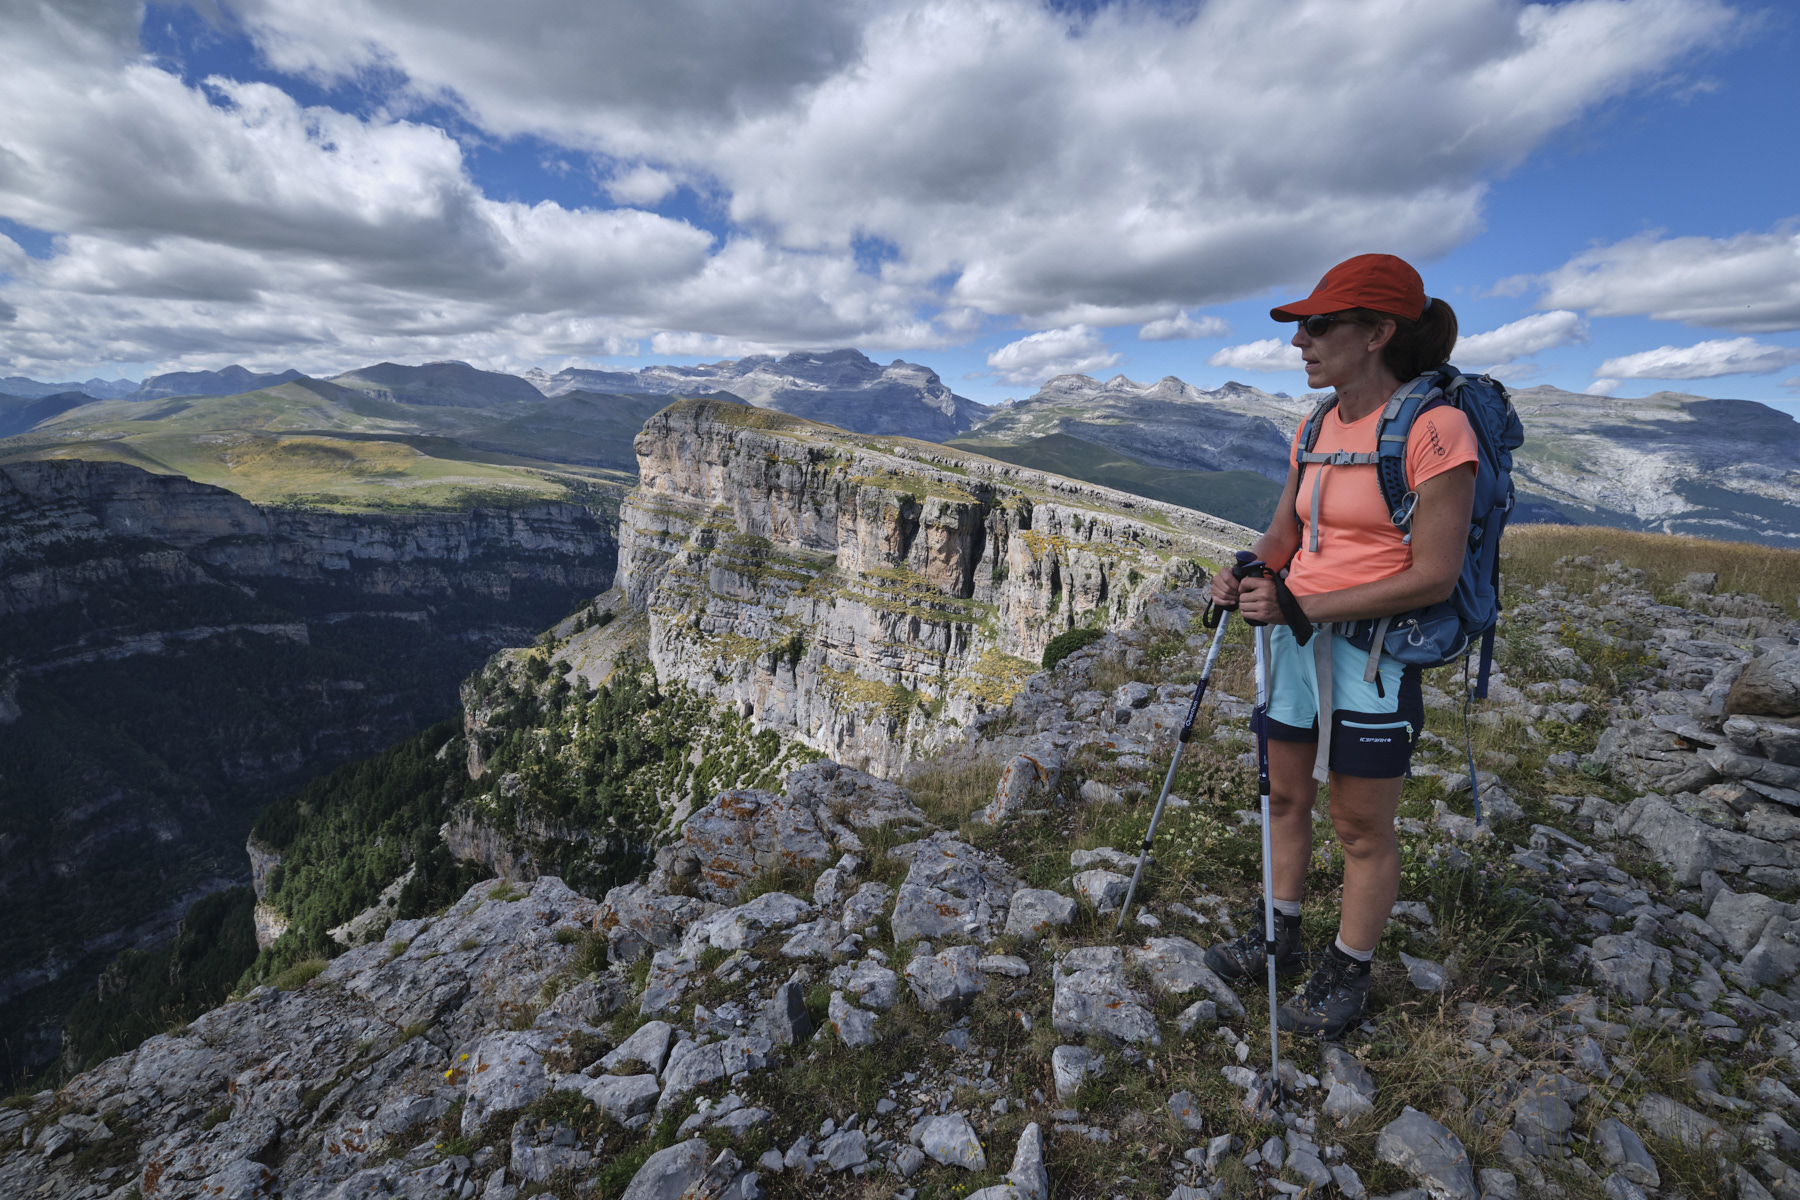
Then climb back up along the canyon rim to take in the exceptional views. We follow the topography of the walls, which wind over the void, to finally reach the Sestral Alto at 2101m.
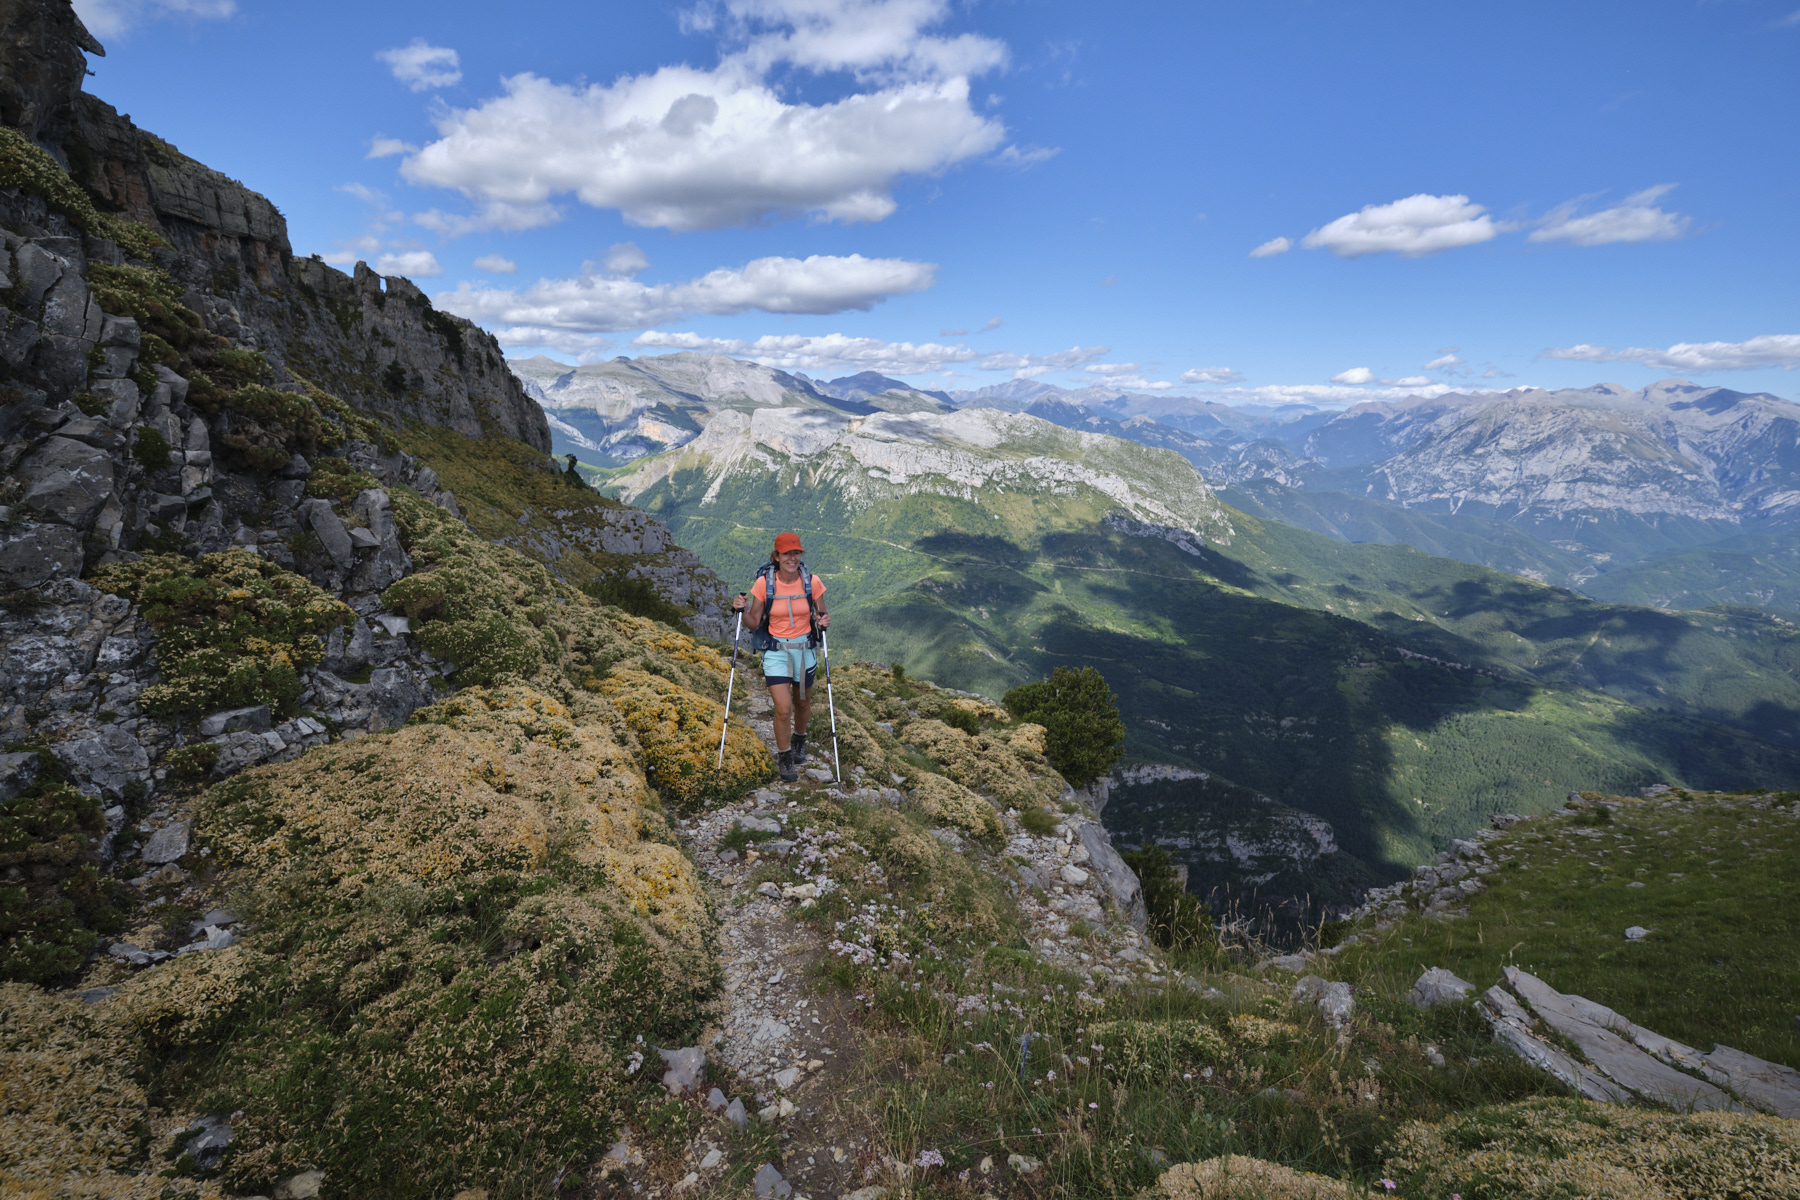
Part 5: Sestral Alto to San Urbez parking lot (960m, 3h)
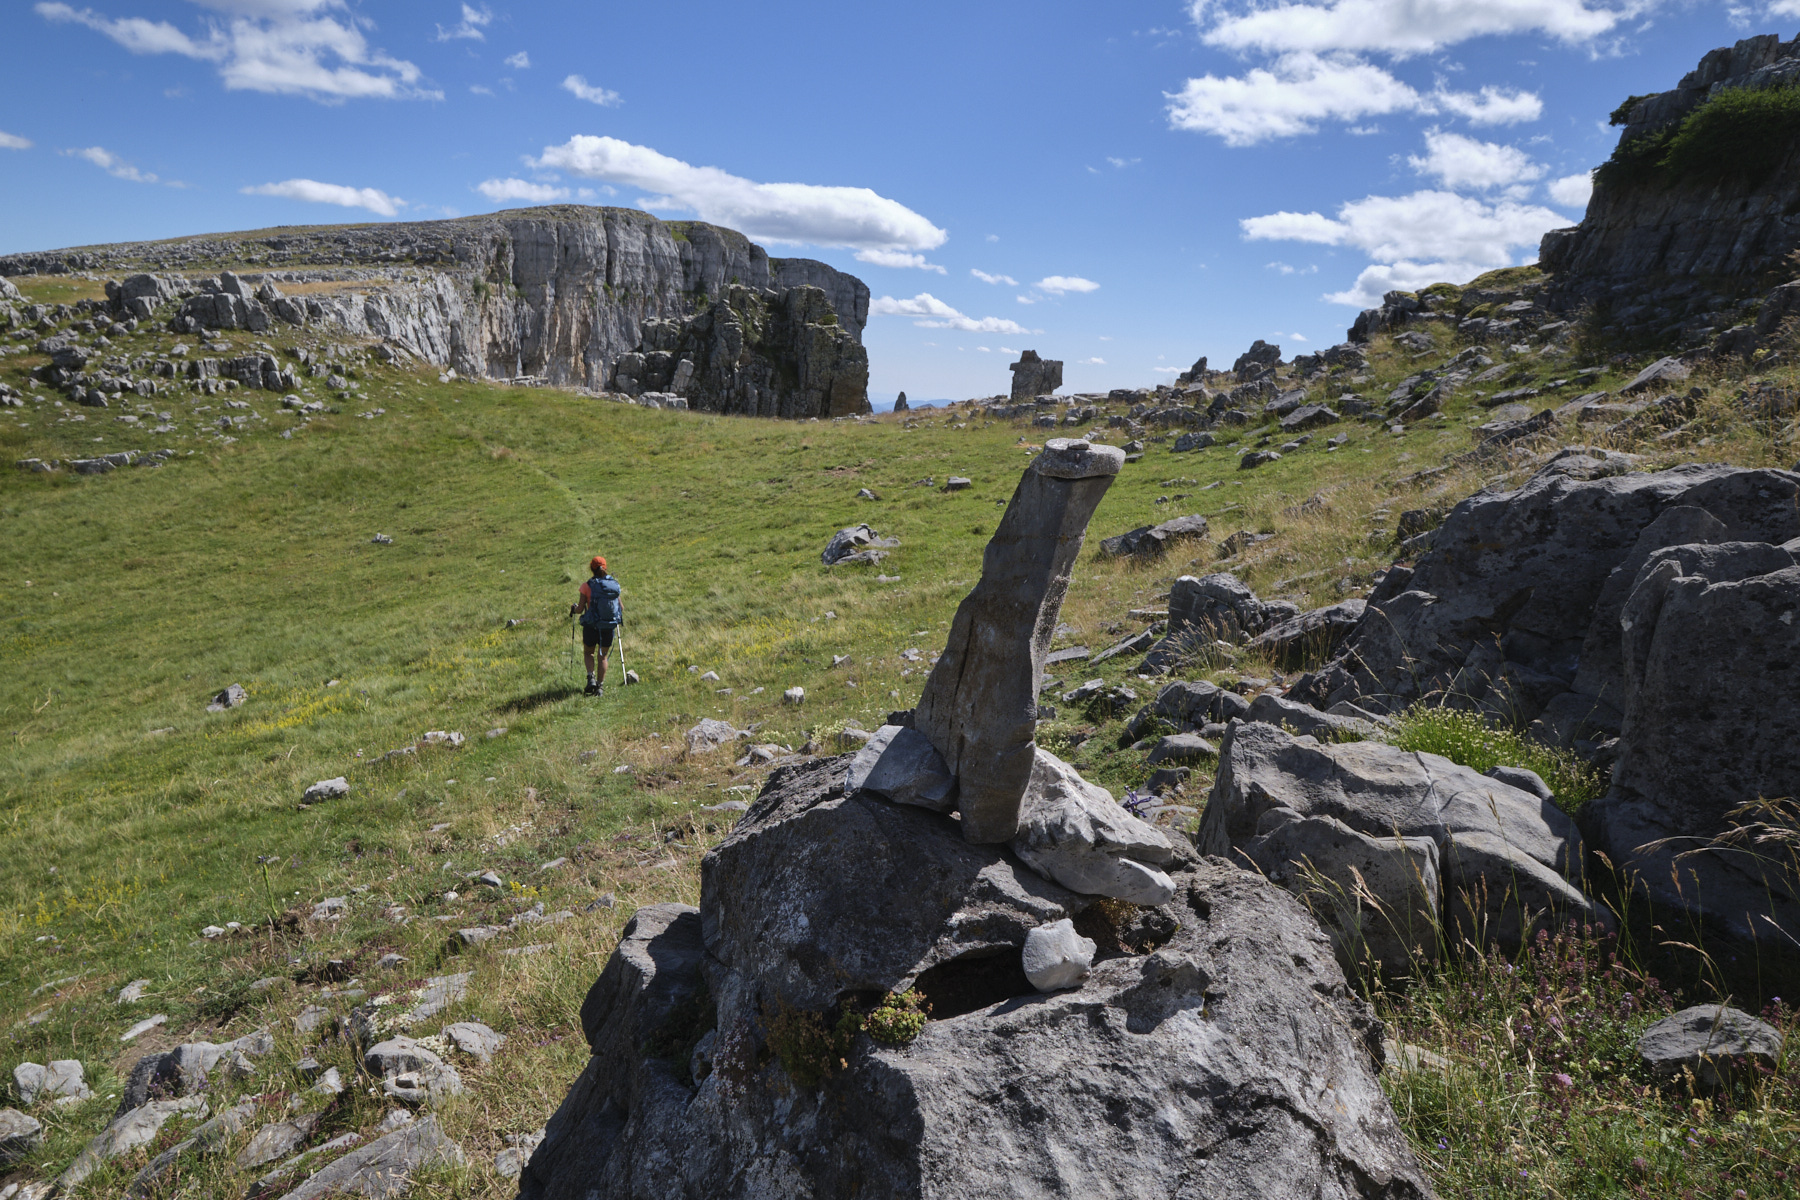
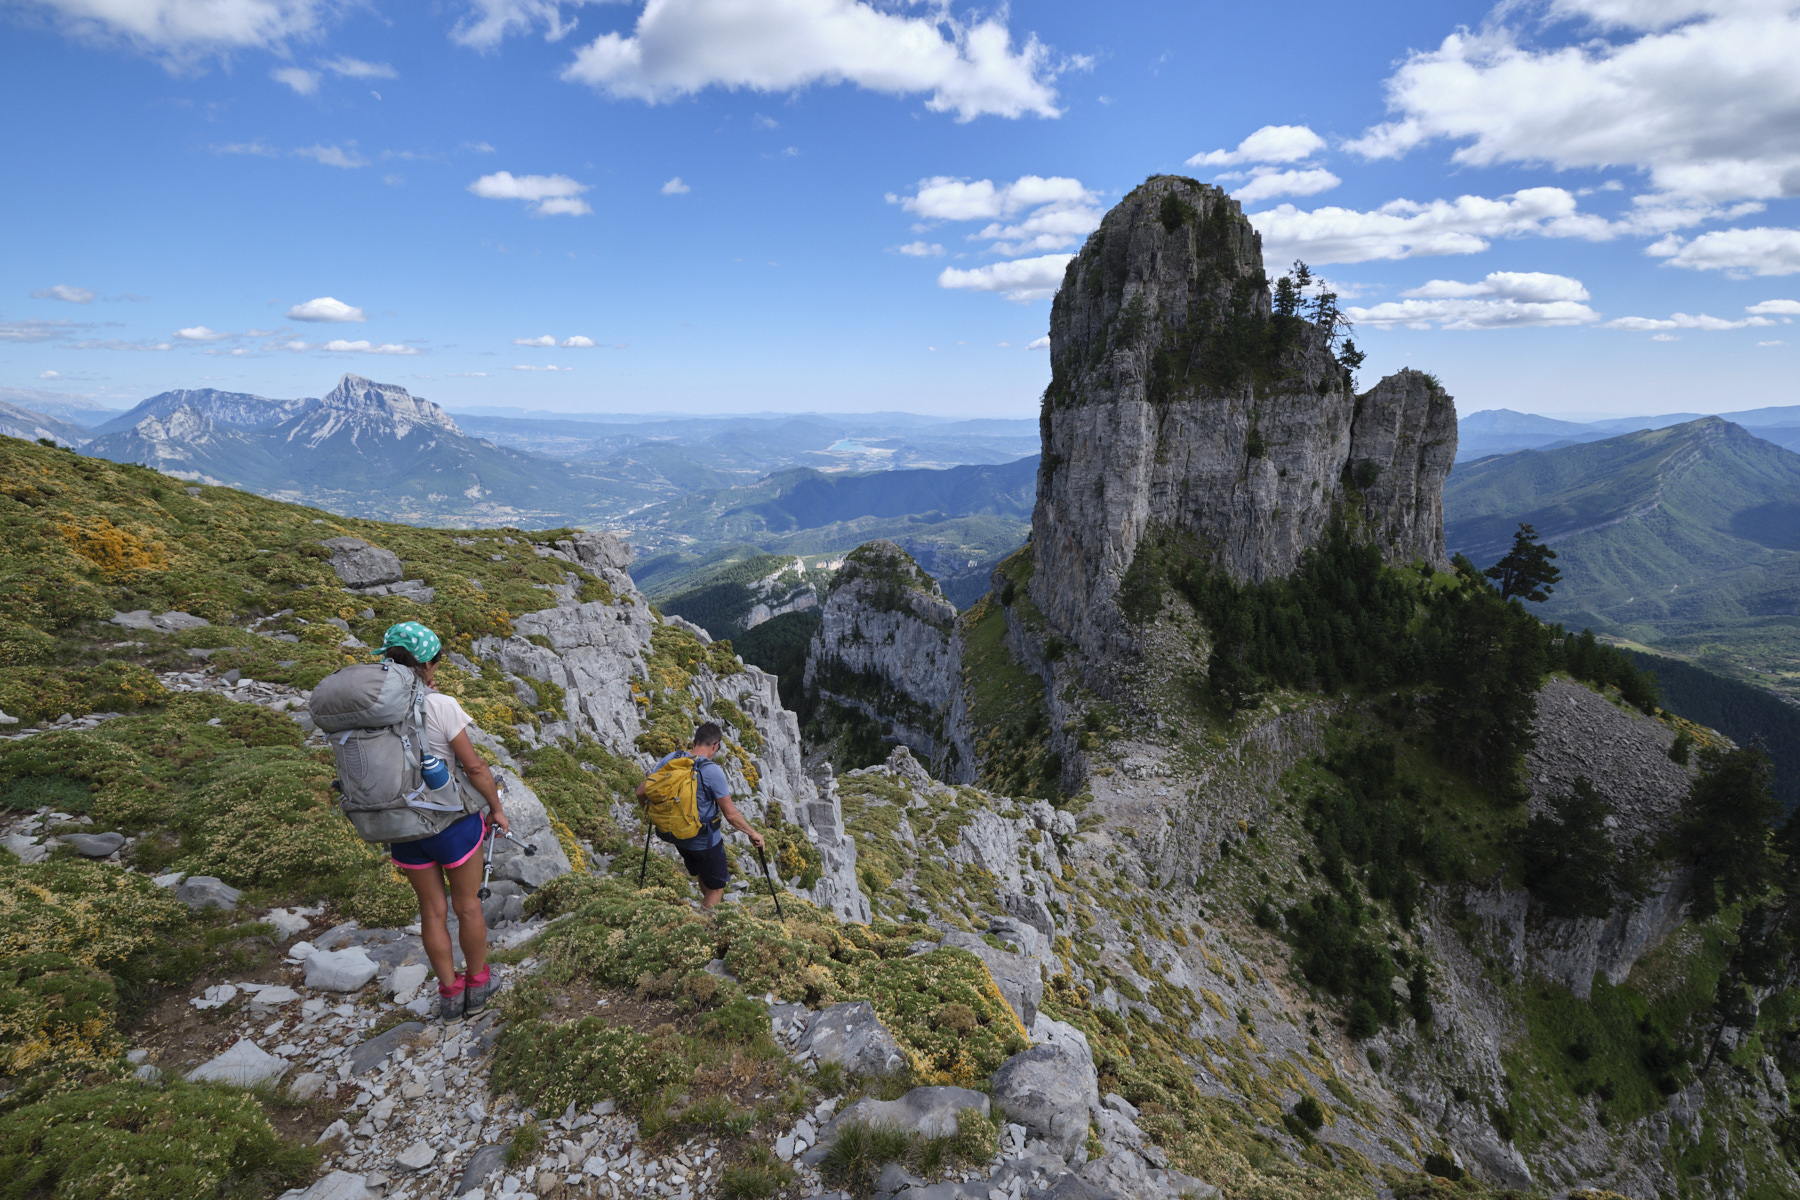
Continue along the ridge, descending a little, walking over a field of lapiaz and ascending very slightly to reach the summit of Sestral Bajo. Then head back away from the edge to find the cairns for the descent path. We then descend a steep couloir, skirting the base of a wall to reach a shoulder facing a characteristic tower, the Punta de las Puertas. The next step is to climb down the rocky ridge, ending up at the foot of the tower on a small pass.
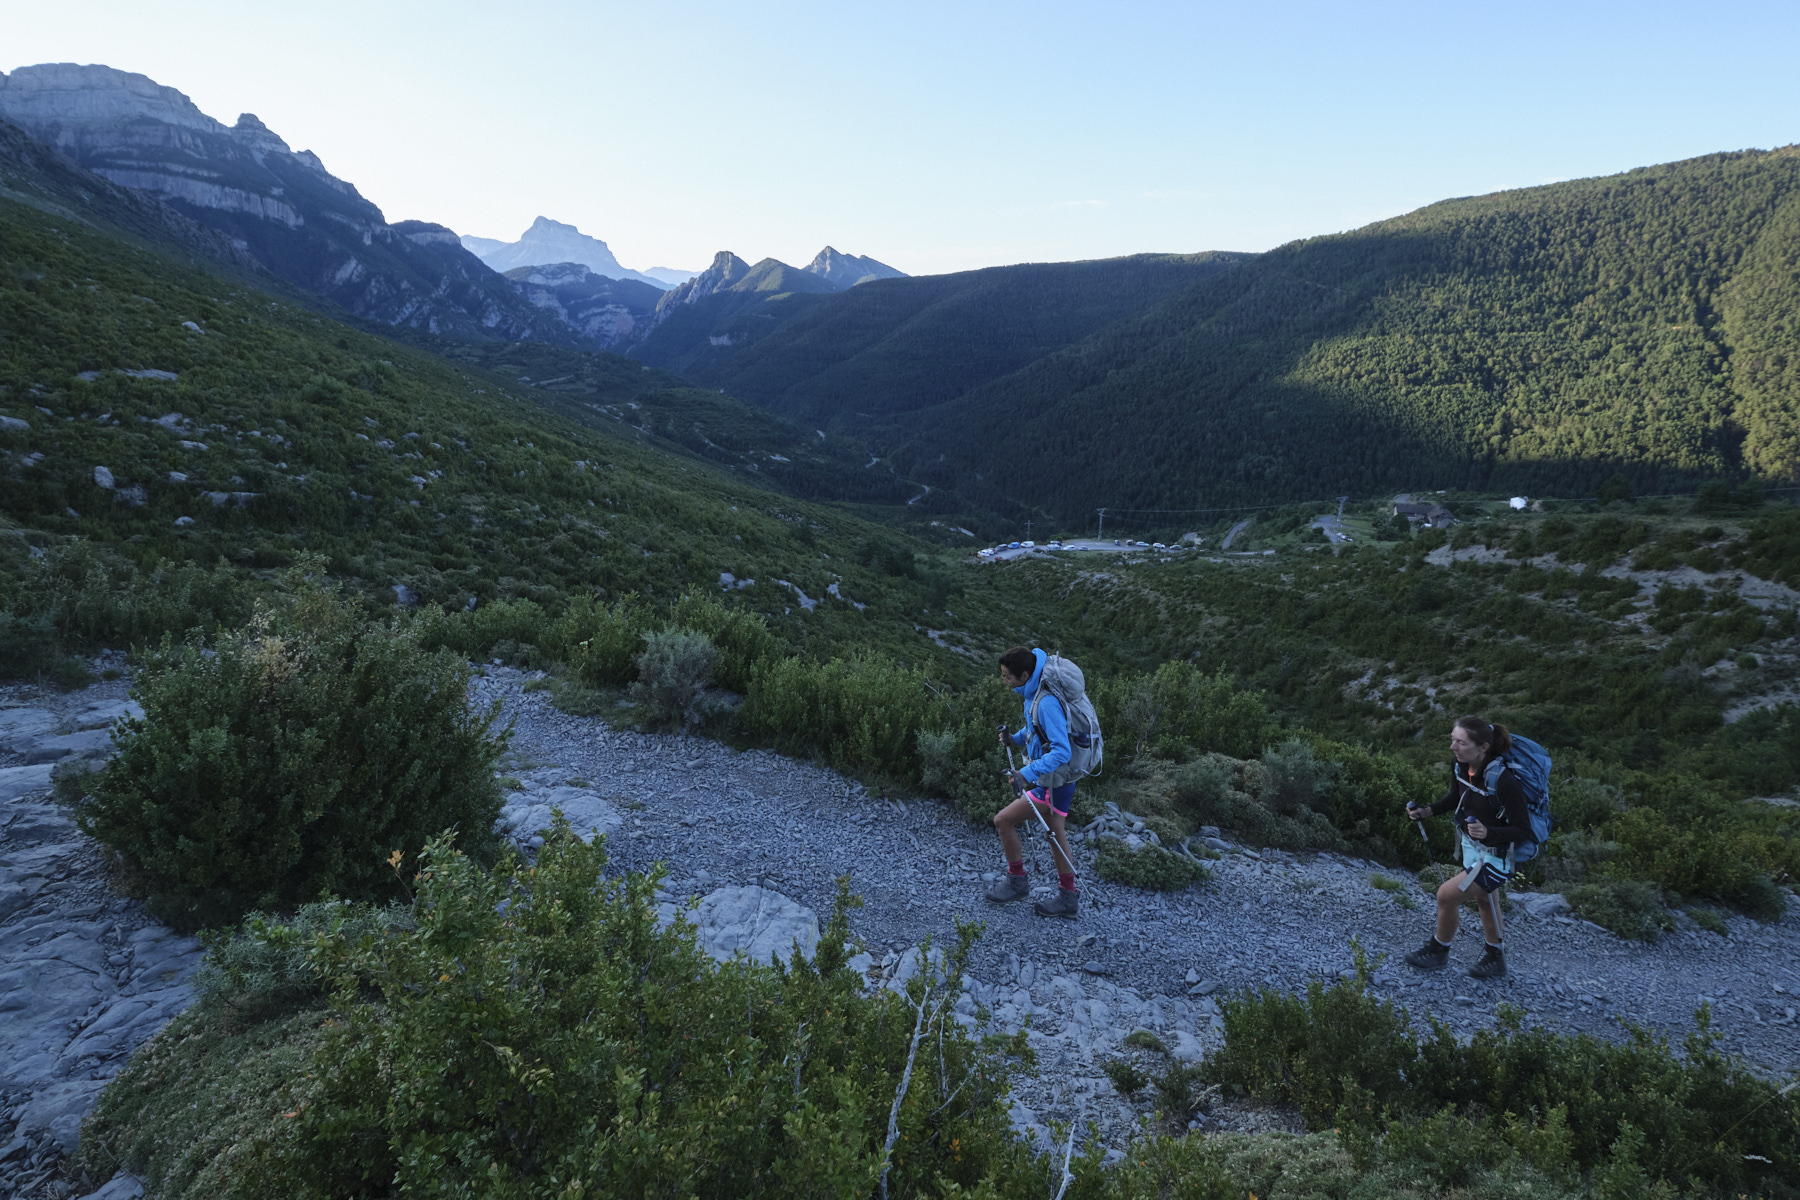
Here, the path drops off to the west on a very steep slope, and further down into an equally steep scree. Keep an eye on the GPS track as there are cairns everywhere, in every direction. Further down, the path bends south then east through the forest for a long, long traverse on a more or less flat lower ridge (with a few small ascents). Finally, at the very end, descend to the west to find the GR 11 10 minutes further down, which after a long and tiring descent takes us back to the bridge over the Rio Bellos and the San Urbez parking lot.


 Partager sur WhatsApp
 Partager sur Twitter
Partager sur Instagram
Partager sur Twitter
Partager sur Instagram

 Partager sur Facebook
 Imprimer le topo
 Laisser un commentaire


Leave a Reply